In This Article
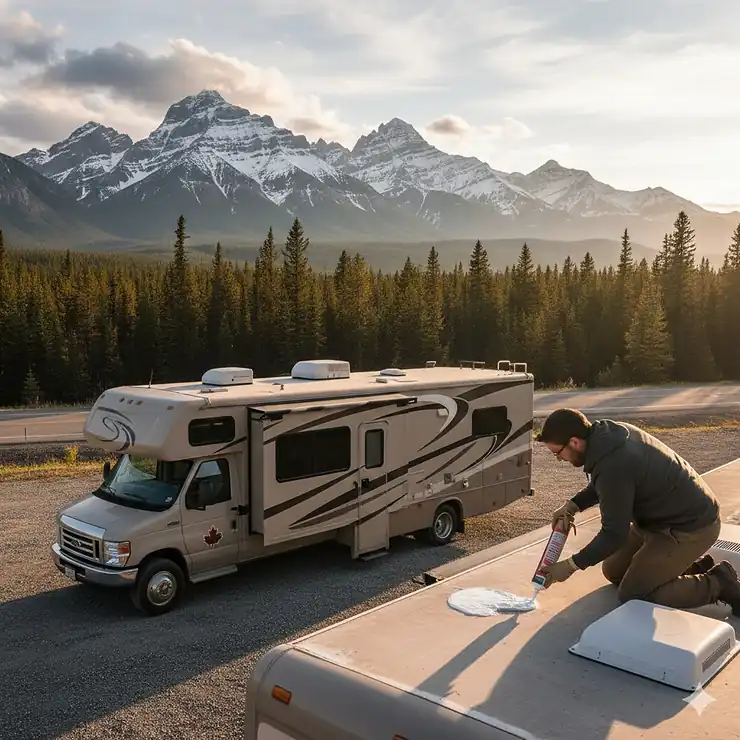
Picture this: you’re nestled in your RV in Banff National Park, rain pattering against your camper roof, when suddenly—drip, drip, drip. That’s the sound of your weekend turning into a nightmare and your wallet crying for mercy. Water damage is the silent killer of recreational vehicles, and in Canada’s diverse climate—from scorching prairie summers to freezing Maritime winters—your camper roof faces unique challenges.
According to Wikipedia, recreational vehicles require specialized roofing materials designed for EPDM, TPO, or fiberglass surfaces. Here’s the thing: most RV manufacturers recommend inspecting and resealing your roof every 90 days. That’s four times a year, folks. Neglect this routine, and you’re looking at repair bills that could easily hit $7,000 to $12,000 CAD for major water damage restoration.
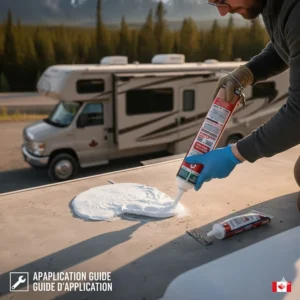
The good news? A quality camper roof sealant costs between $15 to $150 CAD and takes just a weekend to apply. Whether you’re dealing with a weeping seam around your air conditioner, cracks in your lap sealant, or planning preventive maintenance before storing your rig for winter, this guide covers everything you need. We’ve researched real products available on Amazon.ca, compared prices in Canadian dollars, and consulted Canadian RV owners about what actually works in our climate. Let’s dive in and keep your home-on-wheels bone dry!
Quick Comparison Table
| Product | Type | Best For | Price (CAD) | Coverage | Rating |
|---|---|---|---|---|---|
| Dicor 501LSW-1 Self-Leveling | Lap Sealant | Horizontal surfaces, seams | $18-25 | 10.3 oz tube | 4.7/5 |
| Liquid Rubber RV Roof Coating | Elastomeric Coating | Full roof coverage | $120-160 | 50 sq ft/gal | 4.5/5 |
| EternaBond RoofSeal White | Repair Tape | Emergency fixes, seams | $45-85 | 4″ x 50′ | 4.8/5 |
| RVGUARD Self-Leveling Sealant | Lap Sealant | Budget-friendly repairs | $15-20 | 10 oz tube | 4.4/5 |
| Dicor 551LSW-1 Non-Sag | Non-Sag Sealant | Vertical surfaces | $18-24 | 10.3 oz tube | 4.6/5 |
| Flex Seal Liquid | Liquid Rubber | DIY quick fixes | $40-55 | 16 oz can | 4.3/5 |
| EverBond RV Roof Coating | Premium Coating | Long-term protection | $280-350 | 4.75 gal pail | 4.6/5 |
💬 Just one click – help others make better buying decisions too! 😊
✨ Don’t Miss These Exclusive Deals!
🔍 Take your RV maintenance to the next level with these carefully selected products available in Canada. Click on any highlighted item to check current pricing and availability on Amazon.ca. These tools will help you create authentic protection your family will love!
Top 7 Camper Roof Sealants: Expert Analysis
1. Dicor 501LSW-1 Self-Leveling Lap Sealant – Best Overall
If there’s a gold standard in rv roof sealant, this is it. Used by professional RV repair shops across Canada and recommended by manufacturers like Keystone RV, Dicor’s self-leveling formula has been the go-to choice for over two decades.
Key Specifications:
- HAPS-free formula (safer for you and the environment)
- Compatible with EPDM, TPO, PVC roofing materials
- UV-stabilized to prevent discoloration and degradation
- Cures in 48 hours at 10-32°C
Price Range: $18-25 CAD per 10.3 oz tube on Amazon.ca
Canadian buyers consistently praise its performance through our harsh winters. One Ontario RVer shared, “Survived three winters in storage without cracking. Still flexible after four years.” The self-leveling property means it flows into cracks and levels itself for a professional finish—perfect for beginners.
✅ Pros:
- Industry-standard formula trusted by manufacturers
- Excellent adhesion to multiple surface types
- Self-levels for foolproof application
❌ Cons:
- 48-hour cure time means planning around weather
- Requires clean, dry surface for proper bonding
Best For: Sealing horizontal seams, roof vents, skylights, and air conditioner units. This is your workhorse sealant for regular rv roof maintenance.
2. Liquid Rubber RV Roof Coating – Best for Full Roof Coverage
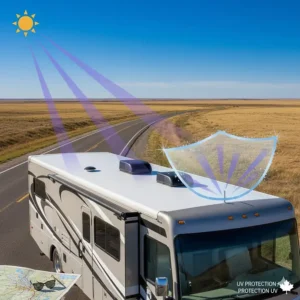
Want to give your entire camper roof a fresh start? This professional-grade rv roof coating creates a seamless, waterproof membrane that reflects 85% of solar heat—a godsend during those sweltering Alberta summers when your RV turns into a mobile sauna.
Key Specifications:
- Elastomeric formula provides 1000% elongation
- Zero VOC, water-based technology
- Solar reflective brilliant white finish
- Designed for EPDM, TPO, fiberglass, and aluminum roofs
Price Range: $120-160 CAD per gallon on Amazon.ca (covers 50 sq ft with 2 coats)
For a typical 30-foot trailer roof, you’re looking at about 5 gallons, or roughly $600-800 CAD for a complete DIY recoating. Professional shops charge $2,500-4,000 CAD for the same job. Canadian customers report the coating holds up excellently through freeze-thaw cycles—critical for those storing rigs outdoors in provinces like Saskatchewan or Manitoba.
✅ Pros:
- Complete roof protection system in one product
- Reduces interior temperature by up to 15°C
- 10-year protection warranty when applied correctly
❌ Cons:
- Requires primer coat for EPDM/TPO surfaces (additional $45 CAD)
- Labour-intensive weekend project
Best For: Aging roofs showing widespread cracking or chalking, or as preventive maintenance on roofs 10+ years old.
3. EternaBond RoofSeal White Tape – Best Emergency Repair Solution
Think of this as the Swiss Army knife of trailer roof sealant. This MicroSealant tape bonds instantly to virtually any surface and has proven UV stability even after 19 years of full sunlight exposure. Available at Canadian Home Hardware stores and Amazon.ca, it’s the emergency fix that becomes permanent.
Key Specifications:
- 35 mil thickness (4″ x 50′ roll)
- Works on EPDM, TPO, Hypalon, PVC, metal, wood
- Built-in primer eliminates prep work
- Temperature resistant from -51°C to +93°C
Price Range: $45-85 CAD (prices vary by width; 4″ is most common)
One Quebec RVer told us, “Applied it in 2019 on a 6-inch tear. Still perfect through four harsh winters including that brutal February 2023.” The tape’s flexibility means it expands and contracts with your roof through Canadian temperature extremes without losing adhesion.
✅ Pros:
- Instant waterproof seal—no curing time
- Can be applied in temperatures down to -1°C
- Lifetime durability when properly installed
❌ Cons:
- More expensive per square foot than liquid sealants
- Requires firm roller pressure for proper bonding
Best For: Emergency repairs on the road, sealing larger tears or damaged areas, and reinforcing high-stress areas like roof edges.
4. RVGUARD Self-Leveling Lap Sealant – Best Budget Option
Not everyone needs the Cadillac of rubber roof sealant rv products. RVGUARD offers surprising quality at a fraction of the price, making it perfect for first-time RV owners or those on a tight budget.
Key Specifications:
- Self-leveling formula for easy application
- Compatible with EPDM, TPO, vinyl, aluminum
- UV and waterproof protection
- Withstands -40°C to +90°C
Price Range: $15-20 CAD per 10 oz tube on Amazon.ca
While Canadian reviews show it doesn’t quite match Dicor’s longevity, most users report 3-5 years of solid performance with proper application. For routine camper roof repair tasks or supplementing your Dicor supply, it’s a smart choice that keeps money in your wallet for actual camping trips.
✅ Pros:
- Budget-friendly without sacrificing basic quality
- Good for learning proper sealing techniques
- Available with Amazon Prime shipping across Canada
❌ Cons:
- May require more frequent reapplication than premium brands
- Less consistent quality control reported by some users
Best For: Budget-conscious RV owners, learning basic roof maintenance, supplemental tubes for your maintenance kit.
5. Dicor 551LSW-1 Non-Sag Lap Sealant – Best for Vertical Surfaces
Here’s a common rookie mistake: using self-leveling sealant on vertical surfaces. Gravity wins every time, and you end up with an unsightly drip show. Dicor’s non-sag formula stays put on sidewalls, ladder mounting points, and vertical seams.
Key Specifications:
- Non-leveling, non-sag formula
- HAPS-free, environmentally safer
- Same compatibility as self-leveling version
- Doubles as adhesive for mounting fixtures
Price Range: $18-24 CAD per 10.3 oz tube on Amazon.ca
British Columbia RVers particularly appreciate this for sealing exterior graphics and decal edges where water intrusion often starts. The thicker consistency provides better vibration resistance—important on Canadian highways where frost heaves create rough riding conditions.
✅ Pros:
- Stays in place on vertical and overhead applications
- Stronger adhesive properties than self-leveling
- Same trusted Dicor quality and compatibility
❌ Cons:
- Doesn’t level itself—technique matters more
- Not suitable for large horizontal seams
Best For: Sidewall seams, ladder mounts, exterior fixture installations, anywhere gravity would cause sealant to run.
6. Flex Seal Liquid – Best for Quick DIY Fixes
Yes, it’s the “As Seen on TV” product, and yes, it actually works. While not specifically formulated as rv roof caulk, Canadian RVers have successfully used Flex Seal Liquid for small emergency repairs and as a temporary measure until proper maintenance can be performed.
Key Specifications:
- Liquid rubber coating
- UV resistant and weatherproof
- Available in white to match most RV roofs
- Covers approximately 100 sq ft per 16 oz can
Price Range: $40-55 CAD per 16 oz can on Amazon.ca
The key word here is “temporary.” Think of it as a band-aid, not surgery. One Nova Scotia camper shared, “Sealed a small puncture at the campground on Victoria Day weekend. Held for the entire summer season until I could properly repair it in fall.” It’s not a replacement for proper rv roof coating systems, but it beats cutting your trip short.
✅ Pros:
- Widely available at Canadian Tire, Home Depot
- Can be applied to damp (not wet) surfaces
- Useful for multiple household applications
❌ Cons:
- Not specifically designed for RV roofing
- Higher cost per ounce than specialized products
Best For: Emergency roadside repairs, temporary fixes, multi-purpose household/RV maintenance arsenal.
7. EverBond RV Roof Coating – Best Premium Long-Term Protection
If you’re serious about maximizing your RV’s lifespan and you want the best protection money can buy, EverBond’s nano-processed formula represents the cutting edge of camper leak repair technology.
Key Specifications:
- Proprietary nano-processing removes 99.7% of impurities
- 1000% stretch and seal flexibility
- 87% UV/IR reflectivity (highest in class)
- Compatible with all major roof types
Price Range: $280-350 CAD for 4.75 gallon pail on Amazon.ca
Yes, it’s expensive. But let’s do the math: a professional roof replacement costs $7,000-12,000 CAD. This coating system, when properly applied, can extend your roof’s life by 10-15 years. For serious full-timers or those with premium coaches, it’s insurance against catastrophic failure.
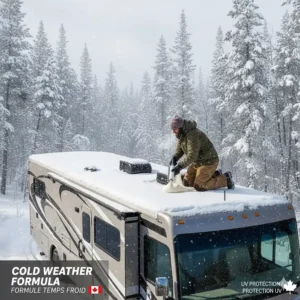
Canadian reviewers consistently mention its performance in extreme weather. One Alberta full-timer reported, “Applied in 2021. We’ve been through +38°C heatwaves and -35°C cold snaps. Not a single leak or crack.”
✅ Pros:
- Industry-leading UV protection and reflectivity
- Superior durability and elasticity
- Professional-grade results for DIY application
❌ Cons:
- Significant upfront investment
- Requires purchasing primer separately
Best For: Premium RVs, full-timers, long-term RV owners planning to keep their rigs 10+ years, ultimate protection for harsh Canadian climates.
Understanding RV Roof Materials: EPDM vs TPO vs Fiberglass
Before you grab any camper roof sealant off the shelf, you need to know what’s on your roof. Using the wrong product can actually damage your roofing membrane—and that’s an expensive lesson.
EPDM (Ethylene Propylene Diene Monomer)
This black or white rubber membrane has been the RV industry workhorse since the 1960s. According to roofing specialists, EPDM offers exceptional durability across temperature extremes and typically lasts 20-25 years with proper maintenance.
How to Identify: Remove a roof vent trim ring and check the exposed edge. EPDM typically has a black backing, even if the surface is white. It’s smooth to the touch and very flexible.
Compatible Sealants: Dicor products, Liquid Rubber EPDM Primer + Coating, most self-leveling lap sealants. Avoid petroleum-based cleaners or solvents, which break down EPDM.
Common in: Travel trailers, fifth wheels, older motorhomes (pre-2005)
TPO (Thermoplastic Polyolefin)
Introduced in the early 1990s, TPO has become the manufacturer’s favourite due to lower cost and excellent heat-reflective properties. The material is naturally white and reflects solar heat better than painted EPDM.
How to Identify: TPO has a white or fleece backing (all one colour throughout). The surface has a subtle “orange peel” texture, making it less slippery when wet—a safety bonus.
Compatible Sealants: Most universal RV sealants work fine. Alpha Systems products for Keystone RVs. Note: Some manufacturers require brand-specific sealants to maintain warranty.
Common in: Modern trailers (2005+), Keystone RVs, Forest River products
Fiberglass
The Cadillac of RV roofing—expensive, durable, and virtually maintenance-free. Fiberglass roofs last 30-50 years but cost 3-4x more than rubber alternatives.
How to Identify: Hard, smooth surface that sounds hollow when tapped. Usually found on high-end motorhomes and small travel trailers.
Compatible Sealants: Marine-grade polyurethane sealants, UV-resistant caulks. Fiberglass typically needs less sealing since it’s molded as one piece, but fixtures still require sealing.
Common in: Class A motorhomes, Airstream trailers, premium fifth wheels
How to Choose the Right Camper Roof Sealant in Canada
Step 1: Identify Your Roof Type
As discussed above, compatibility is non-negotiable. Check your owner’s manual, look for stickers near the entry door indicating roof material, or use the physical inspection method at a roof vent.
Step 2: Assess Your Repair Needs
Minor Maintenance: Small cracks around vents, regular 90-day maintenance → Self-leveling lap sealant (Dicor 501LSW-1 or RVGUARD)
Major Repairs: Large tears, multiple failing seams, impact damage → Repair tape (EternaBond) plus lap sealant
Full Restoration: Widespread cracking, chalking, roof over 15 years old → Complete rv roof coating system (Liquid Rubber or EverBond)
Emergency Situations: Leaking on the road, immediate fix needed → EternaBond tape or Flex Seal Liquid
Step 3: Consider Canadian Climate Factors
Prairie Provinces (AB, SK, MB): Extreme temperature swings demand maximum flexibility. Choose sealants rated to -40°C minimum. UV resistance is critical due to intense summer sun.
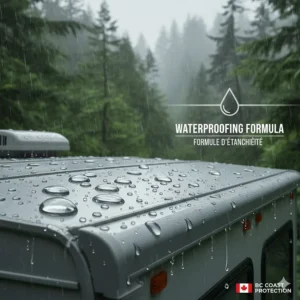
Coastal Regions (BC, Atlantic Canada): Constant moisture requires superior waterproofing. Products with anti-mold properties perform better. Ensure sealants can be applied in high humidity.
Ontario/Quebec: Four-season extremes need all-around performers. Products that handle both heat/UV and freeze/thaw cycles are essential.
Northern Territories: Limited shipping options and extreme cold make product selection critical. Stock up during southern trips and focus on cold-application products.
Step 4: Calculate Coverage Needs
Lap Sealant Tubes: One 10.3 oz tube typically covers 30-40 linear feet of 1/4″ bead. For a typical 30-foot trailer with vents, skylights, and edge seams, budget 4-6 tubes annually.
Roof Coatings: Measure your roof length × width in square feet. Multiply by 2 for proper coverage (two coats). A gallon covers approximately 50 sq ft. Example: 28′ × 8′ = 224 sq ft ÷ 50 = 4.5 gallons needed.
Repair Tape: Measure damaged areas and add 2″ overlap on all sides. EternaBond comes in 2″, 4″, 6″, and 12″ widths.
Step 5: Budget Realistically
Annual Maintenance Budget: $100-200 CAD for sealant tubes, cleaners, and tools
Major Repair Budget: $300-600 CAD for coating systems, primers, brushes, rollers
Professional Installation: $500-1,500 CAD for inspection and resealing; $2,500-4,000 CAD for complete recoating
Step 6: Check Shipping Restrictions
Some liquid rubber products can’t ship in freezing weather. Canadian Amazon sellers typically pause hazardous material shipments November-March in northern regions. Plan ahead and order by early October for winter storage projects.
Step 7: Read Canadian Reviews
US reviews don’t always translate. Search “Canada” within Amazon.ca reviews to find feedback from buyers dealing with similar climate challenges.
Essential Application Tips for Canadian Conditions
Temperature Matters More Than You Think
Most sealants require application between 10°C and 32°C. Here’s the reality: in Alberta, that’s maybe 4-5 months of the year. In Atlantic Canada, add persistent humidity to the challenge.
Pro Tip: Store sealant tubes indoors at room temperature for 24 hours before application. Keep working tubes in your jacket pocket between uses to maintain workable consistency.
Surface Preparation is 80% of Success
You can’t seal over dirt, old sealant, or oxidation. Clean your roof with products specifically designed for RV rubber (avoid household cleaners with petroleum distillates).
Canadian Weather Strategy: Plan sealing projects for dry stretches. Check Environment Canada’s 7-day forecast. You need 48-72 hours of dry weather post-application for proper curing.
The Right Tools Make All the Difference
Essential Tool List:
- Caulking gun (heavy-duty for cold weather use)
- Plastic putty knives (won’t damage roofing membrane)
- Wallpaper roller for EternaBond tape
- Medium-bristle brush for roof cleaning
- Safety harness if walking on roof
- Isopropyl alcohol for final cleaning
- Masking tape for clean lines
Common Application Mistakes to Avoid
Don’t: Apply sealant over failing old sealant. Remove loose material first, even if it’s tedious.
Don’t: Use self-leveling sealant on vertical surfaces. It will sag and look terrible.
Don’t: Skip the primer with liquid rubber coatings on EPDM/TPO roofs. Adhesion will fail.
Don’t: Work in direct sunlight. Early morning or evening prevents sealant from skinning too quickly.
Don’t: Forget to seal screw heads when replacing fixtures. Every penetration is a potential leak point.
Signs You Need Immediate Roof Attention
Interior Warning Signs
- Water stains on ceiling panels (even small spots)
- Musty odour indicating hidden mold
- Soft spots in ceiling when pressed
- Peeling wallpaper or bowing panels
- Visible mold in corners near ceiling
Exterior Indicators
- Chalking (white powdery residue on rubber roofs)
- Cracks wider than a credit card thickness
- Sealant pulling away from surfaces
- Black streaks down sidewalls (EPDM deterioration)
- Bubbling or blistering in roofing membrane
If you spot any interior signs, stop using the RV immediately and have a professional inspection. Water damage accelerates quickly, and what’s a $200 repair today becomes a $5,000 problem in six months.
Preventive Maintenance Schedule for Canadian RVers
Every 90 Days (Quarterly)
- Visual inspection of all roof seams and fixtures
- Check sealant condition around vents, skylights
- Remove debris, leaves, and tree sap
- Light cleaning with RV roof cleaner
Spring (April-May)
- Thorough cleaning after winter storage
- Reseal any cracks developed during freeze-thaw cycles
- Inspect for winter damage from ice/snow
- Apply UV protectant if using coating systems
Summer (June-August)
- Check for UV degradation and chalking
- Monitor after severe weather (hailstorms, high winds)
- Ensure drainage isn’t blocked by debris
Fall (September-October)
- Major inspection and resealing before winter storage
- Apply final protective coating if needed
- Ensure all seams are sealed for winter moisture
- Cover roof with RV cover if storing outdoors
Before Long Trips
- Quick visual check of critical seals
- Pack emergency repair kit (EternaBond tape, lap sealant)
- Verify nothing loose that could damage roof in transit
Comparing Camper Roof Sealant vs Traditional Roofing Methods
| Factor | Modern Sealants | Traditional Methods |
|---|---|---|
| Lifespan | 5-10 years typical | 20-30 years (full replacement) |
| Cost | $100-800 CAD DIY | $2,500-12,000 professional |
| Application Time | Weekend project | 3-5 days pro installation |
| Maintenance | Quarterly inspections | Annual inspections |
| DIY Friendly | Yes, with research | No, requires expertise |
| Climate Adaptation | Excellent (modern formulas) | Excellent (permanent solution) |
| Warranty Coverage | 3-10 years product | 5-15 years labour + materials |
FAQ: Your Camper Roof Sealant Questions Answered
❓ How often should I reseal my camper roof in Canada?
❓ What is the average cost of camper roof sealant in Canada?
❓ Can I use camper roof sealant in cold Canadian weather?
❓ Which camper roof sealant works best for EPDM roofs in Canada?
❓ How long does camper roof sealant take to cure in Canadian climate?
Conclusion: Protecting Your Investment with the Right Sealant
Your RV represents freedom, adventure, and likely a significant financial investment—the average Canadian RV costs $35,000-75,000. Protecting that investment with proper roof maintenance isn’t optional; it’s essential. Water damage doesn’t announce itself with flashing lights; it creeps in silently until you’re facing structural repairs that exceed the RV’s value.
The good news? Armed with the right information and products, maintaining your camper roof is well within reach of any Canadian RV owner. Whether you choose the proven reliability of Dicor sealants, the comprehensive protection of Liquid Rubber coatings, or the emergency convenience of EternaBond tape, you now have the knowledge to make an informed decision.
Remember: in Canada’s harsh climate, an ounce of prevention truly equals a pound of cure. Mark your calendar for quarterly inspections, stock your maintenance supplies before the spring rush, and never ignore even small signs of trouble. Your future self—and your wallet—will thank you.
Ready to protect your home on wheels? The products we’ve reviewed are all available on Amazon.ca with shipping across Canada. Don’t wait for the first leak to take action. Regular maintenance today means worry-free adventures tomorrow!
Recommended for You
- 7 Best Norcold Camper Refrigerator Options for Canadians 2026
- 7 Best Camper Hot Water Tank Options in Canada 2026
- 7 Best Toilet Portable Camping Solutions for Canada 2026
Disclaimer: This article contains affiliate links to Amazon.ca. If you purchase products through these links, we may earn a small commission at no additional cost to you.
✨ Found this helpful? Share it with your friends! 💬🤗