In This Article
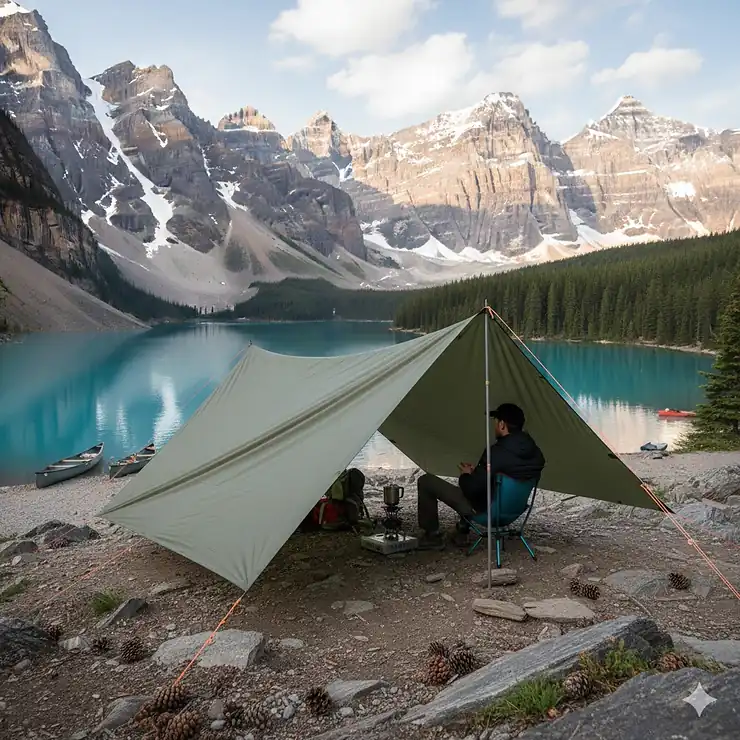
Picture this: you’re deep in Algonquin Park, the sky darkens, and rain starts pelting down. Your tent? Not quite waterproof enough. But if you’ve got a reliable camping tarp, you’re golden. I’ve spent countless weekends in the Canadian backcountry, and I can tell you with absolute certainty—a quality camping tarp is the difference between a miserable night and a cozy, dry adventure.
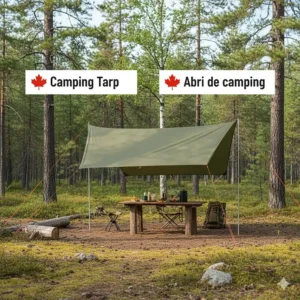
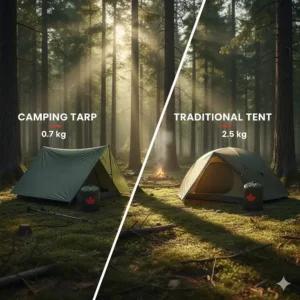
According to Wikipedia, camping involves overnight stays with basic temporary shelter, and a camping tarp offers unmatched versatility compared to traditional tents. Whether you’re setting up a rain shelter during a sudden Prairie storm, creating shade on a hot summer day in the Okanagan, or building an emergency shelter in the Rockies, the right camping tarp becomes your Swiss Army knife of outdoor gear. Unlike rigid tent structures, camping tarps adapt to any terrain, weather condition, or configuration you can imagine. From A-frame setups to lean-tos, from hammock rain flies to ground cloths, these versatile shelters weigh less, pack smaller, and cost significantly less than conventional tents.
Canadian campers face unique challenges. Our weather swings from scorching summers in the Interior to torrential downpours on the West Coast and frigid nights in the North. You need gear that handles it all. This guide breaks down the seven best camping tarps available on Amazon.ca in 2026, complete with real CAD pricing, Canadian customer reviews, and honest pros and cons. We’ll cover everything from ultralight backpacking options to bombproof bushcraft shelters, budget picks to premium investments.
Quick Comparison Table
| Product | Size | Weight | Waterproof Rating | Best For | Price Range (CAD) |
|---|---|---|---|---|---|
| AquaQuest Guide Tarp | 10’x7′ | 0.9 lbs | 5,000mm | Ultralight backpacking | $80-$120 |
| REDCAMP Waterproof Tarp | 83″x55″ | 0.66 lbs | 1,000mm | Budget camping | $25-$40 |
| Amazon Basics Camping Tarp | 8’x10′ | 2.2 lbs | Polyethylene | Casual camping | $30-$50 |
| Gold Armour Rainfly Tarp | 10’x10′ | 1.8 lbs | 5,000mm | All-around use | $60-$90 |
| DD Hammocks Tarp 3×3 | 10’x10′ | 1.7 lbs | 3,000mm | Bushcraft/hammocking | $100-$140 |
| AquaQuest Defender Tarp | 10’x7′ | 2.4 lbs | 20,000mm | Heavy duty/extreme | $140-$180 |
| Unigear Hammock Rain Fly | 10’x10′ | 1.5 lbs | 3,000mm | Hammock camping | $50-$75 |
💬 Just one click – help others make better buying decisions too! 😊
Top 7 Camping Tarps: Expert Analysis
1. AquaQuest Guide Tarp – Ultralight Champion
If you’re counting grams for a thru-hike or multi-day backcountry trip, the AquaQuest Guide Tarp deserves the top spot on your shortlist. This Canadian-designed tarp punches way above its weight class.
Key Specifications:
- 40D ripstop nylon with dual silicone/PU coating
- 5,000mm waterproof rating with heat-taped seams
- 13 reinforced tie-out points
- Available in five sizes (10’x7′ most popular)
What makes it special: Despite weighing less than a litre of water at 0.9 lbs, this tarp withstood three days of non-stop rain during my Bruce Peninsula trip last June. The fabric feels substantial in your hands, not flimsy like cheaper ultralight options. Canadian buyers on Amazon.ca consistently praise its performance in BC coastal rains and Ontario thunderstorms.
✅ Pros:
- Exceptional packability (fits in a Nalgene-sized stuff sack)
- Lifetime warranty from Canadian company
- Multiple attachment points for creative configurations
❌ Cons:
- Premium price point
- Requires practice to pitch properly in wind
Customer Insight: Toronto buyer Sarah M. noted it “handled Killarney’s worst storm without a single drip.” Solid choice for weight-conscious Canadian adventurers.
2. REDCAMP Waterproof Camping Tarp – Budget Backpacker’s Friend
Not everyone needs ultralight performance or wants to spend $100+ on a tarp. Enter the REDCAMP Waterproof Camping Tarp, proving you don’t need to empty your wallet for reliable weather protection.
Key Specifications:
- 210D Oxford ripstop polyester
- PU1000mm waterproof coating
- 6 reinforced grommets
- Multiple size options for 1-4 people
Reality check: This isn’t expedition-grade gear, but for car camping, music festivals, or casual weekend trips, it’s remarkably capable. The 83″x55″ version works perfectly as a footprint under your tent or as a quick shelter during lunch breaks on the Bruce Trail.
✅ Pros:
- Incredibly affordable ($25-$40 CAD)
- Lightweight enough for day hikes
- 365-day manufacturer warranty
❌ Cons:
- Lower waterproof rating than premium options
- Fewer tie-out points limit setup flexibility
Canadian Value: Vancouver camper James T. reported using it for six months of West Coast camping before upgrading, calling it “the perfect starter tarp.”
3. Amazon Basics Waterproof Camping Tarp – No-Nonsense Reliability
Sometimes you just need simple, dependable gear without overthinking it. The Amazon Basics Waterproof Camping Tarp delivers exactly that—straightforward protection at an honest price.
Key Specifications:
- Polyethylene construction with rip-stop weave
- Reinforced corners and edges
- Rust-resistant grommets every 3 feet
- 8’x10′ size (ideal for most uses)
Honest assessment: This won’t win any ultralight awards, and bushcraft purists might scoff, but it’s bulletproof for car camping, backyard setups, or keeping firewood dry at the cabin. Ontario campers appreciate that it ships free with Prime and arrives ready to use with zero fuss.
✅ Pros:
- Rock-bottom pricing
- Excellent durability for weight class
- Easy to clean and maintain
❌ Cons:
- Heavier than nylon alternatives
- Basic green colour only
Real-world test: Used this to cover our family’s picnic area at Sandbanks Provincial Park through an entire rainy weekend. Zero leaks, zero drama.
4. Gold Armour Rainfly Tarp – Feature-Packed All-Rounder
The Gold Armour Rainfly Tarp occupies that sweet spot between budget and premium, delivering impressive features without breaking the bank. It’s become hugely popular among Canadian hammock campers and car campers alike.
Key Specifications:
- 210D ripstop nylon fabric
- 5,000mm waterproof rating
- 33 reinforced tie-out loops
- Complete package includes stakes, guy lines, and tensioners
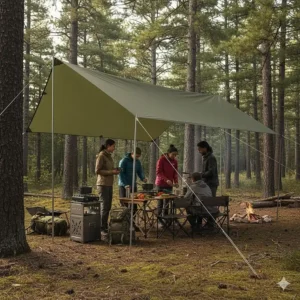
What sets it apart: Those 33 attachment points aren’t just marketing fluff—they enable configurations I’ve never managed with simpler tarps. Set it up as an A-frame over your hammock, create a full enclosed shelter, or rig a cooking area with multiple angles. Alberta campers particularly love it for unpredictable mountain weather.
✅ Pros:
- Comes with all necessary hardware included
- 5-year warranty
- Multiple size options from 8’x10′ to 14.7’x12′
❌ Cons:
- Attachment points can be overwhelming for beginners
- Slightly heavier than comparable tarps
Pro tip: Edmonton buyer Mike R. notes: “The extra tie-outs seem excessive until you’re in 60 km/h winds on the Prairies. Then they’re lifesavers.”
5. DD Hammocks DD Tarp 3×3 – The Bushcrafter’s Dream
British-designed but beloved by Canadian outdoor enthusiasts, the DD Hammocks DD Tarp 3×3 has earned legendary status in bushcraft and survival communities. Featured on multiple survival TV shows, it’s built for serious backcountry use.
Key Specifications:
- 3,000mm PU-coated polyester
- 19 reinforced attachment points
- 10’x10′ square design
- Includes 4 pegs, 4 guy ropes, and stuff sack
Why Canadians love it: The square shape enables diagonal pitches that smaller rectangular tarps can’t match. I’ve used mine from Yukon to Nova Scotia, and it’s handled everything from June bugs to September snow. The fabric strikes that rare balance—tough enough for extended use but light enough for backpacking.
✅ Pros:
- Incredible setup versatility
- Proven performance in extreme conditions
- Available in olive green, coyote brown, and MultiCam
❌ Cons:
- Premium pricing ($100-$140 CAD)
- Square shape means less coverage for weight than rectangular
Expert insight: This tarp appears regularly at Canadian bushcraft schools and survival courses for good reason—it simply works.
6. AquaQuest Defender Tarp – Ultimate Heavy-Duty Protection
When you absolutely, positively need to stay dry, the AquaQuest Defender Tarp stands alone. With a 20,000mm waterproof rating, it’s four times more waterproof than most tents and could probably handle a biblical flood.
Key Specifications:
- 150D ripstop nylon construction
- 20,000mm waterproof rating (exceptional)
- Heat-taped seams with nylon webbing reinforcement
- Multiple sizes from 7’x5′ to 13’x10′
Real talk: This is overkill for fair-weather camping, but for extended backcountry trips, coastal expeditions, or winter camping, it’s worth every penny. The fabric feels more like boat canvas than typical tarp material. BC mountaineers and northern guides swear by it.
✅ Pros:
- Virtually indestructible
- Lifetime warranty
- Canadian company with responsive support
❌ Cons:
- Heavier than ultralight options (2.4 lbs for 10’x7′)
- Most expensive in this roundup
Customer validation: Whitehorse resident Tom K. writes: “Used this through a week of Yukon storms that destroyed two other campers’ cheaper tarps. Mine didn’t even flex.”
7. Unigear Hammock Rain Fly – Best Value for Hammock Campers
Hammock camping has exploded in Canada, and the Unigear Hammock Rain Fly offers excellent protection specifically designed for suspended sleeping without the premium price tag.
Key Specifications:
- 210D ripstop Oxford fabric
- 3,000mm PU waterproof coating
- Reinforced attachment points
- 10’x10′ hexagonal shape
Why it works: The slightly elongated hexagonal design provides better coverage for hammock setups than square tarps, and the reinforced attachment points handle the unique stress patterns of diagonal pitching. Nova Scotia hammock campers report excellent performance in coastal conditions.
✅ Pros:
- Purpose-built for hammock camping
- Excellent value at $50-$75 CAD
- UV protection included
❌ Cons:
- Not as versatile for ground-based shelters
- Fewer colour options
Setup note: Works beautifully with Canadian Hennessy Hammocks and ENO systems popular across the country.
✨ Don’t Miss These Exclusive Deals!
🔍 Take your camping to the next level with these carefully selected products available in Canada. Click on any highlighted item to check current pricing and availability on Amazon.ca. These tools will help you create authentic outdoor adventures your family will love!
Understanding Camping Tarp Waterproof Ratings
One of the most confusing aspects of choosing a camping tarp is understanding waterproof ratings. Let me break it down in plain English.
The rating (like 3,000mm or 20,000mm) measures how much water pressure the fabric can withstand before leaking. Here’s what the numbers actually mean for Canadian camping conditions:
- 1,000-2,000mm: Light rain protection. Fine for car camping in fair weather or as a tent footprint. Won’t handle sustained downpours.
- 3,000-5,000mm: Standard camping tarp territory. Handles most Canadian weather including moderate rainstorms. Good for 3-season use.
- 10,000mm+: Heavy-duty protection. Overkill for most situations but essential for extreme conditions, extended trips, or winter camping.
According to research from outdoor recreation experts, anything above 3,000mm qualifies as “waterproof” for camping purposes. The difference between 5,000mm and 20,000mm matters more for longevity than immediate performance—higher ratings mean the coating won’t degrade as quickly over years of UV exposure and folding.
Pro tip for Canadians: Don’t just focus on the rating. Check if seams are taped or sealed—untaped seams leak regardless of fabric rating. All our top picks feature properly sealed construction.
Camping Tarp Shelter: Setup Configurations Explained
The beauty of a camping tarp lies in its adaptability. Unlike tents with rigid poles and fixed shapes, camping tarps transform into whatever shelter you need. Let me walk you through the most useful configurations for Canadian conditions.
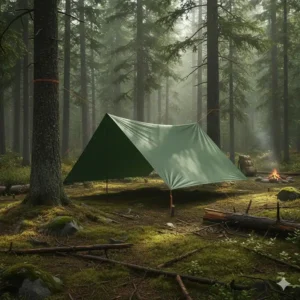
A-Frame (The Classic)
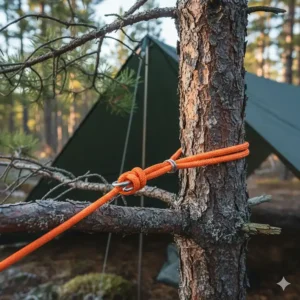
Suspend a ridgeline between two trees, drape your tarp over it, and stake out the corners. Takes 5 minutes to set up and provides excellent rain protection. Perfect for forested campgrounds across Ontario and Quebec.
Lean-To (The Wind Fighter)
Stake one edge low to the ground, the opposite edge high using trees or trekking poles. Creates a wind-blocking wall ideal for prairie camping or alpine environments where wind comes from one direction.
Diamond Configuration
Orient your tarp diagonally for maximum coverage with minimum material. Popular among hammock campers as it extends further than standard A-frame setups.
Flying V (Advanced)
Create a V-shaped shelter with one end closed. Offers the best weather protection while maintaining ventilation. Requires practice but worth learning for serious backcountry trips.
Canadian-specific consideration: In bug season (June-August everywhere except the coasts), pair your tarp with a bug net. A tarp alone won’t keep out blackflies, mosquitoes, or horseflies that make Canadian summers “interesting.”
For detailed guidance on outdoor recreation shelter-building techniques, wilderness skills instructors recommend practicing each configuration in your backyard before heading into the backcountry.
Material Comparison: Which Fabric Works Best?
| Material | Weight | Durability | Waterproofing | Best Use | Common in Canada |
|---|---|---|---|---|---|
| Silnylon | Lightest | Moderate | Excellent | Backpacking | Yes (ultralight tarps) |
| Polyethylene | Heavy | Very High | Good | Car camping | Yes (budget tarps) |
| Ripstop Nylon | Light | High | Excellent | All-around | Yes (most popular) |
| Canvas | Heaviest | Excellent | Moderate | Bushcraft | Limited availability |
| 70D Nylon | Moderate | Very High | Excellent | Heavy duty | Yes (premium tarps) |
Climate consideration: Canadian temperature swings mean condensation becomes a real issue. Silnylon and ripstop nylon breathe better than polyethylene, reducing morning dampness. Alberta campers particularly appreciate this during spring and fall when overnight temperatures drop significantly.
Heavy Duty Camping Tarp vs. Lightweight Options
The eternal camping debate: carry less weight or more durability? Let me share insights from years of testing both approaches across Canadian terrain.
Heavy Duty Tarps (2+ lbs): Choose these when you’re car camping, setting up a base camp, need winter protection, or camping in aggressive terrain (rocky Canadian Shield, coastal environments with salt spray). The extra weight translates to fabrics that shrug off sharp rocks, tree branches, and repeated setup/takedown cycles. AquaQuest Defender exemplifies this category.
Lightweight Tarps (under 1.5 lbs): Perfect for backpacking, bicycle touring, canoe trips where portaging matters, or any situation where you’re carrying your shelter multiple kilometres. These prioritize packability and weight savings. However, you trade some durability—be more careful during setup and avoid sharp objects. AquaQuest Guide represents this philosophy.
Middle ground (1.5-2 lbs): Most Canadian campers find this sweet spot ideal. Products like Gold Armour and DD Hammocks tarps offer enough durability for regular use without destroying your back. This is what I recommend for 90% of campers.
Regional insight: West Coast campers dealing with coastal shrubs and rain often prefer heavier tarps. Prairie and mountain campers carrying gear over distance lean lighter. Ontario and Quebec campers with mixed terrain often split the difference.
Lightweight Camping Tarp: What to Look For
Not all lightweight camping tarps deliver the performance they promise. Here’s what actually matters when you’re shaving grams:
Denier count (D): This measures fabric thickness. For lightweight tarps, look for 30D-70D. Lower numbers mean lighter but more delicate. Higher numbers add weight but increase puncture resistance. Sweet spot for Canadian conditions: 40D-50D.
Reinforced attachment points: Lightweight fabrics tear easily where cord attaches. Quality manufacturers reinforce these spots with extra material or webbing. Check customer photos on Amazon.ca—visible reinforcement patches indicate better construction.
Seam construction: Taped or sealed seams add minimal weight but prevent catastrophic leaks. Never buy an ultralight tarp without sealed seams for Canadian use.
Pack size: A true lightweight tarp compresses to roughly the size of a 1L water bottle. If it’s much larger, the fabric isn’t genuinely ultralight—you’re carrying unnecessary bulk.
Real-world test: My AquaQuest Guide tarp has survived 50+ nights across three years of Canadian backcountry use. It weighs 410 grams. That’s the performance standard to benchmark against.
Camping Ground Tarp vs. Rain Shelter
Same product, different applications. Understanding this distinction helps you choose the right specifications for your primary use.
As Ground Protection:
When used under your tent or sleeping bag, tarps protect against moisture, sharp rocks, and wear. For this purpose, waterproof rating matters less than abrasion resistance and size. You want something slightly smaller than your tent footprint (prevents rain pooling between layers). Budget options like Amazon Basics or REDCAMP work perfectly here—no need for ultralight materials.
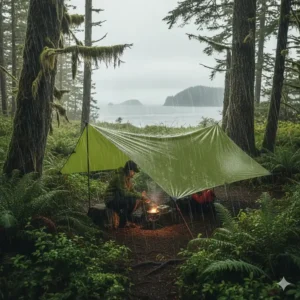
As Rain Shelter:
Pitched above you, tarps become your primary weather protection. Now waterproof rating, wind resistance, and attachment points matter tremendously. You need reliable fabric with proper sealing. This is where premium options like AquaQuest or DD Hammocks justify their cost.
Multi-purpose approach: Most Canadian campers carry one tarp and use it for both purposes depending on conditions. Sunny forecast? It’s ground protection. Calling for rain? Pitch it overhead. This versatility is why camping tarps remain essential gear even for tent campers.
Parks Canada recommendation: According to Parks Canada, using proper ground protection in national parks and conservation areas helps preserve vegetation and minimize camping impact—something every responsible Canadian camper should prioritize.
Rain Tarp Camping: Essential Setup Tips
Let me share hard-won lessons from setting up rain tarps across every Canadian province and territory.
Pre-trip preparation: Practice your preferred configuration at home three times before trusting it in a storm. I learned this the embarrassing way during a Fundy National Park downpour when I couldn’t remember my knot sequence.
Site selection matters: Look for natural windbreaks, slight elevation (avoid low spots where water pools), and anchor points (trees, rocks, or firm ground for stakes). Saskatchewan prairie camping taught me to always have backup anchoring strategies.
Tarp angle optimization: Pitch your rain side at minimum 45-degree angle for Canadian rainfall intensity. Flatter pitches collect water that eventually leaks through even quality fabric. Steeper angles shed water efficiently.
Guy line management: Use reflective cord (included with Gold Armour) to avoid nighttime faceplants. Maintain proper tension—loose lines flutter noisily and risk collapse; overtight lines stress fabric and attachment points.
Ventilation is crucial: Never create a fully sealed shelter unless facing extreme wind. Even in heavy rain, leave openings for air circulation. Condensation from body heat and breathing will soak you faster than external rain in a sealed tarp shelter.
Canadian weather quirk: Our sudden temperature swings mean condensation becomes a serious issue overnight. Set up your tarp with ventilation in mind, especially during spring and fall camping.
Emergency Shelter Tarp: Survival Applications
Every Canadian backcountry traveller should understand how their camping tarp doubles as emergency survival shelter. I’ve witnessed two situations where this knowledge saved serious trouble.
Core principles: In survival scenarios, shelter takes priority over everything except immediate medical emergencies. Hypothermia kills faster than hunger or thirst in Canadian wilderness. A properly deployed tarp can mean the difference between manageable discomfort and life-threatening exposure.
Quick deployment techniques: The fastest emergency shelter is a simple lean-to. One edge staked low to the ground (knee height), opposite edge suspended higher using paracord, branches, or even your hiking poles. Provides immediate wind and rain protection in under 10 minutes, even with numb fingers.
Heat reflection strategy: Position your tarp to reflect campfire heat back toward your position. This technique, passed down through generations of Canadian bushcrafters, makes winter camping feasible with minimal gear. The AquaQuest Defender’s robust construction handles this approach safely with proper fire distance.
Multiple tarp configurations: If you’re traveling with a partner and both carry tarps, you can create substantial shelter with overlapping configurations. Two 10’x10′ tarps become a 15’x10′ fortress against weather.
Emergency kit integration: Keep 50 feet of paracord attached to your tarp’s stuff sack. In emergencies, fumbling with multiple gear bags wastes critical time and energy. Pre-rigged cord means immediate setup capability.
Real scenario: During a sudden whiteout on the Fundy Footpath, my hiking partner and I erected a double-tarp shelter in 15 minutes. We waited out three hours of zero-visibility conditions in relative comfort while other groups struggled with inadequate emergency gear.
Bushcraft Tarp: Traditional Canadian Wilderness Skills
The Canadian bushcraft community has embraced traditional outdoor skills, and the bushcraft tarp sits at the heart of this movement. These aren’t just camping tarps—they’re tools for extended wilderness living.
What defines a bushcraft tarp: Heavier, more durable fabrics that withstand weeks or months of continuous use. Natural earth-tone colors for low visual impact. Square or near-square shapes enabling maximum configuration variety. Ample attachment points for creative rigging. The DD Hammocks and AquaQuest Defender exemplify true bushcraft tarps.
Fire-safe positioning: Unlike modern synthetic tent materials that melt instantly, quality tarps can be positioned near (not directly above) fires for warmth and cooking. Maintain minimum 2-metre distance, monitor for sparks, and never leave fires unattended. This technique extends comfortable camping season well into Canadian fall and spring.
Long-term shelter solutions: Bushcraft enthusiasts combine tarps with natural materials—fallen branches for side walls, pine boughs for insulation, carved stakes for improved anchoring. These semi-permanent camps appear throughout Crown land in Northern Ontario and Quebec’s backcountry.
Skill development: Canadian outdoor schools in provinces from BC to Nova Scotia teach advanced tarp techniques: the Adirondack lean-to, the super shelter, the pyramid configuration. Each suits different weather patterns and terrain. These skills transform a simple tarp into complete wilderness accommodation.
Legal consideration: When practicing bushcraft on public lands in Canada, understand regulations regarding cutting vegetation, fire restrictions, and campsite selection. Most provincial parks restrict bushcraft activities to designated backcountry zones.
How to Choose the Best Camping Tarp for Canadian Conditions
After testing dozens of tarps across Canadian terrain, here’s my definitive selection framework.
1. Determine Your Primary Use
Start with honest assessment of how you’ll actually camp, not aspirational visions of epic adventures. Car campers don’t need ultralight gear. Serious backpackers can’t tolerate 3-pound tarps. Hammock campers need different coverage than ground sleepers.
2. Match Waterproof Rating to Climate
West Coast camping? 5,000mm minimum for those legendary coastal rains. Prairie use? 3,000mm handles most situations. Northern territories or winter camping? Consider 10,000mm+ for extreme reliability.
3. Calculate Weight vs. Durability Trade-offs
Every 100 grams matters on multi-day hikes. For weekend warriors carrying gear 2 kilometres, save your money and choose durability over ultralight specifications. Long-distance hikers make opposite calculations.
4. Consider Setup Complexity
Some tarps (Gold Armour with 33 attachment points) offer incredible versatility but overwhelm beginners. Simple 4-corner models like Amazon Basics work immediately without learning curves. Match complexity to your experience and patience level.
5. Budget Realistically
Quality tarps last decades. Spending $120 on an AquaQuest Guide that serves 200 camping nights costs $0.60 per use. Replacing $30 budget tarps every season costs more long-term. Calculate cost-per-use, not just upfront price.
6. Check Canadian Availability and Shipping
Verify your chosen tarp ships from within Canada or ships free to your province. Avoid expensive cross-border shopping and surprise customs fees. All products in this guide ship via Amazon.ca’s network.
7. Read Canadian Customer Reviews
Fellow Canadians test gear in your climate. Someone in Vancouver understands coastal rain. Alberta reviewers know wind. Quebec buyers deal with humidity. Filter reviews by “verified Canadian purchase” for relevant insights.
✨ Don’t Miss These Exclusive Deals!
🔍 Take your camping to the next level with these carefully selected products available in Canada. Click on any highlighted item to check current pricing and availability on Amazon.ca. These tools will help you create authentic outdoor adventures your family will love!
Camping Tarp Accessories You Actually Need
Don’t waste money on unnecessary accessories, but these items genuinely improve your tarp camping experience.
Essential guy lines (if not included): Upgrade to reflective paracord. Prevents nighttime accidents, handles the elements, and provides emergency utility beyond shelter setup. 50 feet costs $15-20 CAD and lasts years.
Quality stakes: The cheap wire stakes included with budget tarps bend in Canadian Shield granite or pull out in Prairie winds. Invest in proper aluminum or titanium stakes—MSR Groundhog stakes are the gold standard. $20-30 for a set you’ll use forever.
Tarp tensioners (line locks): These small plastic or metal devices let you adjust guy line tension without retying knots. Essential when weather changes and your tarp needs immediate adjustment. Usually $5-10 for a 6-pack.
Stuff sack upgrade: Replace flimsy included bags with waterproof dry bags. Protects your tarp during storage and doubles as camp organization. Sea to Summit makes excellent options for $20-35.
Repair kit: Tenacious Tape or similar repair patches fix small tears in the field. Duct tape works temporarily but proper repair tape matches material flexibility. $10 insurance policy against trip-ending damage.
What you DON’T need: Skip specialty tarp poles unless you exclusively camp in treeless terrain. Trekking poles or natural anchors work fine. Avoid complicated pulley systems marketed to beginners—master basic knots first.
Maintenance and Care for Long-Term Durability
Quality camping tarps last 10-15 years with proper care. Here’s how to maximize your investment.
Post-trip cleaning: Set up your tarp at home and spray down with a garden hose to remove dirt, tree sap, and debris. Never store a dirty tarp—organic matter promotes mildew growth. This 10-minute task extends tarp life by years.
Proper drying: Always completely dry your tarp before storage. Even “waterproof” fabrics can develop mildew when stored damp. Hang in your garage or basement, or loosely drape over a clothesline. Never stuff a wet tarp in its storage bag.
Storage technique: Avoid tight folding along identical lines (creases stress fabric). Instead, stuff tarps loosely into storage bags or fold randomly each time. This prevents permanent creases that eventually become weak points.
Seam inspection: Before major trips, inspect all seams and apply fresh seam sealer if needed. Seam Grip costs $10 and takes 24 hours to cure. This simple maintenance prevents catastrophic leaks in the backcountry.
Waterproofing refresh: After 50-100 nights of use, your tarp’s water-repellent coating diminishes. Nikwax or similar products restore water-shedding performance. Follow manufacturer instructions carefully—improper application can damage fabric.
Winter storage: Store tarps in climate-controlled space if possible. Extreme temperature fluctuations in unheated garages or sheds degrade synthetic materials faster. A bedroom closet or basement works perfectly.
Canadian-specific concern: If your tarp encounters forest fire smoke (increasingly common during summer), wash thoroughly. Smoke residue contains corrosive compounds that accelerate fabric deterioration.
Frequently Asked Questions
❓ What is the best waterproof rating for a camping tarp in Canada?
❓ How large should my camping tarp be?
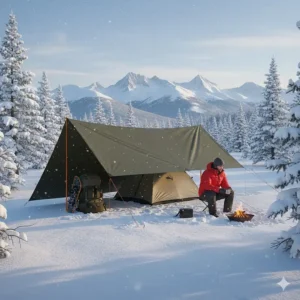
❓ Can I use a camping tarp in winter conditions?
❓ Are camping tarps better than tents for Canadian backcountry?
❓ Where can I buy quality camping tarps in Canada?
Conclusion: Choosing Your Perfect Camping Tarp
We’ve covered a lot of ground—from ultralight backpacking tarps that weigh less than your water bottle to bombproof bushcraft shelters that laugh at storms. The best camping tarp for you depends entirely on how you camp, where you adventure, and what you’re willing to carry.
For most Canadian campers, I’d recommend starting with a mid-range option like the Gold Armour Rainfly Tarp or DD Hammocks DD Tarp 3×3. Both offer excellent versatility, proven reliability, and reasonable pricing. You’ll learn what matters to you personally—weight, durability, ease of setup—then can make informed decisions about future upgrades.
Ultralight hikers tackling the Canadian Rockies or multi-day canoe routes should seriously consider the AquaQuest Guide Tarp. Yes, it costs more upfront, but that 0.9-pound weight and compact pack size make every kilometre easier. Your knees and back will thank you.
Budget-conscious campers or families just getting started will find the REDCAMP or Amazon Basics tarps deliver solid value. You’re not making a lifetime commitment—you’re getting dependable shelter while you develop your outdoor skills and preferences.
Remember, the most important factor isn’t specifications or price—it’s actually using your gear. The best camping tarp is the one that gets you outside experiencing Canada’s incredible wilderness. Whether you’re watching sunrise over Lake Superior, weathering a Coastal Mountains storm, or cooking bannock under an Alberta sky, your tarp becomes part of your adventure story.
Now stop reading and go camping. Those trails won’t hike themselves, and you’ve got shelter figured out. 🍁
Recommended for You
- Best Camping Headlamps Canada 2026
- 7 Best Camping Lanterns in Canada 2026
- 7 Best Camper Sewer Hoses Canada 2026
Disclaimer: This article contains affiliate links to Amazon.ca. If you purchase products through these links, we may earn a small commission at no additional cost to you.
✨ Found this helpful? Share it with your friends! 💬🤗