In This Article
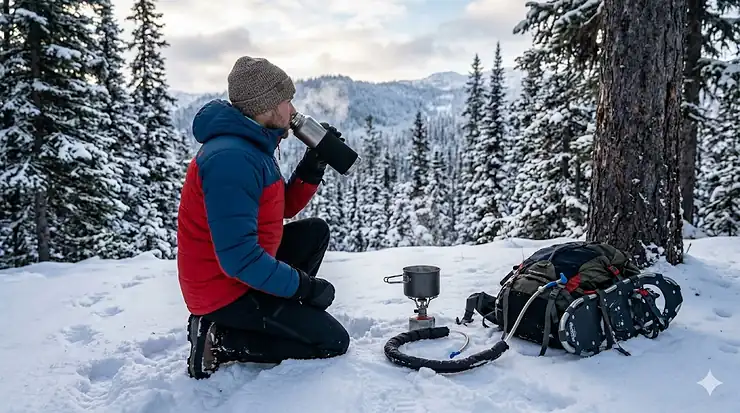
Picture this: you’re camping in Algonquin Park at -15°C, and your water bottle is solid ice. Frustrating? Absolutely. Dangerous? Potentially. According to Health Canada, “dehydration seriously impairs the body’s ability to produce heat,” increasing hypothermia risk—a critical concern for Canadian winter campers.

The challenge is real: water freezes at 0°C, yet Canadian winter temperatures routinely plunge to -30°C or colder from the Rockies to the Maritimes. But here’s the good news—combining modern gear with proven techniques makes prevent water bottle freezing camping entirely manageable. Whether you’re planning a weekend snowshoe trip in Banff or a multi-day backcountry skiing expedition in Quebec, mastering these seven methods will transform your cold-weather camping experience.
From selecting the right insulated gear to employing clever techniques like the upside down water bottle trick, this guide covers everything Canadian winter campers need to stay hydrated safely. Let’s explore solutions that keep you hydrated when temperatures plummet across Canada’s stunning wilderness.
Quick Comparison: Top Prevention Methods
| Method | Effectiveness | Cost (CAD) | Best For | Ease |
|---|---|---|---|---|
| Vacuum Thermos | Excellent (12+ hrs) | $45-$75 | Hot liquids, day trips | Easy |
| Nalgene + Sleeve | Very Good (6-8 hrs) | $40-$60 | Multi-day trips | Easy |
| Boiling Water Technique | Excellent (overnight) | $18-$30 | Overnight warmth | Moderate |
| Upside Down Storage | Good (3-5 hrs) | Free | Quick trips | Very Easy |
| Hydration Reservoir | Moderate (2-4 hrs) | $50-$90 | Active skiing | Moderate |
| DIY Cozy | Good (4-6 hrs) | $5-$15 | Budget option | Easy |
| Inside Pack Storage | Good (variable) | Free | Multi-bottle systems | Easy |
💬 Just one click – help others make better buying decisions too!😊
Top 7 Products to Prevent Water Bottle Freezing Camping
After extensive research of products available on Amazon.ca, here are the top solutions Canadian winter campers trust.
1. Hydro Flask Wide Mouth Insulated Bottle
The Hydro Flask Wide Mouth sets the standard for winter camping hydration. Double-walled vacuum insulation with TempShield technology keeps liquids hot for 12 hours and cold for 24 hours—ideal for how to keep water from freezing camping.
Key Specs: 32-40 oz capacity, 18/8 stainless steel, 342g weight
Price: $45-$65 CAD
Alberta campers report it kept coffee drinkable for an entire day at -25°C ice fishing. The wide mouth accepts boiling water and ice cubes easily.
✅ Pros: Exceptional insulation, durable powder coating, wide mouth design
❌ Cons: Heavier than plastic, premium price
Canadian Availability: Widely available on Amazon.ca with Prime shipping.
2. Nalgene 32oz HDPE Bottle with Insulated Sleeve
The classic Nalgene Wide Mouth HDPE (milky white) paired with an insulated water bottle sleeve represents tried-and-true reliability. Unlike clear Tritan models, HDPE safely holds boiling water and weighs just 99g.
Key Specs: 1000ml capacity, -40°C to 100°C rated, BPA-free
Price: $18-$25 CAD (bottle), $22-$35 CAD (sleeve)
The Nalgene Insulated Sleeve features reflective insulation and zipper closure. Manitoba winter campers report 6-8 hours of liquid water at -15°C when starting hot.
✅ Pros: Lightweight, proven reliability, inexpensive
❌ Cons: Sleeve less effective than vacuum bottles, zipper can freeze below -30°C
Canadian Feedback: Excellent value for most winter camping conditions.
3. 40 Below Neoprene Water Bottle Boots
For minimalists, 40 Below Boots offer excellent neoprene insulation without zippers that fail in extreme cold. The 5mm construction works with standard 32 oz Nalgene bottles.
Key Specs: Thick neoprene, zipperless, 140g weight
Price: $28-$38 CAD
No frozen zippers means easy use with bulky winter gloves. The webbing strap attaches to pack hip belts for quick access.
✅ Pros: No zipper, glove-friendly, durable
❌ Cons: Bulkier than zippered options, limited sizes
Availability: Available on Amazon.ca, though stock varies during peak winter season.
4. IRON °FLASK 32oz Stainless Steel Bottle
A budget-friendly alternative, the IRON °FLASK delivers impressive winter performance with 18/8 food-grade stainless steel vacuum insulation keeping liquids hot for 12 hours.
Key Specs: 32 oz capacity, includes 3 lids (straw/spout/flex), 350g
Price: $32-$45 CAD
Canadian customers appreciate the three-lid versatility—flip lid for skiing, solid lid for maximum heat retention at camp.
✅ Pros: Excellent value, multiple lids, strong insulation
❌ Cons: Heavier than listed, powder coating chips
Canadian Availability: Ships free with Prime across most provinces.
5. CamelBak Crux Insulated Tube
For hydration reservoir winter systems, the CamelBak Crux Insulated Tube transforms existing bladders into cold-weather solutions with neoprene sleeve protection.
Key Specs: Neoprene insulation, Big Bite valve with on/off lever, 85g
Price: $35-$48 CAD
BC backcountry skiers report good performance to -15°C when using proper blow-back technique (blowing water back into reservoir after each sip).
✅ Pros: Hands-free hydration, on/off valve prevents leaks
❌ Cons: Requires blow-back discipline, freezes below -20°C, expensive
6. Stanley Classic Vacuum Bottle (1.9L)
The legendary Stanley Classic has kept liquids hot for over 100 years. This Canadian favourite excels at the boiling water bottle technique used nationwide.
Key Specs: 1.9L capacity, 18/8 stainless, 24+ hour hot retention
Price: $55-$75 CAD
Not a trail bottle—it’s a basecamp workhorse. Fill with boiling water in the morning for steaming evening cocoa. Many use it as hot water source for meals and bed warming.
✅ Pros: Unmatched 24+ hour heat retention, lifetime warranty, nearly indestructible
❌ Cons: Heavy (1.2kg full), wide body, overkill for day trips
Best Use: Multi-day winter camping where reliable hot water is essential.
7. DIY Reflectix Insulated Cozy
The budget approach: DIY water bottle cozy using Reflectix bubble insulation from Canadian hardware stores. Cut Reflectix to wrap your bottle, secure with duct tape.
Materials: Reflectix insulation ($12-$18), duct tape ($5-$8), scissors
Price: $5-$15 CAD total
Yukon campers use this successfully for decades. When properly constructed, DIY cozies keep water liquid 4-6 hours at -10°C to -15°C.
✅ Pros: Cost-effective, customizable, lightweight, Canadian hardware store materials
❌ Cons: Homemade appearance, less durable, requires DIY effort
Performance: Effective budget solution for moderate cold conditions.
Product Specifications Comparison
| Product | Capacity | Insulation | Weight | Price (CAD) | Best For |
|---|---|---|---|---|---|
| Hydro Flask | 32-40 oz | Vacuum | 342g | $45-$65 | Premium performance |
| Nalgene + Sleeve | 32 oz | Neoprene | 239g | $40-$60 | Value & versatility |
| 40 Below Boots | 32 oz | Neoprene | 140g | $28-$38 | No-zipper reliability |
| IRON °FLASK | 32 oz | Vacuum | 350g | $32-$45 | Budget-conscious |
| CamelBak Tube | N/A | Neoprene | 85g | $35-$48 | Hands-free hydration |
| Stanley Classic | 1.9 L | Vacuum | 1200g | $55-$75 | Basecamp use |
| DIY Reflectix | 32 oz | Reflective | 50g | $5-$15 | Ultimate budget |
✨ Don’t Miss These Exclusive Deals!
🔍 Take your winter camping to the next level with these carefully selected products available in Canada. Click any highlighted item to check current pricing on Amazon.ca. These tools will help create authentic cold-weather camping experiences!
The Upside Down Water Bottle Trick
One cost-free technique for how to keep water from freezing camping is storing bottles upside down—it’s saved countless Canadian winter campers from frozen hydration.
How It Works
When stored right-side up, water in cap threads freezes quickly, cementing your cap shut. By storing upside down, water fills the cap area completely. Motion from hiking keeps this water agitated and prevents freezing, while your drinking access stays clear.
Proper Technique:
- Tightly seal cap after drinking (check gasket)
- Immediately invert bottle
- Store in insulated sleeve
- Keep moving—agitation prevents freezing
This works best -5°C to -15°C with wide-mouth bottles. At extreme cold (below -25°C), you’ll need additional insulation regardless. Test your bottle-sleeve combination before backcountry trips. Parks Canada recommends this as your first defense combined with hot water.
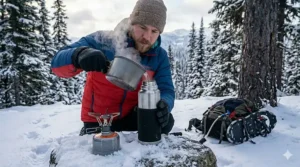
Boiling Water Bottle Technique
The boiling water technique serves double duty—preventing freezing and adding sleeping bag warmth during frigid Canadian nights.
Fill a durable HDPE Nalgene or Hunersdorf bottle with boiling water, seal tightly, and place in your sleeping bag 15-20 minutes before bed.
Critical Safety:
- Only use bottles rated for boiling water
- Never use clear Tritan Nalgene—they deform
- Check cap seals carefully—leaks create emergencies
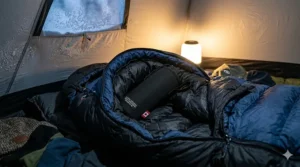
- Wrap bottle in sock initially to prevent burns
Place at your feet on your sleeping pad (not under it). Your feet warm up, and by morning you’ll have warm water for breakfast. This traditional technique is recommended across Parks Canada facilities from Banff to Fundy.
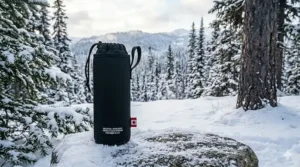
Insulated Sleeve Selection Guide
Material Comparison
Neoprene sleeves (40 Below) provide excellent insulation and moisture handling. Effective to -20°C.
Reflective sleeves (Nalgene) bounce radiant heat back. Lighter but less effective in extreme cold. Work best with hot water starts.
Foam-padded sleeves offer middle ground. Less expensive but may not perform below -10°C.
Key Design Features
Zipper vs No-Zipper: Zippered allow quick access but freeze in extreme cold. Zipperless eliminate this problem but may be harder to remove with gloves.
Attachment Points: Carabiner loops or straps for hip belt mounting provide warmth and accessibility.
Bottom Insulation: Quality winter sleeves provide full coverage—freezing often begins at the bottom.
Performance by Temperature
- Basic fabric sleeves: effective to -5°C
- Standard neoprene: effective to -15°C
- Premium insulated: effective to -20°C
- Vacuum bottle (no sleeve needed): effective to -30°C+
The sweet spot for most Canadian winter campers: quality neoprene sleeve ($25-$35) with HDPE Nalgene ($18-$25). This combination offers proven reliability and affordability.
Hydration Reservoir Winter Strategies
Using hydration reservoir winter systems requires different strategies than three-season use. The tube is the weak point—small diameter and constant air exposure means rapid cooling.
The Blow-Back Technique (Critical Skill)
After every single sip:
- Drink normally through bite valve
- Close bite valve
- Blow forcefully back through tube
- Feel water return to reservoir
- Release and ensure bite valve sealed
This pushes water from the exposed tube back into the insulated reservoir. The tube now contains only air, which won’t freeze. Canadian winter campers report this works reliably to -20°C with insulated hose cover.
Reservoir Positioning
Store reservoir inside pack pressed against your back. Body heat keeps water warm. Never use outer pockets—this exposes the reservoir to cold air.
Skip reservoirs entirely when:
- Temperatures consistently below -20°C
- Doing stationary activities (ice fishing, camp setup)
- New to winter camping (minimize complexity)
DIY Water Bottle Cozy Instructions
Creating DIY water bottle cozy allows customization for specific bottles and Canadian conditions at minimal cost.
Materials
- Reflectix bubble insulation (Canadian Tire, Home Depot: $12-$18 per roll)
- Duct tape ($5-$8)
- Scissors
- Optional: Velcro strips ($4-$6), paracord ($3-$5)
Construction Steps
Step 1 – Measure: Wrap bottle to determine circumference (approximately 30cm + 5cm overlap for 32 oz Nalgene). Measure full height.
Step 2 – Cut: Cut Reflectix to size. For maximum insulation, use double layers with reflective surfaces facing bottle and outward.
Step 3 – Bottom: Trace bottle bottom and cut circle from Reflectix.
Step 4 – Attach: Tape bottom circle to main wrap, creating sleeve.
Step 5 – Secure: Wrap sleeve around bottle and secure overlapping edge with duct tape running full length.
Step 6 – Add Loops: Thread paracord through holes for carabiner attachment.
Testing
Before backcountry use:
- Fill bottle with hot water (60-70°C)
- Insert in cozy
- Place outside in freezing temps
- Check every 2 hours
Quality DIY cozies keep water liquid 6-8 hours at -10°C with hot start, or 3-4 hours with room temperature water.
Storing Bottles Inside Your Pack
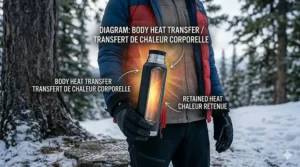
The simplest effective strategy: proper pack storage. Your backpack creates a microclimate warmer than ambient air through body heat transfer, insulation layers, and wind protection.
Strategic Placement
Best position: Against back panel surrounded by insulating gear (spare clothing, sleeping bag). Benefits from body heat and maximum insulation.
Secondary position: Pack center surrounded by bulky items like sleeping bag or puffy jacket.
Avoid: Outer pockets, mesh pockets, anywhere with thin pack material separating from exterior.
Multi-Bottle Rotation System
Canadian winter camping experts use rotating systems:
- Bottle 1: Insulated sleeve on hip belt for active use
- Bottle 2: Inside pack against back panel with hot water
- Bottle 3: Deep in pack surrounded by gear
When Bottle 1 empties or approaches freezing, swap with Bottle 2. This ensures continuous liquid water access while maximizing heat retention.
Clothing Layer Integration
Place bottles inside spare clothing for extra insulation:
- Wrap in down jacket (exceptional insulation)
- Slip into wool socks or mittens
- Nest inside fleece layers
This works particularly well overnight. Before sleeping, move bottles to sleeping bag. In morning, return to pack wrapped in your sleeping layers.
Temperature Performance Guide
Understanding realistic expectations for prevent water bottle freezing camping across Canadian winter climates:
Temperature Zones
Zone 1: 0°C to -10°C (Mild Canadian Winter)
Coastal BC, southern Ontario, Maritimes daytime conditions. Most basic methods work well.
- Vacuum thermos: 18-24 hours
- Nalgene + sleeve: 8-12 hours
- DIY cozy: 6-8 hours
- Uninsulated inside pack: 4-6 hours
Zone 2: -10°C to -20°C (Typical Canadian Winter)
Most Canadian winter camping happens here. Proper insulation essential, start with hot water.
- Quality thermos: 12-18 hours
- Insulated bottle: 6-10 hours
- Nalgene + quality sleeve + hot start: 6-8 hours
- DIY cozy: 4-6 hours
Zone 3: -20°C to -30°C (Serious Cold)
Prairie provinces, interior Yukon, high Rockies. Multiple strategies must combine.
- Premium thermos: 8-12 hours
- Insulated bottle with hot start: 4-6 hours
- Nalgene + sleeve: 3-4 hours
- Basic methods: 2-3 hours
Zone 4: Below -30°C (Extreme Conditions)
Northern territories, arctic weather, extreme cold snaps. Even best gear has limits.
- Best thermos: 6-8 hours
- Most standard methods: Under 3 hours
- Special techniques required (sleeping bag storage, chemical warmers, constant rotation)
Regional Canadian Variations
British Columbia Coast: Wet cold, rarely below -10°C. Standard sleeves and bottles work well.
Alberta/Saskatchewan Prairies: Dry cold reaching -40°C. Multiple insulation layers essential. Wind protection critical.
Ontario/Quebec: Variable -15°C to -25°C in winter camping areas. Well-rounded approach needed.
Atlantic Canada: Coastal humidity moderates extremes. Good basic insulation sufficient.
Northern Territories: Extreme cold requires expedition preparation. Standard techniques inadequate below -25°C.
Winter Hydration Planning
Winter camping increases hydration requirements due to dry air, increased energy expenditure, and cold-induced diuresis. Most winter campers need 3-4 litres daily for moderate activity.
Gear Selection by Trip Type
Day Trip (6-8 hours): 2L minimum capacity
- 1× insulated thermos (1L) + 1× Nalgene with sleeve (1L)
- Or: Hydration reservoir (2-3L) with insulated tube
Overnight: 4-5L capacity
- 1× large thermos (1.5-2L) for hot water source
- 2× insulated bottles or Nalgenes with sleeves
- Fuel and pot for snow melting backup
Multi-Day Expedition: 6+ L capacity
- Mix of thermoses and bottles
- Dedicated snow-melting system
- Water treatment for natural sources
Snow Melting Considerations
If planning snow melt as primary or backup water:
- 1L water requires approximately 2L compact snow
- Melting takes 2-3× longer than boiling water
- Budget 200-300g canister fuel per person per day
Always bring more fuel than calculated—cold temperatures reduce stove efficiency significantly.
FAQ: Common Winter Water Questions
❓ How long can water stay unfrozen without insulation in Canada?
❓ Can I use clear Tritan Nalgene bottles with boiling water?
❓ Is melting snow reliable for winter camping water in Canadian parks?
❓ What temperature rating for bottles in Alberta or Saskatchewan winters?
❓ Can I safely sleep with hot water bottles in my sleeping bag?
Conclusion: Master Canadian Winter Hydration
Preventing water bottle freezing while camping across Canada’s diverse winter landscapes requires combining strategies based on conditions. From BC rainforests to Saskatchewan prairies, Ontario lakes to Rocky peaks, each region presents unique hydration challenges demanding thoughtful preparation.
Core principles: start with hot water when possible, use appropriate insulation, employ upside down storage, and maintain backup systems. Whether investing in Hydro Flask or Stanley premium gear, choosing proven Nalgene reliability, or crafting DIY Reflectix cozies, success comes from understanding techniques rather than just owning expensive equipment.
Remember: proper hydration directly impacts safety. As noted by the Canada Safety Council, dehydration impairs heat production—serious when winter camping. By mastering prevent water bottle freezing camping strategies, you ensure liquid water access even at -30°C during magical Canadian winter nights under aurora borealis or beside crackling campfires.
Start with day trips testing systems in mild conditions before attempting overnight adventures in extreme cold. Join Canadian winter camping communities to share experiences and learn from decades of snow-country expertise. Most importantly, maintain multiple backup plans—redundancy in winter camping isn’t wasteful, it’s wise.
The rewards of winter camping across Canada’s spectacular wilderness justify the preparation. Whether waking to fresh snow at Bruce Peninsula National Park, skiing untouched Jasper powder, or watching winter sunrise over frozen Yukon lakes—with proper hydration management, you can safely enjoy these incredible experiences throughout Canada’s beautiful winter season.
Now get out there and explore—with your water bottles properly protected against the cold!
✨ Ready for Your Next Winter Adventure?
🔍 Equip yourself with top-rated insulated bottles, sleeves, and hydration systems from our Canadian recommendations. Check current prices and availability on Amazon.ca. Don’t let frozen bottles stop you—master winter hydration today!
Recommended for You
- 7 Best Insulated Water Bottles Winter Canada 2026 Guide
- 7 Best Compact Winter Backpacking Stoves Canada 2026
- 7 Best Liquid Fuel Stove for Winter Canada 2026 Guide
Disclaimer: This article contains affiliate links to Amazon.ca. If you purchase products through these links, we may earn a small commission at no additional cost to you.
✨ Found this helpful? Share it with your friends! 💬🤗