In This Article
It’s 2 a.m., deep in the bush. One mosquito has found the only gap in your defences, and it is playing the world’s tiniest, most infuriating violin directly beside your left ear. Sleep is over. Rage has begun.
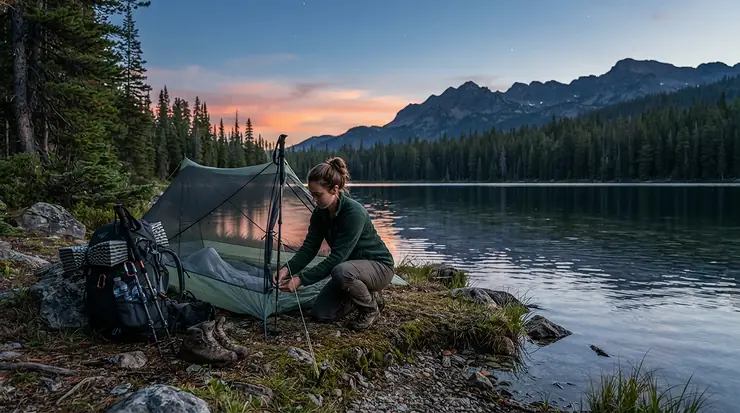
So what is the real choice in mosquito bivy vs bug tent for backpacking? Both are ways to keep biting insects off you at night. A mosquito bivy is a mesh sleeve that wraps your pad and bag. A bug tent, or net tent, is a mesh enclosure with real headroom and a bit of floor space. The bivy wins on grams. The bug tent wins on sanity.
Biting insects are not just a nuisance. Health Canada stresses that bite-prevention habits and approved repellents work together, and a physical barrier like mesh is the one layer that never runs out or washes off. From blackfly season in June to the no-see-ums of late summer, Canadian trails give you plenty of reasons to carry one.
Here is how this guide works. Weights and specs come from published manufacturer and gear-review data gathered during research, and US prices are converted to approximate Canadian ranges. I haven’t slept in any of these shelters, so everything below is analysis built on those specs and on aggregated reviewer feedback, not on invented trail stories. By the end you’ll know which style suits your trips, and which of seven real shelters is worth a look.
Quick Comparison: Bivy Sack, Bug Bivy and Net Tent
| Style | Typical weight (published) | Setup | Headroom | Best For |
|---|---|---|---|---|
| Bivy sack (e.g., Borah Ultralight Bivy) | About 142 g (5 oz) | Lay it down, crawl in | None; hugs your bag | Gram-counters in dry, mild bugs |
| Bug bivy (e.g., MLD Bug Bivy, Hyperlite Bug Bivy, Paria Breeze Bivy) | About 162-369 g (5.7-13 oz) | Hang overhead or pole-support it | Sit-up room is minimal | Solo hikers pairing with a tarp |
| Net tent (e.g., Serenity Net Tent, Yama 1P Bug Shelter) | About 278-312 g (9.8-11 oz) | Trekking poles plus stakes | Room to sit and change | Heavy bugs, long camp evenings |
The gap between the lightest and heaviest options here is only about 170 g, roughly a large apple. If you hate being zipped into a sleeve, the net tent’s extra weight buys you a lot of mental comfort, which is why the “lightest” option is not always the “best” one. Availability on Amazon.ca varies by brand, since some of these are small-maker products, so check current listings and pricing before you decide.
💬 Just one click — help others make better buying decisions too!😊
Top 7 Bug Shelters for Backpacking: Expert Analysis
I picked these seven to span budget, mid-range and premium, and to cover all three styles. Each was chosen because its published specs and reviewer feedback tell a clear story about who it suits.
1. Paria Outdoor Breeze Bivy — the budget mesh bivy with real coverage
The Paria Outdoor Breeze Bivy is the one to look at if you want bug protection without a premium-tier price tag. It’s listed at about 369 g (13 oz), which makes it the heaviest bivy-style option here, but it is also the cheapest.
That extra weight over cottage-brand bivies means you’re paying for affordability in grams. Think of it as your first bug shelter: a way to find out whether you even like sleeping in mesh before you commit real money. It suits casual weekenders and anyone building a kit on a budget.
Independent review coverage is thinner than for the pricier names, so I can’t point to a big pool of verified feedback. SectionHiker does publish a hands-on review of the Breeze line, and that is worth reading before you buy. Treat this as a smart starter option, not a long-haul workhorse.
Pros:
- ✅ Lowest price among the seven picks
- ✅ Full mesh coverage for warm nights
- ✅ Great low-risk way to try bivy-style sleeping
Cons:
- ❌ Heaviest bivy-style option at about 369 g
- ❌ Fewer verified reviews than premium rivals
Expect to pay around C$100, which is solid value for beginners but less compelling once weight matters.
2. Borah Gear Ultralight Bivy — the featherweight sack for dry, warm trips
The Borah Ultralight Bivy is the minimalist’s pick. It weighs about 142 g (5 oz), with a waterproof silnylon floor, no-see-um netting over your head and a breathable, water-resistant top fabric.
That top fabric is the clever part. It gives you light shower protection, but it also traps more moisture than all-mesh designs, so expect more condensation on humid nights. A sack like this isn’t a tent substitute. It’s insurance for dry, mild trips.
SectionHiker’s review of the related Borah Bug Bivy concludes that it works well for mild to moderate bug pressure, but extreme swarms may call for a double-wall tent. That fits the physics: a snug mesh sleeve offers little standoff from your body, so a hungry mosquito can still reach skin pressed against netting.
Pros:
- ✅ Lightest shelter on this list
- ✅ Water-resistant top for light showers
- ✅ Packs down to almost nothing
Cons:
- ❌ Condensation risk in humid conditions
- ❌ No sitting room whatsoever
Budget around C$140-C$160 (converted from a US price), plus possible cross-border shipping. Excellent value if grams are your religion.
3. Mountain Laurel Designs Bug Bivy — the proven ultralight classic
The MLD Bug Bivy has been the reference point for ultralight hikers for years. It’s listed at about 184 g (6.5 oz) in its standard fabric, and it comes with a silnylon floor and a mesh canopy.
The reason hikers like this design is simple. Because it’s a bug bivy and not a bivy sack, it has sidewalls, which means you can suspend it overhead with a trekking pole, a tarp or a ridgeline. That lifts mesh off your face and keeps sleeping bag edges from becoming a buffet.
The trade-off is that it needs something to hang from, so it works best paired with a tarp or in a spot with convenient anchor points. It also isn’t ideal in a crowded lean-to. Gear writers repeatedly cite the model as a light, dependable choice for tarp campers, but I couldn’t verify a large pool of independent consumer reviews.
Pros:
- ✅ Very light at about 184 g
- ✅ Sidewalls keep mesh off your body
- ✅ Works with tarps or trekking poles
Cons:
- ❌ Needs overhead suspension to work well
- ❌ Limited space inside to rearrange gear
Expect around C$190-C$210 (converted). A fair price for how little it weighs.
4. Hyperlite Mountain Gear Bug Bivy — premium and spacious
The Hyperlite Bug Bivy is the splurge in this group, listed at about 162 g (5.7 oz). It is a spacious bug bivy with multiple attachment points on top, so you can pitch it under a tarp or on its own.
Spacious is a relative term, since this is still a bivy, but extra volume matters because it gives you more room to roll over without your shoulder pressing mesh against your skin. That is the single biggest real-world complaint about tight bivies.
Hyperlite also sells a Splash Bivy variant that adds a partial nylon covering over the mesh for wind and splashback protection under a tarp. If your trips are blustery and your tarp is minimal, that option is worth knowing about.
Pros:
- ✅ Among the lightest bug bivies listed
- ✅ Multiple top attachment points
- ✅ Roomier than tight bivy sacks
Cons:
- ❌ Highest price of the seven picks
- ❌ Still needs overhead support in rain
Plan on roughly C$320-C$350 (converted), which is serious money for a few ounces of mesh. Whether that premium makes sense depends on how hard you chase weight.
5. Outdoor Research Bug XT Bivy — the pole-supported crowd-pleaser
The Bug XT Bivy is the easiest of the bivy-style options to live with. It uses a pole-supported design, a polyester mesh body and a seam-taped floor, with an interior height of about 66 cm (26 in).
That pole is the key. Without relying on a tarp or a convenient tree, you can pitch it almost anywhere, so it doubles as an open-sky shelter in fair weather. Ventilation is passive, which means plenty of airflow, but also no protection from rain by itself.
The earlier Outdoor Research Bug Bivy, which weighs about 454 g (1 lb), earned roughly 4 out of 5 on a retailer’s 42 ratings. Reviewers there praised its simplicity, but some said setup and accessories needed experimenting, and a few noted bites when mesh touched skin. Treat that as a likely theme for the XT’s descendant design too, though I can’t verify XT-specific feedback.
Pros:
- ✅ Self-supporting pole means flexible pitching
- ✅ Taped floor seams for ground moisture
- ✅ Backed by a well-known brand
Cons:
- ❌ Not a rain shelter on its own
- ❌ Heavier than cottage-brand bivies
One Canadian retailer lists it around C$200, a respectable middle-of-the-road price and the easiest place to start if you want something sold locally.
6. Six Moon Designs Serenity Net Tent — the roomy bug tent that still packs small
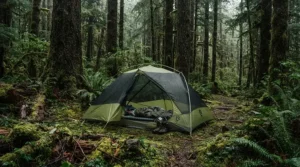
The Serenity Net Tent is the standard bearer for the bug-tent side of this debate. It weighs about 312 g (11 oz), stands about 114 cm (45 in) at the peak, and has 20 cm (8 in) end walls to keep netting off your head and feet.
A 3 in bathtub floor and large side door round it out. You can pitch it alone with trekking poles, hang it from a rafter in a lean-to, or put it under a wide variety of tarps. That versatility is why it keeps showing up in gear roundups.
Headroom changes how you feel at camp. You can sit up, change clothes and eat dinner while the bugs bounce off the walls like tiny frustrated tourists. For multi-night trips in heavy bug season, that’s worth a lot. Check door placement if you’re combining it with a tarp, since misaligned doors are the classic annoyance.
Pros:
- ✅ Real sitting room and headroom
- ✅ Pitches alone, under a tarp or in a lean-to
- ✅ Bathtub floor with sensible side walls
Cons:
- ❌ Around 170 g heavier than the lightest bivy
- ❌ More stakes and pitching effort
Expect around C$205-C$230 (converted). Strong value for the comfort you get.
7. Yama Mountain Gear 1P Bug Shelter — the lighter net tent alternative
The Yama 1P Bug Shelter is listed at about 278 g (9.8 oz), making it the lightest of the net tents here. It sits in the same category as the Serenity Net Tent, but shaves off roughly 34 g.
That weight advantage is small, so the real question is which layout suits you. Yama also sells a bug bivy, the Y-Zip, at about 264 g (9.3 oz), so if you want to compare bivy and bug-tent options within a single brand, this maker makes it easy.
Published coverage is mostly gear-roundup material rather than a large pool of customer reviews, so look for recent buyer feedback on current listings before ordering. Because it’s a net tent, you get the headroom and sitting space bug-tent fans love, with a modest weight penalty over bivies.
Pros:
- ✅ Lightest net tent in this group
- ✅ More room than any bivy style
- ✅ Same-brand bivy option for comparison
Cons:
- ❌ Limited independent review coverage
- ❌ Needs trekking poles or a tarp for support
Plan on around C$205-C$230 (converted). Good value if you want a bug tent without the heaviest build.
| Product | Type | Weight (published) | Price range | Best For |
|---|---|---|---|---|
| Paria Breeze Bivy | Bug bivy | About 369 g | Around C$100 | First-time buyers |
| Borah Ultralight Bivy | Bivy sack | About 142 g | C$140-C$160 | Weight-obsessed, dry trips |
| MLD Bug Bivy | Bug bivy | About 184 g | C$190-C$210 | Tarp campers |
| Hyperlite Bug Bivy | Bug bivy | About 162 g | C$320-C$350 | Premium ultralight |
| Bug XT Bivy | Pole-supported bivy | Check listing | Around C$200 | Flexible pitching |
| Serenity Net Tent | Net tent | About 312 g | C$205-C$230 | Headroom, heavy bugs |
| Yama 1P Bug Shelter | Net tent | About 278 g | C$205-C$230 | Lighter net-tent buyers |
Looking at the comparison above, the Borah Ultralight Bivy wins on pure grams and the Hyperlite Bug Bivy wins on refined roominess, but the Serenity Net Tent and Yama 1P Bug Shelter justify their extra weight when evenings in camp are as buggy as the nights. Budget-minded hikers should note that the Paria Breeze Bivy trades about 190-230 g for a much friendlier price than the cottage-brand bivies.
How to Choose Between a Mosquito Bivy vs Bug Tent for Backpacking
Short answer: pick a bivy if you want the lightest possible carry and you’ll sleep under a tarp or open sky, and pick a bug tent if you want room to sit, change and wait out heavy bug pressure. Here is how to decide in seven steps.
- Rate your bug pressure. Mild to moderate bugs suit a bivy. Relentless swarms favour a net tent with more standoff from your body.
- Check your rain plan. Bug-only shelters have no weather protection, so you need a tarp or a fallback.
- Weigh the whole system. Add the tarp, poles and stakes to the shelter, not just the mesh.
- Think about trip length. One night tolerates discomfort. Seven nights punishes it.
- Check your sleeping position. Side sleepers press against mesh more, so they benefit from extra volume.
- Match your anchor points. Bug bivies need something overhead, so know your pitching options.
- Set a budget with duties in mind. Imported small-maker gear can add shipping, duties and currency cost.
Bivy vs Tent Weight Comparison: What the Ounces Really Mean
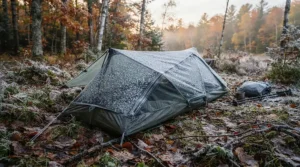
On paper, a bivy vs tent weight comparison looks like a runaway win for bivies. The Borah Ultralight Bivy at about 142 g sits well under the Serenity Net Tent at about 312 g. SectionHiker’s guide to ultralight bug shelters confirms the pattern: net tents offer the most living space but are also the heaviest of the three styles.
But the sticker weight hides a system truth. A bug bivy is not a rain shelter, so a hiker who adds a tarp, guylines and stakes can end up near the weight of a lightweight tent anyway. A net tent paired with the same tarp shares that cost, so the real gap is the bivy-versus-net difference of roughly 130-170 g.
What is 170 g? About the weight of a large apple or two energy bars. Over a long day that is a rounding error. Over an eight-day trip you’ll think about it for roughly nine minutes, then forget it. For perspective, hikers who weigh their kit often trim more from a heavy rain jacket, a bulky stove or extra clothing than from choosing a bivy over a bug tent.
The takeaway is practical. Don’t pick a shelter style to shave 170 g if it costs you sleep. Save weight elsewhere first.
| Comparison | Lightest option | Heaviest option | Spread |
|---|---|---|---|
| Bivy sack | Borah Ultralight Bivy (about 142 g) | Borah Ultralight Bivy | Single entry |
| Bug bivies | Hyperlite Bug Bivy (about 162 g) | Paria Breeze Bivy (about 369 g) | About 207 g |
| Net tents | Yama 1P Bug Shelter (about 278 g) | Serenity Net Tent (about 312 g) | About 34 g |
Net tents cluster tightly in weight, so choose between them on layout, not grams. Bug bivies spread much wider, which means a premium model can save over 200 g versus a budget one, and that is where weight-conscious buyers should spend their attention.
Pack Weight Priorities: Where a Bug Shelter Fits
Pack weight priorities are really about trade-offs, and your shelter is one of the big three, alongside your pack and your sleep system. Hikers who chase ultralight base weights, commonly under 4.5 kg (10 lb), often start with these big items because they offer the largest savings per decision.
A bug shelter is a bit different. It’s a small, specialized item that solves one problem very well. That means its weight is less about the shelter itself and more about whether it replaces something heavier. If a bug bivy lets you leave a double-wall tent at home on a dry trip, you’ve saved weight. If you carry both, you’ve added it.
Here is a simple ranking approach: protect your sleep first, then your safety, then your grams. A hiker who sleeps badly walks slowly, makes worse decisions and burns extra energy. Eight hours of unbroken sleep is worth more than 100 g of savings.
So use the Hyperlite Bug Bivy or the Borah Ultralight Bivy if you’ve already optimised everything else and have a trusted rain plan. Choose the Serenity Net Tent or Yama 1P Bug Shelter if comfort is your priority and you’re happy to give up a little weight for it. Neither choice is wrong. They just serve different priorities.
Ventilation Differences Between Styles
Ventilation differences between styles are the sleeper issue in this debate, and they matter more than most hikers expect. All-mesh bug bivies like the Paria Breeze Bivy and the MLD Bug Bivy let air flow freely, so on warm nights they feel like sleeping outdoors with a screen over your face.
That openness has a cost. Mesh provides almost no warmth, so on cool nights you may feel drafts and need a warmer bag or liner. A Bug XT Bivy uses passive ventilation, which is another way of saying the air moves because the walls are porous, not because of vents you can adjust.
Sacks with a breathable but water-resistant top, like the Borah Ultralight Bivy, trade some airflow for splash resistance. In humid conditions that top layer can hold moisture, so condensation can build up inside. A net tent such as the Serenity Net Tent offers more air volume, since the walls sit further from you, and that extra distance tends to help both airflow and comfort.
Floors matter too. A bathtub-style floor keeps ground moisture out, but it also means no ventilation from below. On hot, still nights that can feel stuffy, which is why many hikers pitch under a tarp with the sides raised to get some cross-breeze. In short, bivies breathe best when all-mesh and suspended, and bug tents breathe best when pitched with room to spare.
Single vs Multi-Night Trip Needs
Single vs multi-night trip needs push the decision in different directions. On a single night, you can tolerate a tight bivy, a little condensation and a slightly cramped setup, because you’ll be home tomorrow. Over several nights those small annoyances compound into real fatigue.
Consider three honest scenarios. A weekend hiker on a Bruce Trail section, with one or two buggy nights and a short forecast, can reasonably use a bug bivy such as the MLD Bug Bivy under a small tarp. A week-long Rockies trip with variable weather benefits from a net tent like the Serenity Net Tent plus a good tarp, because long evenings and unpredictable weather make the extra room valuable.
A wet-coast trip, such as a rainy route on Vancouver Island, is different again. Bug-only shelters are the wrong tool when persistent rain is likely, and a full tent is the safer call. Know the limits of your gear before you leave.
For multi-night trips, add a few practical checks:
- Carry a backup plan for rain, since mesh doesn’t help when it pours.
- Dry the mesh during breaks so it doesn’t stay damp.
- Consider a bug tent if you’ll spend long evenings in camp.
The pattern is simple: shorter, drier, lighter trips favour bivies, and longer or buggier trips favour bug tents.
Best Backpacking Mosquito Shelter Style by Buyer Type
Choosing the best backpacking mosquito shelter style depends on who you are. Use this quick framework.
- If you’re a first-timer on a budget, choose the Paria Breeze Bivy, because it’s the cheapest way to test bivy sleeping.
- If you count every gram on dry trips, choose the Borah Ultralight Bivy or the Hyperlite Bug Bivy, because they’re the lightest in this group.
- If you pitch under a tarp, choose the MLD Bug Bivy, because it’s designed to hang from overhead supports.
- If you want flexible pitching without a tarp, choose the Bug XT Bivy, because its pole makes it more self-sufficient.
- If bugs are brutal and you’ll spend evenings in camp, choose the Serenity Net Tent or Yama 1P Bug Shelter, because standing room and standoff from mesh matter most.
If you can’t decide, ask yourself one question: will I be disappointed by 170 g, or by a cramped night? Most people dread the second one more.
Lightweight Shelter Options for Backpackers Beyond Bivies and Bug Tents
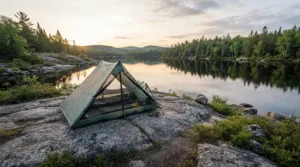
Lightweight shelter options for backpackers go beyond bivies and net tents. Hammock systems with built-in or add-on bug nets work well in forested terrain with trees. A tarp plus a head net suits those who tolerate bugs and want minimal weight. Some hikers even repurpose the inner tent of a double-wall tent, though that is heavier and awkward in tight spots.
| Option | Weight profile | Bug protection | Weather protection | Best For |
|---|---|---|---|---|
| MLD Bug Bivy plus tarp | Very light | Full mesh enclosure | Depends on tarp | Solo, tarp-comfortable hikers |
| Serenity Net Tent plus tarp | Light | Full mesh, room to sit | Depends on tarp | Heavy bugs, longer trips |
| Freestanding backpacking tent | Heavier (commonly over 1 kg for solo models) | Built-in mesh | Full weather coverage | Variable weather, simplicity |
Compared with a conventional tent, bug-only systems cut weight but ask you to manage weather yourself. A tent is simpler and more forgiving, while a bivy-and-tarp system is lighter and more skill-intensive. The right pick comes down to how much work you want to put into your shelter.
✨ Don’t Miss These Top Picks!
🔍 Take your backpacking nights to the next level with these carefully selected shelters. Click on any highlighted item to check current pricing and availability. These picks will help you create bug-free, restful nights on the trail! 🚴♂️
Practical Usage Guide: Setup, First Nights and Maintenance
A shelter is only as good as your setup. Here is how to get the most from a bivy or bug tent.
Before your first trip, pitch it at home. Learn how the pole, stakes or suspension points work, and check zippers and seams. A garden or living room practice session beats discovering a problem in the dark.
At camp, pick a spot with some natural breeze, which helps both bugs and condensation. Set up your pad inside first so you don’t drag dirt into the mesh later. If using a bug bivy, hang it so the mesh clears your face, and pull the sides taut so it doesn’t cling to your skin.
Entering at dusk, zip in fast and use your headlamp to check for stowaway insects before sleeping. One mosquito inside is worse than a hundred outside.
Common mistakes in your first 30 days include pressing against the mesh (bites follow), pitching too close to wet ground, and forgetting that zippers need gentle handling.
Maintenance is simple. Dry the shelter fully before storing it, wipe off dirt, rinse with fresh water if needed and avoid harsh detergents. Check seams and mesh for snags, and repair tiny holes promptly. Treat a small tear like a leaking boat: ignore it and it’ll find you.
Problem-Solution Guide: Condensation, Black Flies and Mesh Bites
Most bug-shelter problems have straightforward fixes.
Problem: condensation inside. Solution: improve airflow by pitching under a raised tarp, choosing a breezy spot and avoiding low, damp ground. All-mesh designs like the Paria Breeze Bivy manage this better than bivies with a water-resistant top.
Problem: bites through mesh. Solution: keep your body away from the netting. A roomier design such as the Hyperlite Bug Bivy or a net tent like the Serenity Net Tent reduces contact. Reviewer feedback for the Outdoor Research Bug Bivy reported bites after mosquitoes attacked heavily, which is consistent with this physics.
Problem: black flies and no-see-ums. Solution: choose fine no-see-um mesh, as used in the Borah Ultralight Bivy, and avoid wide-mesh nets designed only for mosquitoes.
Problem: sudden rain. Solution: carry a tarp or fallback. Bug-only shelters don’t shed rain, and no amount of optimism will change that.
Problem: feeling claustrophobic. Solution: step up to a net tent. The extra room can make the difference between restful and miserable.
Common Mistakes When Buying a Bug Shelter
The biggest mistake is buying by weight alone. A shelter that saves 100 g but keeps you awake is a bad deal. The second is forgetting rain: a bug bivy without a tarp is a screen door, not a roof.
Third, hikers often assume repellent or treated clothing removes the need for a shelter. Even with treated gear, protection is partial. CBC reported that permethrin-treated clothing approved in Canada is marketed only for mosquitoes, not ticks, a reminder that no single layer covers everything.
Fourth, check size: a bivy that’s too narrow for your pad or sleeping bag becomes a torture chamber. Fifth, check door alignment if pairing with a tarp, because awkward entry points are a classic annoyance. Finally, remember that small-maker products may involve shipping, duties and currency swings, so compare total landed cost, not just the sticker price.
Safety, Regulations and Repellents in Canada
A physical barrier works best alongside approved repellents and sensible habits. Health Canada requires personal insect repellents to carry a Pest Control Product (PCP) registration number, and it recommends applying sunscreen first, then repellent. Ingredients such as DEET, icaridin and permethrin-treated clothing each have rules and limits, so read the label carefully.
The Public Health Agency of Canada notes in its guidance on permethrin-treated clothing that it doesn’t provide complete protection and should be combined with other prevention measures. It also advises looking for a PCP number on the label when buying treated clothing.
Some practical rules follow. Don’t apply repellent to skin that will press against your shelter mesh in a way that could leave residue on shared gear. Keep your food stored away from your sleeping area as local park rules require, since a mesh shelter does nothing to protect against bears or other wildlife. And check provincial or park regulations before you head out.
Mesh also helps against ground crawlers when paired with a floor, but it won’t solve every risk. Use it as one part of a layered system.
FAQ: Mosquito Bivy vs Bug Tent for Backpacking
❓ Can a mosquito bivy keep out rain without a tarp?
❓ Is a bug tent worth the extra weight for one night?
❓ How do I stop mosquitoes biting through the mesh?
❓ Do I need no-see-um mesh for Canadian trails?
❓ Can I share a bug bivy with a partner?
Conclusion
The honest verdict on mosquito bivy vs bug tent for backpacking is that neither wins outright. Bivies win on weight and packability, and bug tents win on room and comfort. The right answer depends on your trips, your bugs and your tolerance for cramped nights.
If you’re hiking light on short, dry trips, the Borah Ultralight Bivy, MLD Bug Bivy or Hyperlite Bug Bivy are strong choices. If you want flexibility, the Bug XT Bivy is easy to live with. If you want a first step on a budget, the Paria Breeze Bivy gets you started. And if bugs are brutal or your evenings are long, the Serenity Net Tent and Yama 1P Bug Shelter give you a place to sit while the swarm hums outside.
Whatever you choose, remember the bigger picture: a good night’s sleep is worth more than a few grams. Pair your shelter with a rain plan, approved repellents and sensible camp habits, and you’ll spend less time swatting and more time enjoying the trail.
✨ Ready to pick your bug shelter? Check current prices and availability, and sleep easier on your next trip!
Recommended for You
- Bug Tent For Camping: 7 Best Bite-Free Picks In 2026
- Lightweight Solo Bug Bivy: 7 Best Picks For Canada In 2026
- Mosquito Net Tent: 7 Best Budget Picks For Canada In 2026
Disclaimer: This article contains affiliate links. As an Amazon Associate, I earn from qualifying purchases. If you purchase products through these links, we may earn a small commission at no additional cost to you.
✨ Found this helpful? Share it with your friends! 💬🤗
