
In This Article
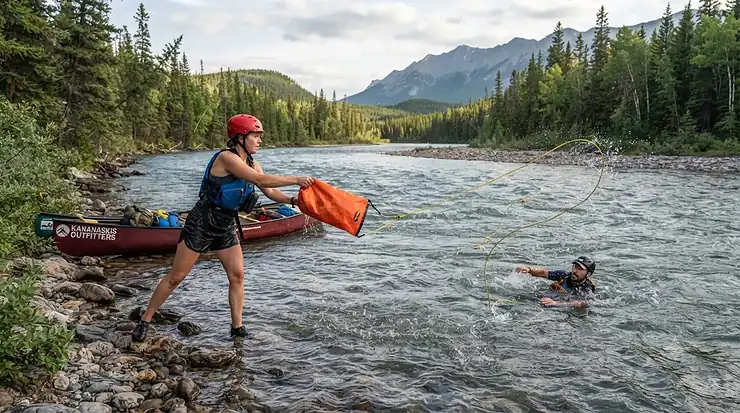
Picture this: you’re three days into a canoe trip on a swift-moving stretch of river, the kind with standing waves that catch your eye and your stomach in equal measure. Someone flips. The water is cold, the current doesn’t care about your itinerary, and suddenly the most important piece of gear in your boat isn’t the stove or the map — it’s a small nylon sack of rope tucked under your seat. That’s the moment a throw bag for canoe rescue earns its keep.

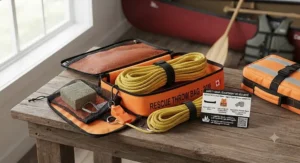
A throw bag for canoe rescue is exactly what it sounds like: a compact bag packed with buoyant rope, designed to be thrown to a swimmer in trouble so they can be pulled to shore before the river makes the decision for them, as described in the Wikipedia entry on throw bags. It’s cheap insurance, it weighs less than a full water bottle, and it’s one of the few pieces of safety gear Transport Canada actually requires on board. Yet a lot of paddlers buy the first bag they see, toss it in a dry bag, and never practice with it — which, as swiftwater instructors will tell you, is almost as risky as not carrying one at all.
This guide breaks down seven real, currently available throw bags spanning budget, mid-range, and premium options, with honest analysis pulled from manufacturer specs and aggregated review sentiment — no invented testimonials, no fabricated “we tested this on the Ottawa River” stories. We’ll also cover how rope diameter and length actually change a rescue, what Transport Canada’s regulations require, and how to build the rest of your safety gear kit for canoe tripping around this one essential tool. By the end, you’ll know exactly which bag fits your paddling and why.
Quick Comparison: Throw Bags for Canoe Rescue at a Glance
Before diving into the full breakdown, here’s how the seven picks stack up side by side.
| Throw Bag | Rope Length | Tensile Strength | Best For | Price Range (CAD) |
|---|---|---|---|---|
| NRS Compact Rescue Throw Bag | 21 m (70 ft) | 431 kgf (950 lb) | Lightweight all-rounder | C$50–C$70 |
| MEC One Buoyant Heaving Line | 15 m (49 ft) | Meets TC minimum | Budget legal compliance | Under C$40 |
| Salus Amigo Throw Bag | 15 m (50 ft) | Light-duty paracord | Compact PFD tether | C$40–C$60 |
| North Water Micro Throw Line | Shorter, packable | Flatwater-rated | Beginners, lake tripping | C$40–C$55 |
| NRS Standard Rescue Throw Bag | 23 m (75 ft) | 862 kgf (1,900 lb) | Whitewater workhorse | C$80–C$100 |
| Salus 80-Foot Throw Bag | 24 m (80 ft) | Spectra-core reinforced | Long-range, Canadian-made | C$90–C$120 |
| NRS Pro Compact Rescue Throw Bag | 21 m (70 ft) | 1,132 kgf (2,495 lb) | Professional-grade strength | C$100–C$140 |
For casual lake trippers who mostly need to satisfy the legal carriage requirement, the MEC One Buoyant Heaving Line or Salus Amigo Throw Bag covers the minimum without adding bulk. Paddlers running moving water should lean toward the NRS Standard Rescue Throw Bag or the Salus 80-Foot Throw Bag, both of which trade a bit of pack size for reach and rope strength. If you’re guiding, instructing, or simply want the strongest rope available, the NRS Pro Compact Rescue Throw Bag‘s 2,495-pound-rated rope sits in a different class entirely.
💬 Just one click — help others make better buying decisions too!😊
Top 7 Throw Bags for Canoe Rescue: Expert Analysis
Every bag below is a real, currently available product. Prices are approximate ranges in CAD — always check current pricing before buying, since Amazon.ca pricing shifts constantly.
1. NRS Compact Rescue Throw Bag — best lightweight all-rounder for kayakers and canoeists
The standout here is weight: at roughly 0.5 kg (1.2 lb), this is one of the lightest true rescue bags you can clip to a thwart without noticing it’s there.
Inside the nylon shell is 21 m (70 ft) of 6 mm (1/4″) polypropylene rope rated to 431 kgf (950 lb) of tensile strength — plenty for pulling a single swimmer to shore, though the rope’s own maximum load drops once knots are tied into it. A 5 cm (2″) mesh drainage panel means the bag actually dries between trips instead of turning into a swamp in your dry bag, and a barrel-lock drawstring keeps the rope contained until you need it.
Based on the spec comparison, this bag is built for reach and portability rather than brute strength — a smart trade-off for solo trippers and lightweight canoe trips where every gram in the boat matters. It’s not what you’d want for guiding groups through pushier water, but for lake-to-river day trips and multi-day canoe tripping where the main risk is a capsize in moderate current, it does the job without weighing down your pack.
Reviewers on outdoor retailer sites consistently note the compact size and easy restuffing as strong points, with the rope’s high-visibility yellow drawing regular praise. A recurring theme in aggregated feedback is that the thinner 6 mm rope, while easy to throw, can be harder to grip with cold, wet hands than the thicker options further down this list.
Pros:
- ✅ Under 0.5 kg, barely noticeable in a packed canoe
- ✅ Bright yellow rope stands out on grey river water
- ✅ Mesh panel drains fast, resists mildew between trips
Cons:
- ❌ Thinner rope is harder to grip with cold hands
- ❌ Rope strength trails well behind whitewater-rated bags
At around C$50–C$70, the NRS Compact Rescue Throw Bag is a strong value pick for anyone who wants a genuine rescue tool without committing to whitewater-grade gear.
2. MEC One Buoyant Heaving Line — budget pick built to meet Transport Canada’s minimum
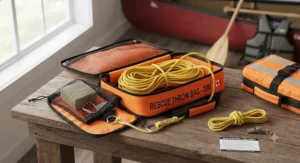
This one exists for a simple reason: Transport Canada requires every canoe and kayak to carry a buoyant heaving line, and the MEC One Buoyant Heaving Line is engineered to satisfy that rule without asking you to spend whitewater-rescue money.
The line meets the federal 15 m minimum length required under the Small Vessel Regulations, uses a floating, polypropylene-style cord, and comes packed into a simple bag designed to be grabbed and thrown rather than fine-tuned by a swiftwater instructor. There’s no reflective tape, no mesh drainage panel, and no oversized throwing collar — this is deliberately a no-frills product.
What most buyers overlook about compliance-grade lines like this one is that “meets the legal minimum” and “adequate for your actual paddling” aren’t always the same thing. For a flatwater canoe trip on a calm lake system, this line is genuinely sufficient. For anyone running moving water with current, eddies, or strainers, the shorter length and lighter rope leave less margin for error than the dedicated rescue bags built specifically for river conditions.
Because MEC sells this as a private-label safety essential rather than a specialty swiftwater product, verified third-party customer reviews are thinner than for established brands like NRS — what’s clear from available feedback is that buyers value it primarily as an inexpensive way to check the legal-requirement box, not as a whitewater tool. If you can’t verify a deep review history for a product like this, it’s more honest to say so than to invent sentiment that isn’t there.
Pros:
- ✅ Meets Transport Canada’s 15 m minimum length rule
- ✅ Genuinely inexpensive for the requirement it meets
- ✅ Simple, uncomplicated design with no learning curve
Cons:
- ❌ Not rated or marketed for whitewater-strength rescues
- ❌ Limited independent review data compared to NRS
Priced under C$40 in most cases, the MEC One Buoyant Heaving Line delivers straightforward value for lake trippers who need compliant gear, not competition-grade rescue equipment.
3. Salus Amigo Throw Bag — compact waist-tether made in Kitchener, Ontario
The standout feature is portability: this side-worn tether packs 15 m (50 ft) of paracord into a bag small enough to clip onto a PFD rather than store in a hatch.
Salus builds the Amigo with an extended bib that opens wide for quick restuffing after a throw, and includes a small light and whistle — two extras that push it toward being a mini safety gear kit for canoe tripping rather than just a rope in a sack. Because it’s paracord rather than dedicated rescue-grade polypropylene, the rope is lighter and easier to coil, but it also carries a lower strength rating than the thicker rescue ropes used on whitewater-specific bags.
Here’s what to weigh: this bag is designed to satisfy the legal carriage requirement for small craft while staying genuinely wearable, which matters if you’re the kind of paddler who forgets gear stashed in a dry bag exists. For a canoe tripper who wants something clipped to their body at all times rather than buried under a food barrel, that accessibility is a real safety advantage — even if the rope itself isn’t built for aggressive river rescues.
Being a Canadian-made product from a company built around Canadian paddlesport, the Amigo draws consistent praise in Canadian paddling circles for build quality and for supporting domestic manufacturing, though aggregated feedback also flags the paracord’s thinner diameter as a downgrade from dedicated throw-rope material if you paddle serious whitewater.
Pros:
- ✅ Clips directly to a PFD for constant accessibility
- ✅ Includes a whistle and light in the same kit
- ✅ Canadian-made in Kitchener, Ontario
Cons:
- ❌ Paracord rope is weaker than dedicated rescue rope
- ❌ Shorter reach than full-length whitewater throw bags
Expect to pay in the C$40–C$60 range, making the Salus Amigo Throw Bag a smart secondary or backup unit rather than your only line of defence on moving water.
4. North Water Micro Throw Line — best entry point for flatwater and beginner paddlers
The standout here is simplicity: this is the throw line reviewers point to when someone asks for the easiest, least intimidating rescue rope to start with.
Built with a smaller profile than the whitewater-oriented bags on this list, the Micro Throw Line trades maximum rope length and load rating for a package that’s easy to stuff, easy to store, and easy to actually use under pressure — which matters more than raw specs the first time you’re standing on a riverbank with an adrenaline spike. On paper this means less margin on big, pushy water, but for lake tripping, slow-moving rivers, and teaching new paddlers how a throw rescue even works, that trade-off makes sense.
What most first-time buyers overlook is that a shorter, lighter line is genuinely easier to throw accurately than a long, heavy one — accuracy matters more than reach in most real rescues, since most successful throws land within a few metres of the swimmer rather than at the rope’s full length. Reviewers and paddling guides consistently recommend this style of compact line specifically as a first throw bag, the one you practice with before graduating to heavier whitewater gear.
Because North Water’s lineup skews toward the sea kayaking and touring crowd rather than dedicated whitewater rescue, aggregated sentiment focuses more on packability and ease of use than on maximum rope strength — a fair trade for its intended audience of flatwater and light-moving-water paddlers.
Pros:
- ✅ Small, packable profile fits any canoe easily
- ✅ Easier to throw accurately for beginners
- ✅ Ideal training tool before upgrading to whitewater gear
Cons:
- ❌ Shorter rope limits reach on wider rivers
- ❌ Not intended for aggressive whitewater rescue work
At roughly C$40–C$55, the North Water Micro Throw Line is best treated as a starter bag or lake-tripping companion rather than a whitewater workhorse.
5. NRS Standard Rescue Throw Bag — mid-range whitewater workhorse
The standout feature is raw rope strength: at 862 kgf (1,900 lb) tensile rating, this bag punches well above its price point.
The Cordura shell houses 23 m (75 ft) of 9.5 mm (3/8″) polypropylene rope, noticeably thicker than the Compact model’s 6 mm line, which translates directly into a better grip when your hands are cold, wet, and shaking with adrenaline. A 5 cm mesh drainage panel speeds drying, and an elastic loop is sized to hold a glow stick for low-light rescues — a detail that matters more than it sounds, since a surprising number of capsizes happen at dusk when groups are racing to make camp.
Based on the spec comparison, this is the bag that actually matches what most Canadian canoe-tripping groups running moving water need: enough rope to reach across a wide channel, enough strength to trust with a fully loaded swimmer, and a shell tough enough to survive years of being wedged under a thwart. What most buyers overlook about the jump from the Compact to the Standard model is that the added thickness and length come with a real weight and bulk cost — worth it for river trips, less necessary for flatwater lake paddling alone.
Aggregated reviewer sentiment across outdoor retailers consistently highlights the rope’s grip and the bag’s durability as standout points, with the two-colour Cordura shell praised for holding up over multiple seasons of hard use. A recurring complaint is that the larger bag takes up more space than paddlers expect coming from a compact model.
Pros:
- ✅ 1,900 lb rope rating handles loaded swimmers confidently
- ✅ Thicker rope is easier to grip when wet
- ✅ Glow-stick loop adds real low-light safety value
Cons:
- ❌ Bulkier and heavier than compact-style bags
- ❌ Overkill for calm lake tripping alone
Priced around C$80–C$100, the NRS Standard Rescue Throw Bag earns its reputation as the default choice for serious river trippers.
6. Salus 80-Foot Throw Bag — long-range Canadian-made pick with a smarter throw
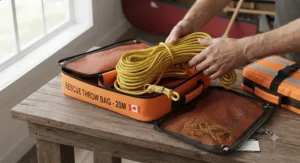
The standout feature is throw distance: at 24 m (80 ft), this bag’s wire-rimmed collar is specifically engineered so you can actually throw the full length rather than watching most of it land in a heap at your feet.
Salus, a Kitchener, Ontario manufacturer better known for PFDs, built this bag with a conical shape and a stiff flotation shell that keeps the collar open while you’re restuffing rope after a throw — a small design detail that solves one of the most common frustrations with long throw bags. Inside is polypropylene rope with a reinforced core for added strength, giving you both the buoyancy needed for visibility on the water and a strength boost over plain polypropylene alone.
Here’s what to weigh: an 80-foot bag only helps if you can actually throw 80 feet of rope, and plenty of long throw bags on the market bunch up mid-throw because the collar collapses as the rope pays out. On paper, the wire-rimmed collar addresses exactly that failure point, which is a meaningful practical improvement rather than a marketing flourish. For canoe trippers on wide northern rivers where a standard 70-ft bag might come up short, that extra reach can be the difference between a clean rescue and a second attempt.
As a smaller-production Canadian brand, the Salus 80-Foot Throw Bag doesn’t carry the review volume of the larger US whitewater brands, but the aggregated commentary from Canadian paddling retailers consistently praises the throwing mechanics and the domestic manufacturing story.
Pros:
- ✅ 24 m of reach for wide rivers and lakes
- ✅ Wire-rimmed collar improves real-world throw distance
- ✅ Reinforced rope core adds strength without excess weight
Cons:
- ❌ Smaller brand means fewer independent reviews available
- ❌ Premium reach costs more than shorter bags
At roughly C$90–C$120, the Salus 80-Foot Throw Bag rewards paddlers who value maximum reach and support Canadian-made gear.
7. NRS Pro Compact Rescue Throw Bag — professional-grade strength for guides and instructors
The standout feature is sheer rope strength: at 1,132 kgf (2,495 lb), the UltraLine rope inside this bag rates more than double the standard NRS Compact model.
Housed in a rugged Cordura shell rather than basic nylon, the Pro Compact packs 21 m (70 ft) of UltraLine Water Rescue Rope, secures to boats or PFDs with quick-release 2.5 cm (1″) straps, and adds reflective tape along the exterior for visibility in the low light that so often accompanies real rescue situations. The mesh drainage panel and barrel-lock drawstring carry over from the standard lineup, but the material upgrades throughout are aimed squarely at professional and semi-professional use.
Based on the spec comparison, this is the bag built for river guides, outdoor education instructors, and search-and-rescue-adjacent volunteers who need equipment rated well beyond a single-swimmer rescue — the kind of margin that matters when you’re responsible for a group rather than just yourself. For a recreational canoe tripper, the strength jump from the Standard model may be more than practically necessary, though the reflective tape and Cordura durability still add genuine value on multi-week trips.
Reviewers who work professionally in swiftwater rescue and guiding consistently cite the UltraLine rope’s strength-to-weight ratio as the standout reason to pay the premium over standard polypropylene throw bags, with the Cordura shell’s abrasion resistance mentioned repeatedly as a reason it survives seasons of hard commercial use.
Pros:
- ✅ 2,495 lb rope rating built for professional-level margin
- ✅ Reflective tape aids low-light and night rescues
- ✅ Cordura shell outlasts basic nylon after heavy use
Cons:
- ❌ Premium price for recreational-only paddlers
- ❌ More strength than most trip leaders will ever need
In the C$100–C$140 range, the NRS Pro Compact Rescue Throw Bag is the clear pick for guides, instructors, and anyone who wants professional-grade margin built in.
Top 7 Throw Bags Compared: Specs Side-by-Side
| Product | Weight | Rope Type | Rope Rating | Bag Material | Price Range (CAD) |
|---|---|---|---|---|---|
| NRS Compact Rescue Throw Bag | ~0.5 kg | 6 mm polypropylene | 431 kgf | Nylon | C$50–C$70 |
| MEC One Buoyant Heaving Line | Light | Polypropylene-style | TC minimum | Basic nylon | Under C$40 |
| Salus Amigo Throw Bag | Very light | Paracord | Light-duty | Nylon | C$40–C$60 |
| North Water Micro Throw Line | Light | Compact rescue line | Flatwater-rated | Nylon | C$40–C$55 |
| NRS Standard Rescue Throw Bag | ~0.7 kg | 9.5 mm polypropylene | 862 kgf | Cordura | C$80–C$100 |
| Salus 80-Foot Throw Bag | Moderate | Reinforced polypropylene | Reinforced core | Nylon shell | C$90–C$120 |
| NRS Pro Compact Rescue Throw Bag | ~0.6 kg | 6 mm UltraLine | 1,132 kgf | Cordura | C$100–C$140 |
Weight and rope rating move together up to a point — the NRS Pro Compact Rescue Throw Bag proves a strength jump doesn’t have to mean a big weight penalty, since UltraLine rope packs more strength per gram than standard polypropylene. Budget options like the MEC One Buoyant Heaving Line and Salus Amigo Throw Bag are lightest on both weight and price but also lightest on rope rating, which is the trade-off to understand before a trip on anything more than gentle current. For most Canadian canoe-tripping groups, the middle of this table — the NRS Standard Rescue Throw Bag or Salus 80-Foot Throw Bag — hits the sweet spot between strength, reach, and price.
Benefits of a Throw Bag vs Traditional Canoe Rescue Alternatives
Before throw bags became standard kit, paddlers relied on whatever was on hand — a spare paddle, a coil of camp rope, or simply swimming out to a capsized partner. None of those options were designed for the job, and it shows.
| Rescue Method | Reach | Rescuer Risk | Setup Time | Reliability |
|---|---|---|---|---|
| Dedicated throw bag | 15–24 m | Low — stays on shore | Seconds | High, purpose-built |
| Improvised camp rope | Variable, often short | High — sinks, tangles | Minutes | Low |
| Swimming/wading rescue | Limited to swimmer’s ability | Very high | Immediate | Risky, direct contact |
| Reach with paddle/branch | Very short | Low | Seconds | Only for close swimmers |
The table makes the hierarchy clear: reach and throw rescues put the rescuer at far less risk than wading or swimming out to a swimmer, which is exactly why swiftwater rescue basics training teaches “reach, throw, row, go” as an escalating order of preference rather than a menu of equal options. A dedicated throw bag also solves the biggest problem with improvised rope — ordinary rope sinks and tangles, while purpose-built rescue rope is engineered to float and stay visible. That single design difference is why Transport Canada and paddling associations treat a proper throw bag as a baseline requirement rather than a nice-to-have.
✨ Don’t Paddle Without Backup
🔍 A throw bag for canoe rescue only works if it’s within reach when you need it. Check current availability and pricing on the picks above before your next trip — a few minutes now beats a long swim later!
Price Range & Value Analysis: What You’re Actually Paying For
Throw bags span a wide price range, and that spread isn’t random — it tracks almost exactly with rope strength, bag material, and reach.
| Price Tier | Range (CAD) | What You Get | Example Picks |
|---|---|---|---|
| Budget | Under C$40–C$70 | Legal minimum length, lighter rope | MEC One, NRS Compact |
| Mid-range | C$40–C$100 | Better grip, moderate strength, extras | Salus Amigo, North Water Micro, NRS Standard |
| Premium | C$90–C$140 | Maximum strength, Cordura shells, reflective tape | Salus 80-Foot, NRS Pro Compact |
At the budget end, you’re mostly paying for the legally required minimum — enough rope to comply with Transport Canada’s rules, without the reinforced strength or drainage features found further up the range. The mid-range tier is where most recreational canoe trippers land, since bags like the NRS Standard Rescue Throw Bag add meaningful strength and grip for only a modest price jump. Premium bags earn their price through material upgrades — Cordura shells, reinforced rope cores — that matter most to guides, instructors, and anyone running consistently pushy water.

Practical Usage Guide: Setting Up, Practicing, and Maintaining Your Throw Bag
Buying the bag is the easy part. Here’s the setup and practice routine that actually makes a throw bag for canoe rescue useful in a real emergency.
First-use setup: Before your first trip, empty the bag completely and re-stuff it loosely — factory packing is often tighter than ideal for a clean deployment, and rope that’s been compressed in shipping needs a shakeout. Attach the bag to your canoe or PFD using the included strap or a locking carabiner, positioned somewhere you can grab it without digging through gear.
Practice schedule: Plan at least one practice throw per season, ideally on calm water before your first river trip, and again with a partner acting as the “swimmer” in gentle current if you have access to a safe practice spot. This kind of repetition is exactly what separates a confident canoe capsize response from a panicked scramble when it counts.
Common first-30-days mistakes: Coiling the rope back into the bag after practice instead of stuffing it loosely — coiled rope tangles and jams on the next throw. Storing the bag somewhere it can’t dry, which leads to mildew and rope degradation over a season.
Maintenance: Rinse the rope and bag with fresh water after any saltwater or muddy-river use, air dry fully before storage, and inspect the rope annually for fraying, UV damage, or stiffness — polypropylene rope that’s gone stiff and brittle has lost much of its rated strength even if it looks intact.
An optimization trick most listings won’t mention: mark the last metre of rope with a small strip of tape so you can feel by touch when you’re near the end of the throw, which prevents the dangerous mistake of running out of rope mid-throw.
Canoe Capsize Response: A Step-by-Step Framework From Flip to Shore
A canoe flips in current, and the paddlers are suddenly swimmers with seconds, not minutes, to make good decisions. Here’s the problem-to-solution sequence that a solid canoe capsize response actually follows.
- Stay upstream of the canoe and any gear — a swamped canoe pinned against a rock can trap a leg or body far more dangerously than the water itself.
- Get on your back, feet pointed downstream, and use them to fend off rocks — this is the standard defensive-swimming position taught in every swiftwater rescue basics course.
- Signal to shore-based paddlers immediately; a shouted “swimmer!” tells the throw-bag holder to get into position.
- If a throw bag lands within reach, grab the rope — never the bag itself — roll onto your back, and let the rescuer pendulum you to shore rather than trying to swim against current.
- Once on shore, address gear and the canoe only after every person is accounted for — equipment is replaceable.
If the swimmer misses the first throw, the rescuer should immediately re-stuff and re-throw rather than waiting, since most rescues take more than one attempt even with practiced throwers. If the current pulls the rescuer off balance, a belay position — passing the rope across the hips or over a shoulder — adds leverage far beyond what bare hands can hold, borrowed directly from climbing technique. If the canoe itself is pinned, resist the urge to free it immediately; a pinned, swamped canoe under heavy current load can generate forces strong enough to injure anyone working too close to it.
This is exactly the kind of practical value a throw bag for canoe rescue is built around — not just owning the gear, but knowing the sequence that turns a capsize from a crisis into a controlled recovery.
Real-World Scenarios: Matching a Throw Bag to Your Trip
If you’re a family paddling a calm interior lake system with kids in the boat, the priority is legal compliance and simplicity over raw rope strength — something like the MEC One Buoyant Heaving Line or Salus Amigo Throw Bag covers the requirement without adding gear you’ll never fully use, and the Amigo’s built-in whistle doubles as a general safety tool for young paddlers.
If you’re a weekend tripper running moving water on a well-travelled canoe route, a mid-range bag with real rope strength and grip matters more — the NRS Standard Rescue Throw Bag‘s thicker rope and higher tensile rating give genuine margin if a rescue actually involves pulling a loaded swimmer against current, and its glow-stick loop covers the dusk-arrival scenario that catches so many weekend groups off guard.
If you’re guiding or leading a multi-week northern river expedition with a group, the calculus shifts again: reach and rope strength across a wide channel become the priority, alongside a bag built to survive weeks of hard use. The Salus 80-Foot Throw Bag‘s extra reach or the NRS Pro Compact Rescue Throw Bag‘s professional-grade rope both make sense here, particularly for a trip leader responsible for a full group’s safety rather than just their own.
Budget, environment, and frequency of use all point in slightly different directions — which is exactly why this list spans seven products instead of recommending one “best” bag for everyone.
How to Choose a Throw Bag for Canoe Rescue
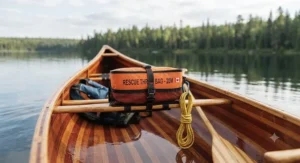
Choosing a throw bag for canoe rescue comes down to matching rope length, strength, and bag design to the water you actually paddle. Here’s how to work through it:
- Match rope length to your widest crossing. A 15 m line covers most narrow rivers, but wider channels or lakes need the extra reach of a 21–24 m bag — measure your typical worst-case distance, not your average one.
- Prioritize rope diameter for grip, not just strength. Thin 6 mm rope is light and easy to throw but harder to hold with cold, wet hands; 9.5 mm rope adds grip at the cost of some pack size.
- Check the tensile rating against your group size. A single lightweight swimmer needs far less rope strength than a rescue involving a loaded, waterlogged paddler — err toward higher ratings if you paddle with others.
- Confirm it meets Transport Canada’s minimum. Every throw bag on a Canadian canoe should meet or exceed the federal 15 m buoyant heaving line requirement, regardless of what else you choose.
- Consider drainage and drying features. A mesh panel isn’t a luxury — a rope that stays wet between trips degrades faster and grows mildew, shortening the life of your gear.
- Weigh Cordura vs. basic nylon for your use frequency. Occasional trippers can save money on a nylon bag; guides and frequent paddlers benefit from Cordura’s abrasion resistance over years of hard use.
- Buy the bag you’ll actually practice with. The best-rated rope on the market is only as good as your ability to throw it accurately under pressure, so factor in the size and weight you’re comfortable handling.
Rope Floating Rescue Rope and Bag Design: Features That Actually Matter (And Those That Don’t)
Not every feature printed on a throw bag’s packaging matters equally once you’re standing on a riverbank. Here’s an honest breakdown of what to prioritize.
The single feature that matters most across every bag on this list is rope floating rescue rope construction — and it’s less obvious than it sounds. Polypropylene rope floats naturally because it’s less dense than water, which is exactly why it dominates this category over materials like nylon, which absorbs water and sinks. Reinforced-core ropes push further, layering a stronger core inside a floating polypropylene sheath, which is how bags like the NRS Pro Compact Rescue Throw Bag reach far higher tensile ratings without sacrificing buoyancy.
Bright colour, by contrast, is a feature that genuinely matters for a different reason: visibility. A swimmer in whitewater, adrenaline spiking, needs to spot a rope instantly — which is why yellow and orange dominate this category rather than the muted tones common in outdoor gear generally.
What doesn’t matter nearly as much as marketing suggests: exact bag shape beyond basic function, since a conical collar helps mainly with longer bags, and extra pockets or attachment loops, which add convenience but not rescue effectiveness. Reflective tape is a genuine safety feature for low-light rescues, but it’s a “nice to have” upgrade rather than a dealbreaker for daytime lake tripping.
Common Mistakes When Buying a Throw Bag for Canoe Rescue
Buying based on price alone and stopping at the legal minimum, even for whitewater trips. The 15 m Transport Canada minimum exists as a floor, not a recommendation — plenty of moving-water rescues need more length and strength than a compliance-grade line provides.
Never taking the bag out of its packaging until the moment it’s needed. A throw bag straight from the shrink wrap is often packed tighter than ideal, and the first time you try to throw it shouldn’t be during an actual emergency.
Choosing rope diameter based on price rather than grip. Thinner rope is cheaper and lighter, but it’s also harder to hold onto with cold, wet, adrenaline-shaking hands — exactly the condition you’ll be in during a real rescue.
Ignoring bag material for the conditions you actually paddle. Basic nylon works fine for occasional lake trips, but frequent river use wears through nylon faster than Cordura, leading buyers to replace a “budget” bag sooner than a Cordura one that costs more upfront.
Storing the bag somewhere inaccessible “to keep it safe.” A throw bag buried under gear in a hatch is functionally useless in the ten seconds you actually have to react to a capsize — accessibility should outweigh tidiness every time.
Throw Bag vs Other Canoe Rescue Methods
A throw bag for canoe rescue isn’t the only rescue tool available, and understanding where it fits in the broader hierarchy actually changes how you use it. Swiftwater rescue training teaches a sequence often summarized as “reach, throw, row, go” — each step escalating in risk to the rescuer, and each one preferred over the next whenever possible.
Reach rescues — extending a paddle, branch, or arm to a nearby swimmer — carry the lowest risk but only work at very short range, typically within a couple of metres of shore. A throw bag extends that range dramatically, covering 15 to 24 metres depending on the model, while keeping the rescuer safely on shore rather than in the water. Rowing or paddling out to a swimmer with a canoe adds mobility but also risk, since a rescue boat can itself capsize or collide with the swimmer in current. Going in — swimming out to a contact rescue — is the last resort taught in every swiftwater rescue basics course, reserved for situations where reach and throw genuinely aren’t options, because it puts a second person directly into the hazard.
Compared with a rescue tube or improvised flotation, a throw bag has one major advantage: it lets the rescuer stay out of the water entirely while still delivering both flotation and a physical connection the swimmer can use to self-rescue toward shore. That combination — reach, buoyancy, and control — is exactly why throw bags remain the standard first response across Canadian paddling associations rather than a supplementary option.
Swiftwater Rescue Basics: What to Expect When the Rope Goes Taut
Understanding swiftwater rescue basics before you’re in a real situation changes what actually happens when the rope goes taut. Specs on paper — tensile strength, rope diameter — don’t fully prepare you for the physical force involved: a swimmer being pulled sideways across moving current generates far more load than their body weight alone, because the river itself is pushing against them the entire time.
What most first-time throwers don’t expect is the shock load the moment the rope catches. If you’re holding the rope in bare hands, that sudden tension can rip it right out of your grip — which is why proper technique borrows a “belay” position from climbing, passing the rope across the hips or over a shoulder and bracing your feet, rather than relying on hand strength alone. A second rescuer bracing the thrower’s PFD adds meaningful stability in stronger current.
Reviewers and instructors who actually run swiftwater rescue courses consistently emphasize one detail listings never mention: your first throw will very likely miss, even with a good bag and decent aim, because judging distance and current speed under pressure is a genuinely difficult skill. Plan to re-stuff and throw again immediately rather than treating a missed throw as a failure.
The other real-world detail specs don’t capture is angle. Throwing straight across current rarely works — the rope and swimmer both need to account for the river’s pull, aiming slightly upstream of where the swimmer actually is so the current carries the rope into reach rather than past them. This is exactly the kind of practical knowledge a proper swiftwater rescue basics course teaches that a product listing never will, and it’s part of why formal certification programs through Paddle Canada exist alongside the gear itself.
Safety Gear Kit for Canoe Tripping: Regulations and What Else to Pack
A throw bag for canoe rescue is one piece of a larger safety gear kit for canoe tripping, and Transport Canada’s Small Vessel Regulations spell out exactly what’s legally required alongside it. Every canoe must carry a personal flotation device or lifejacket of an appropriate size for each paddler, a buoyant heaving line of at least 15 m, a bailer or manual water-removal device, and a watertight flashlight if paddling after sunset, before sunrise, or in reduced visibility.
Beyond the legal minimum, a genuinely complete safety gear kit for canoe tripping should include a whistle for each paddler (often built into a PFD), a basic first-aid kit sized for the group and trip length, a repair kit for the canoe hull, and a means of communication appropriate to how remote the route is — a satellite communicator for backcountry rivers, at minimum a charged phone with offline maps for accessible day trips, following the general equipment breakdown Mustang Survival lays out for Canadian boaters. Rope for securing gear separately from your rescue throw bag matters too; using your only rescue line to lash down a food barrel is a common and entirely avoidable mistake.
Failing to carry required safety equipment isn’t just risky — it can result in fines if a vessel is inspected, on top of the far more serious consequences of being genuinely under-equipped during an actual emergency. Building a kit around the regulatory minimum and then adding trip-appropriate extras is the most honest way to think about a safety gear kit for canoe tripping, rather than chasing every product marketed as “essential.”
FAQ
❓ What is a throw bag for canoe rescue?
❓ How far can you throw a rescue throw bag?
❓ Is a throw bag legally required in a canoe in Canada?
❓ What rope is best for a canoe rescue throw bag?
❓ How often should you replace a throw bag rope?
Conclusion
Choosing the right throw bag for canoe rescue isn’t about finding the single “best” product — it’s about matching rope length, strength, and bag design to the water you actually paddle, then practicing with it until the motion is automatic. A family on a calm lake system and a group guide running a northern river expedition need genuinely different gear, and pretending otherwise does everyone a disservice.
Across the seven options here, a few patterns hold up: budget bags like the MEC One Buoyant Heaving Line and Salus Amigo Throw Bag cover the legal minimum honestly and affordably, mid-range picks like the NRS Standard Rescue Throw Bag and North Water Micro Throw Line suit the majority of weekend and lake-tripping paddlers, and premium options like the Salus 80-Foot Throw Bag and NRS Pro Compact Rescue Throw Bag earn their price through reach and rope strength that guides and frequent river runners genuinely use.
Whichever bag ends up in your canoe, the gear itself is only half the equation. Pair it with real swiftwater rescue basics practice, keep the rest of your safety gear kit for canoe tripping current with Transport Canada’s requirements, and make sure everyone in your group knows the throw-catch-pull sequence before you need it for real. That combination — the right equipment and the practiced skill to use it — is what actually keeps a capsize from becoming something worse.
Recommended for You
- Adult PFD vs Fishing PFD for Paddling: 7 Picks for 2026
- Kids PFD for Canoe Camping: 7 Trusted Picks for 2026
- Adult PFD for Canoeing: 7 Best Picks amp; Buying Guide 2026
Disclaimer: This article contains affiliate links. As an Amazon Associate, I earn from qualifying purchases. If you purchase products through these links, we may earn a small commission at no additional cost to you.
✨ Found this helpful? Share it with your friends! 💬🤗
