
In This Article
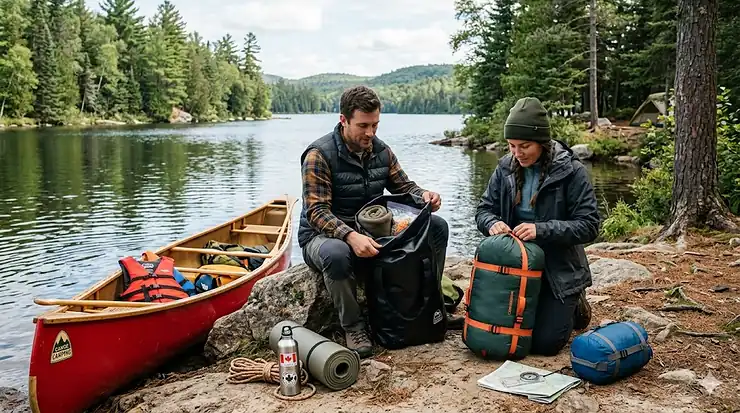
Picture this: you’re deep in Algonquin Park, halfway through a 400-metre portage, the footing is slick from last night’s rain, and you’ve just realised your gear is heavier than it needs to be — and bulkier than your canoe can comfortably hold. Every gram and every litre of wasted air inside your dry bags is working against you. That’s the moment most Canadian paddlers wish someone had walked them through the compression dry bag vs regular dry bag canoe camping debate before they headed into the backcountry.\
The short answer is that both types of dry bag will keep your gear dry. But choosing the wrong one for the wrong situation — especially in Canada, where portage-heavy routes like Killarney, Quetico, and the Nahanni demand smart packing — can mean the difference between a smooth, enjoyable trip and a physical slog that leaves your shoulders screaming by noon.
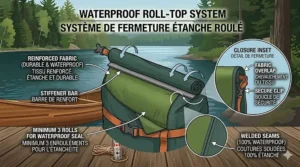
A compression dry bag is a roll-top waterproof sack fitted with external straps (and often an air-permeable base) that lets you squeeze out trapped air and cinch your gear down to its smallest possible shape. A regular (or standard) dry bag is a straightforward waterproof sack — roll-top or zip-top — designed primarily to protect contents from water, with no mechanism to compress volume. In portage-heavy Canadian wilderness paddling, this distinction matters enormously.
This guide breaks down exactly when to use a compression dry sack, how each type performs on a Canadian portage trail, which seven bags available on Amazon.ca are worth your hard-earned CAD, and how to build a dry bag system that actually saves your back — and your trip.
Quick Comparison Table: Compression vs Regular Dry Bags for Canoe Camping
| Feature | Compression Dry Bag | Regular Dry Bag |
|---|---|---|
| Waterproofing | ✅ Excellent (roll-top) | ✅ Excellent (roll-top or zip) |
| Volume Reduction | ✅ 30–50% smaller when packed | ❌ None |
| Weight | Slightly heavier (straps add weight) | Lighter |
| Portage Friendliness | ✅ Very high | Moderate |
| Pack Compatibility | ✅ High (fits into canoe packs) | Variable |
| Price Range (CAD) | $40–$140 CAD | $25–$220 CAD |
| Best For | Sleeping bags, insulation, clothing | Electronics, food, rigid items |
| Available on Amazon.ca | ✅ Yes | ✅ Yes |
The table tells part of the story, but here’s what it can’t show: on a trip with five or more portages per day — the norm on Canadian wilderness routes like Ontario’s Temagami or BC’s Bowron Lake Circuit — the cumulative benefit of compression bags is enormous. Stuffing a sleeping bag into a compression dry sack instead of a regular one can reclaim 3–5 litres (L) of canoe space and shave 15–20% of perceived pack bulk. For shorter, lake-focused trips with few carries, a quality regular roll-top bag is perfectly adequate and often more economical.
💬 Just one click — help others make better buying decisions too! 😊
✨ Don’t Miss These Exclusive Deals!
🔍 Take your canoe camping setup to the next level with these carefully selected dry bags. Click on any highlighted item to check current pricing and availability on Amazon.ca. These picks will help you keep your gear bone dry — from put-in to portage to campsite.
Top 7 Dry Bags for Canoe Camping in Canada: Expert Analysis
1. Sea to Summit Evac Compression Dry Bag (Standard, 13L / 20L / 29L)
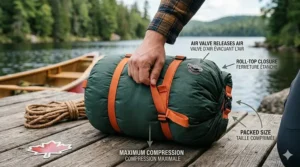
The Sea to Summit Evac Compression Dry Bag is the one bag I’d recommend to nearly every Canadian canoe camper as a starting point. What makes it genuinely clever is the eVent® air-permeable base: you pack in your sleeping bag or puffy jacket, roll the top down, and simply squeeze — air pushes out through the base while water physically cannot push back in. No purge valve to fail, no gimmicks. The 70D recycled nylon main body is bluesign® approved, which matters for environmentally conscious paddlers, and the four compression straps use a combination of ladderlock and side-release buckles that stay secure even when your pack is bouncing around on a rocky portage.
In practice, a 0°C sleeping bag that fills a 20L regular dry bag compresses into roughly 13L in this sack — that’s meaningful space recovery when you’re fitting two packs into a 17-foot Prospector. The hypalon roll-top closure is non-wicking, meaning even after your canoe capsizes in a cold Ontario spring freshet, you can trust your bag’s seal. The field-repair buckle is another clever touch: replaceable with a Phillips-head screwdriver in the field — no special tools needed.
Seasoned Canadian paddlers consistently rate this bag as their go-to for sleeping bag storage. A few note that at very low temperatures (below -15°C), the eVent base can stiffen slightly — fine for three-season paddling but worth knowing if you’re extending into late-autumn Algonquin trips.
✅ eVent® air-permeable base — no purge valve
✅ Four-strap compression system
✅ Bluesign® approved, recycled materials
❌ Slightly pricier than basic roll-top bags
❌ eVent base can stiffen in sub-zero temperatures
Price range: around $55–$85 CAD depending on size. Available on Amazon.ca; Prime-eligible in most provinces.
2. Sea to Summit Evac Compression Dry Bag UL (Ultralight, 3L / 8L / 13L)
If you’re the type of Canadian paddler who counts grams the way other people count calories, the Sea to Summit Evac Compression Dry Bag UL is the version for you. Built from a 30D Ultra-Sil Cordura® nylon — one of the lightest waterproof fabrics on the market — this bag weighs next to nothing while still delivering the same air-out/water-stays-out eVent® base technology as the standard Evac.
The practical implication: you get genuine volume compression for your insulation layers without adding meaningful weight to your portage load. This makes the UL version exceptional for solo trippers, ultralight canoe campers, and anyone doing technical routes through Quetico or Wabakimi where every gram matters over multiple days of back-to-back carries. The C0 non-PFC DWR finish means it sheds light rain without relying on environmentally problematic PFAS chemicals — a nice alignment with Leave No Trace principles that Parks Canada promotes on backcountry routes.
Where it gives ground to the standard Evac is durability. The 30D fabric is noticeably thinner, and Canadian paddlers who frequently bushwhack between portage trails or drag their packs over granite outcroppings have reported surface wear faster than the 70D version. For protected use inside a canoe pack? Excellent. As an exposed exterior bag on a raft frame? Go with something heavier.
✅ Ultralight 30D Cordura® construction
✅ Same eVent® technology as the standard Evac
✅ Perfect for solo, ultralight, or technical routes
❌ Lower abrasion resistance than standard version
❌ Smaller size range
Price range: around $45–$65 CAD. Available on Amazon.ca.
3. Sea to Summit Evac Compression Dry Bag HD (Heavy Duty, 8L / 14L / 20L)
Think of the Sea to Summit Evac Compression Dry Bag HD as the Evac built for people who are harder on gear than most. The main body is a 420D TPU-laminated ripstop nylon, and the eVent® base is a 500D Cordura® — this is the fabric weight you’d expect on serious paddling expedition gear. External lash points mean you can strap it to the deck of a canoe, the outside of a canoe pack, or a roof rack without worrying about the fabric tearing under load.
For Canadian paddlers heading into serious whitewater or planning extended expeditions (think a 10-day route on the Bloodvein River or paddling Manitoba’s remote north), this is the bag to trust. The TPU laminate is more abrasion- and puncture-resistant than standard PU coatings, which matters when your bag is dragged across granite portage landings or stuffed next to a tent stake. It still compresses via the same four-strap, valve-free system — just in a chassis built to outlast several seasons of hard use.
One thing most buyers overlook: the HD’s lash points make it genuinely useful as a day-access bag strapped to a thwart inside the canoe, keeping your rain layer, sunscreen, and snacks accessible without opening your main pack. Canadian reviewers praise its durability in cold, wet conditions — which is exactly what you’ll encounter on any spring paddle in the Shield country.
✅ 420D TPU ripstop body — highly abrasion-resistant
✅ External lash points for canoe deck attachment
✅ Built for expedition-level use
❌ Heavier than standard or UL versions
❌ Premium price point
Price range: around $70–$105 CAD. Available on Amazon.ca.
4. NRS Bill’s Bag Dry Bag (65L / 110L)
The NRS Bill’s Bag Dry Bag is something of a legend in canoe tripping circles, and for good reason — it’s been trusted by guides and outfitters since 1977. The body is a heavy-duty 21-oz PVC TobaTex material, with a reinforced 34-oz bottom: this is the bag you bring when you need near-indestructible waterproofing for a full canoe load of camping gear. The roll-top StormStrip closure and four compression straps with aluminium fasteners mean nothing rattles loose or fails mid-portage — a real concern when cheaper plastic buckles crack in cold Canadian temperatures below -5°C.
What sets the Bill’s Bag apart from most compression alternatives is raw capacity: the 65L expands to over 3,900 cubic inches (about 63,900 cubic centimetres), and the 110L holds essentially your entire shelter-and-sleep system. Compression straps cinch it down for a more manageable carry on portage. A removable adjustable backpack harness makes it actually portable — though I’ll be honest, it’s not as comfortable as a purpose-built canoe pack with a hip belt for carries beyond 500 metres (550 yards).
What most buyers overlook is that this bag is PVC, not PVC-free — an important environmental consideration for some paddlers, and one that affects flexibility in extreme cold. That said, at the price point and durability level, it remains one of the best-value bags for lodge-style or family canoe camping on Canadian lakes where portages are shorter and durability over many seasons is the priority.
✅ Legendary durability — 21-oz PVC TobaTex
✅ Aluminium fasteners won’t fail in the cold
✅ Huge capacity with cinchable compression
❌ PVC construction (not environmentally preferred)
❌ Backpack harness less comfortable on long portages
Price range: around $115–$175 CAD. Available on Amazon.ca; check availability for your province as some larger/heavier items ship selectively.
5. SealLine Discovery Dry Bag (5L / 10L / 20L / 30L)
If you want a no-frills, reliable roll-top dry bag made in the USA that won’t disappoint on Canadian rivers, the SealLine Discovery Dry Bag is an excellent anchor for a modular dry bag system. SealLine’s patented double-banded roll-top closure is noticeably more secure than single-banded alternatives — it’s one of the only standard roll-tops that kept gear completely dry in extended submersion testing by independent outdoor review organisations.
The Discovery is not a compression bag, which is worth stating plainly: it won’t reduce the volume of your sleeping bag. But what it does brilliantly is serve as a workhorse bag for items that don’t compress — food, cookware, first aid kits, maps in a drybag, and electronics. The welded seams and heavy-duty TPU laminate construction also make this a bag you can expect to last 5–10 seasons with reasonable care.
For Canadian paddlers building a mixed dry bag system, I’d recommend pairing one or two SealLine Discoverys for rigid/non-compressible gear alongside a Sea to Summit Evac for your sleep system. The Discovery also comes in a “View” semi-transparent version — handy for quickly identifying contents without dumping everything on the portage trail.
✅ Patented double-banded roll-top closure
✅ Made in the USA; welded seams
✅ Excellent value across multiple sizes
❌ No compression function
❌ No handles or lash points on standard model
Price range: around $35–$75 CAD. Available on Amazon.ca.
6. Ortlieb Dry Bag PS10 (1.5L to 22L)
The Ortlieb Dry Bag PS10 takes a slightly different approach to waterproofing: welded seams and a simple roll-top closure on lightweight, heat-bonded PVC-free nylon. Ortlieb is a German brand with a fanatical following among cycle tourers and kayakers, and their dry bag quality is consistently excellent. The PS10 is their entry-level paddling dry bag — lighter and less indestructible than their PS490 range, but more than adequate for canoe use.
What makes the PS10 stand out in the compression dry bag vs regular dry bag canoe camping debate is its exceptional size range (1.5L to 22L), which means you can use it to modularise gear across your canoe pack in very precise increments. Canadian reviewers particularly appreciate the robust zipper-pull tabs — they’re easy to grip with gloves on, which matters on a cold October morning on a Quebec lake. The bag packs almost flat when empty, adding essentially nothing to your carry weight.
One honest note: the PS10 is not a compression bag and offers no volume reduction. For a sleeping bag, you’ll want a Sea to Summit Evac or similar. Where the PS10 shines is as a waterproof organiser for smaller items — socks, toiletries, a spare headlamp — where its sub-$50 CAD price point makes building a complete multi-bag system affordable.
✅ PVC-free, welded construction
✅ Huge size range for modular packing
✅ Easy-grip tabs work with gloves
❌ No compression capability
❌ Less durable than PS490 series in rough use
Price range: around $30–$55 CAD. Available on Amazon.ca.
7. Exped Fold Drybag BS (4L to 40L)
The Exped Fold Drybag BS (Broadside) is a smart pick for canoe campers who want a budget-friendly, reliable regular dry bag with versatile sizing. Exped is a Swiss outdoor brand well-regarded for sleeping gear and packs, and their dry bag range reflects that same careful design sensibility. The broadside opening makes packing and retrieving gear easier than narrow-mouth alternatives — a small thing, but welcome at the end of a long portage day.
The Fold Drybag is built from a lightweight thermoplastic material with welded seams and a roll-top closure. It’s not as heavy-duty as the NRS Bill’s Bag or as technically sophisticated as the Sea to Summit Evac line, but at its price point it’s hard to fault. For Canadian paddlers who are just starting out, heading on shorter two- to three-day routes, or building a mixed-gear dry bag setup, the Exped Fold Drybag offers excellent entry-level protection.
What most beginners overlook is the importance of the broadside (horizontal) roll-top design: it allows the bag to be packed horizontally inside a canoe pack, conforming to the shape of the load rather than creating awkward pressure points. Experienced canoe trippers often use Exped Fold Drybags for clothing organisation within a larger NRS Bill’s Bag — a “bag within a bag” system that keeps socks away from food and a change of clothes instantly accessible.
✅ Budget-friendly across a wide size range
✅ Broadside opening for easier access
✅ Lightweight thermoplastic welded seams
❌ No compression function
❌ Less durable than premium options in sustained hard use
Price range: around $25–$55 CAD. Available on Amazon.ca.
✨ Don’t Miss These Exclusive Deals!
🔍 Ready to upgrade your canoe camping kit? Click any highlighted product above to check live pricing and Prime availability on Amazon.ca. Whether you’re heading into Algonquin, Killarney, or the Yukon backcountry, the right dry bag makes every portage less painful — and every campsite arrival a little more satisfying.
How to Use a Compression Dry Sack for Canoe Portage: A Practical Guide
Getting the most out of your compression dry bag isn’t as intuitive as it might seem, and most paddlers leave significant volume (and back pain) on the table because they haven’t learned the technique. Here’s how to use a compression dry sack correctly on a Canadian canoe portage.
Step 1 — Pack it right. Loose, fluffy items compress best: sleeping bags, down or synthetic insulated jackets, fleece layers, and lightweight pants. Do not try to compress rigid or semi-rigid gear (cook pots, bear canisters, water filters) — you’ll damage the bag and achieve nothing.
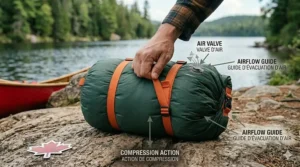
Step 2 — Fill, then sit on it. Once your sleeping bag is inside, roll the top down three times and seal the buckle. Then set the bag on the ground and literally sit on it (or press firmly with your hands) to push air out through the eVent® base. This is the technique Sea to Summit themselves recommend, and it genuinely removes 30–50% more air than just squeezing.
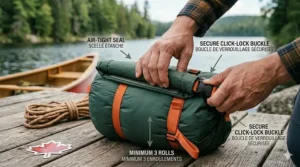
Step 3 — Cinch the straps evenly. Pull the four compression straps in sequence — two sides, then top and bottom — rather than cranking one strap fully before moving to the next. Even tension prevents the bag from distorting and keeps the roll-top closure’s seal integrity intact.
Step 4 — Pack it last, place it strategically. In the canoe, compression bags go toward the centre of the hull for trim balance. On portage, they’re ideal as the last item packed into a canoe pack because their compressed, oval shape fills gaps rather than creating them.
Canadian climate tip: In temperatures below 5°C, down sleeping bags fluff back up more slowly when cold. Pack your down bag into the compression sack while it’s still warm from the night — inside the tent, before you start breaking camp. Cold down that hasn’t fully lofted is harder to compress and takes more effort. A synthetic sleeping bag (recommended for wet Canadian spring conditions) compresses reliably at any temperature.
A common mistake: over-compressing a down sleeping bag every night for a 10-day trip. Down clusters can be damaged by sustained extreme compression. Use the bag’s compression feature for portaging and pack-loading, then store it loosely at camp. For detailed guidance on Canadian backcountry canoeing routes where portage planning matters most, Parks Canada’s paddling resource is an excellent starting point.
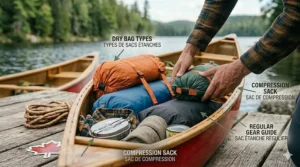
Canadian Paddler Profiles: Which Dry Bag Fits Your Trip?
The compression dry bag vs regular dry bag canoe camping decision isn’t one-size-fits-all. Here are three real-world Canadian scenarios to help you identify your situation.
Profile 1: The Algonquin Weekend Warrior (Ontario) Meera and her partner do three-day trips out of Canoe Lake most summers — two to three portages per route, mostly under 500 metres, with canoe rental from a local outfitter. They pack a 4-season sleeping bag each and dress in layers. Best setup: One Sea to Summit Evac Compression Dry Bag (20L) per person for sleep systems, two SealLine Discovery Dry Bags (20L each) for food and clothing. Total dry bag investment: around $200–$250 CAD. They don’t need the HD version — their portages are short and the bags live inside canoe packs.
Profile 2: The Quetico Expedition Paddler (Northern Ontario) Dani is planning a 12-day self-guided route through Quetico Provincial Park with 8–12 portages per day averaging 600–900 metres each. Every gram counts, and the bags need to withstand portage trail abuse daily. Best setup: Sea to Summit Evac Compression Dry Bag UL (13L) for sleeping bag, Sea to Summit Evac Compression Dry Bag HD (14L) for layering system (lashed to outside of pack for rain-layer access), and SealLine Discovery Dry Bags for food and gear. Total investment: around $180–$260 CAD. The weight savings and volume reduction over 12 days of heavy portaging justify the premium.
Profile 3: The Family Canoe Camper (BC Bowron Lake Circuit) The Nguyen family of four is doing the 116 km Bowron Lake Canoe Circuit in British Columbia — a structured circuit that requires advance permits and has specific campsite rules. They’re paddling a freighter canoe and prioritise durability over weight. Best setup: Two NRS Bill’s Bags (110L) as the main cargo bags, plus Exped Fold Drybags (8–10L each) for individual clothing organisation. The Bill’s Bags can take a beating, the Exped bags keep everything sorted, and the family isn’t doing the kind of daily high-mileage portaging that demands compression.
Roll Top vs Compression Dry Bag: What the Spec Sheet Won’t Tell You
Most online comparisons between roll top vs compression dry bag options focus on weight and waterproofing ratings. What they don’t tell you is how the two designs feel after a full day of portaging in Canadian conditions.
A standard roll-top dry bag seals beautifully and protects gear reliably. But when your sleeping bag is inside one, it expands to the bag’s full rated volume — and that volume is typically 20–35% air, not sleeping bag. That air becomes a problem when you’re trying to close the buckle on your canoe pack, when you’re loading a 16-foot Kevlar canoe with two weeks of food, or when you’re triple-portaging and want to reduce the number of carries from three to two.
A compression dry bag — specifically those using the eVent® air-permeable base — eliminates that trapped air permanently until you re-open the bag. The sleeping bag doesn’t “re-inflate” inside the compression sack the way it slowly does when packed in a standard stuff sack. This is because the eVent® base is one-directional at the micro level: air can be mechanically pushed out, but ambient air pressure alone cannot push back in through the membrane at meaningful rates during normal use.
What this means on the portage trail: your 20L sleeping bag compresses to roughly 12–13L, which might not sound dramatic — but combined with a compressed 8L insulation layer and a compressed 6L clothing bag, you’ve reclaimed nearly 15L of space from your pack. That’s enough space to re-sort your gear and potentially reduce a triple carry to a double. On routes like Algonquin’s classic Canoe Lake to Opeongo route, or the multi-portage circuits through Northern Ontario’s wilderness parks, that efficiency adds up dramatically.
The spec sheet also won’t tell you that compression straps — when properly cinched — stabilise the shape of the bag against your back, reducing the swaying, shifting, and off-centre loading that makes pack carrying unnecessarily tiring. A well-packed compression dry bag sits closer to the spine and stays there. A bloated regular dry bag moves.
How to Choose the Right Dry Bag for Canoe Camping in Canada
- Count your portages. If your planned route has five or more portages per day, compression bags for sleeping gear and insulation are not optional — they’re practical necessity. If you’re doing flatwater touring with one or two short carries, a standard roll-top will serve you fine.
- Assess your sleep system. Down sleeping bags compress dramatically (40–50%) in a compression sack. Synthetic bags compress less efficiently (20–30%). Either way, the savings are meaningful. A 0°C down bag in a standard roll-top bag might take 25L; in a compression sack, it drops to 13–15L.
- Match fabric weight to use. 30D UL fabric for gear that lives inside a canoe pack. 70D standard for bags that get handled frequently on portages. 420D HD or 21-oz PVC for bags that get dragged, dropped, and generally abused daily.
- Consider Canadian cold. PVC and basic TPU bags can stiffen noticeably below -5°C, making roll-tops harder to seal and compression straps harder to cinch. If you’re paddling into October or November in Northern Ontario, Manitoba, or the Yukon, prioritise bags rated for cold-weather use. The Sea to Summit Evac line’s eVent® base performs well in three-season Canadian conditions.
- Think about the roll-top vs compression dry bag question per gear category. Your answer should be: compression for sleeping bag, insulation, and clothing. Standard roll-top for food, cookware, electronics, and items that don’t compress meaningfully.
- Budget in CAD. A functional two-bag compression dry bag setup (sleep system + clothing) plus two standard roll-tops for food and gear can be assembled from Amazon.ca for around $120–$200 CAD — well within reach for most paddlers and far cheaper than the gear it protects.
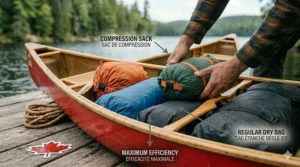
Pack Weight Reduction: The Portage Math Every Canadian Paddler Needs to Know
Here’s something nobody calculates until they’re standing at the start of a 900-metre portage with 35 kg (77 lbs) of gear: air weighs next to nothing, but the space it occupies weighs on your schedule and energy just as much as actual gear does.
The equation is simple. A canoe pack typically holds 65–80L. If your sleeping bag, insulation layer, and clothing bag collectively consume 55L in standard dry bags but only 38L in compression sacks, you have 17L of reclaimed space. That’s enough to re-sort your kit and drop from two canoe packs to one — eliminating an entire carry on each portage.
On a route with 20 portages (typical for a five-day Quetico trip), that’s 20 fewer carries. At an average portage length of 700 metres (about 2,300 feet), that’s 14 additional kilometres (roughly 8.5 miles) not walked with a pack on your back. This is why experienced Canadian trippers obsess over pack weight reduction and compression dry sacks in a way that can seem excessive to newcomers — but is completely rational once the math lands.
The investment in good compression dry bags pays for itself in energy saved, not just gear protected. Transport Canada’s Safe Boating Guide doesn’t cover dry bag selection, but canoe trip safety absolutely includes not exhausting yourself on portages before reaching open water.
Common Mistakes When Buying a Dry Bag for Portaging in Canada
Mistake 1: Buying one large bag instead of several smaller ones. A single 50L regular dry bag seems efficient but creates a logistical nightmare — you have to unpack everything to find the item at the bottom. A modular system of three to five bags in different sizes (and ideally different colours) lets you identify contents instantly. Canadian paddlers have been doing this since the birchbark canoe era, and it still holds.
Mistake 2: Ignoring waterhead ratings. A bag rated at 5,000mm waterhead will leak under sustained submersion (like a canoe capsize). In cold Canadian lakes where a capsize means fighting hypothermia, not just wet gear, you want a minimum of 10,000mm waterhead on any bag storing critical items. The Sea to Summit Evac line hits 10,000mm; cheaper alternatives often don’t disclose their rating at all, which tells you something.
Mistake 3: Choosing compression bags for the wrong items. Compression does nothing useful for a cast iron pan, a water filter, or a hard-sided food container. You’ll damage the bag trying and achieve zero volume savings. Reserve compression sacks for soft, compressible items only.
Mistake 4: Assuming all Amazon.ca listings are actually in Canada. Some dry bag listings are fulfilled from US warehouses, adding customs fees, longer delivery timelines, and potential warranty complications. Look for “Ships from Canada” and “Sold by” a Canadian seller or Amazon.ca directly. Cross-border warranty issues are a real headache — a broken compression strap buckle on a bag under warranty is only convenient if that warranty is honoured in Canada.
Mistake 5: Buying based on volume alone. A 20L compression dry bag from Sea to Summit and a 20L roll-top from a no-name brand are not the same product. The former has a tested closure, proven materials, and a trackable waterproofing standard. The latter may fail on your first rain-heavy portage.
Portage Gear Organisation: Building Your Dry Bag System
The ideal dry bag system for a Canadian canoe trip isn’t one bag type — it’s a curated mix. Here’s a framework used by experienced trippers:
- Sleeping bag: Compression dry bag (Sea to Summit Evac 13L or 20L)
- Insulation layers / puffy: Compression dry bag (Evac UL 8L or standard 13L)
- Clothing: Compression dry bag or standard roll-top (13–20L), one per person
- Food: Standard roll-top dry bag, large (20–30L) — food doesn’t compress
- Electronics / maps / first aid: Small standard roll-tops (5–10L), ideally waterproof-rated; the SealLine Discovery View’s semi-transparent body helps you find things quickly
- Main cargo / overflow: NRS Bill’s Bag (65L or 110L) as an outer shell for entire sleeping system, with compression sacks inside
Colour-coding this system saves enormous time at camp and on portage: blue for sleep, red for first aid, yellow for food, green for clothing. It sounds like overthinking until you’re setting up camp in a Canadian downpour at 8 PM and need to find your rain pants in three seconds.
When to Use a Compression Dry Sack vs a Standard Bag
| Scenario | Use Compression | Use Standard Roll-Top |
|---|---|---|
| Route with 5+ portages/day | ✅ Yes | ❌ No |
| Flatwater touring, 1–2 carries | ❌ Unnecessary | ✅ Yes |
| Sleeping bag or puffy jacket storage | ✅ Always | ❌ Inefficient |
| Food and cookware storage | ❌ Ineffective | ✅ Always |
| Electronics and first aid | ❌ Not suitable | ✅ Yes |
| Multi-week expedition | ✅ Yes | ✅ Both |
| Beginner paddlers, budget build | Partial (1 compression) | ✅ Rest of system |
The decision framework is simple: anything soft and fluffy benefits from compression. Anything rigid, liquid, or fragile stays in a standard roll-top. The compression dry bag vs regular dry bag canoe camping question isn’t binary — the best Canadian canoe trippers use both, and use them deliberately.
❓ Frequently Asked Questions
❓ When should I use a compression dry sack on a canoe trip?
❓ Are compression dry bags available on Amazon.ca with Prime shipping?
❓ What's the difference between a roll top vs compression dry bag for portaging?
❓ Can I use compression dry bags in cold Canadian weather?
❓ How do I build an affordable dry bag system for canoe camping in Canada?
Conclusion: Choose Your Dry Bag Like a Canadian Tripper
The compression dry bag vs regular dry bag canoe camping debate has a clear answer once you know your route: compression for soft gear on portage-heavy trips, standard roll-tops for everything rigid, and a mixed system for most real-world Canadian canoe camping scenarios.
Canada’s backcountry paddling heritage — from the voyageur routes of Ontario to BC’s coastal circuit — has always demanded smart packing. The modern compression dry bag is simply the current best answer to a centuries-old problem: how do you carry enough gear, keep it dry, and still make it to the next lake before dark?
If you’re starting out, invest in one quality compression dry bag for your sleeping system and a pair of reliable roll-tops for food and gear. As your routes get longer and your portages more demanding, expand your system deliberately. The seven bags reviewed here — all available on Amazon.ca in the appropriate price ranges — represent the best the market currently offers for Canadian paddlers in 2026.
Your shoulders will thank you on that fourth portage of the day.
✨ Don’t Miss These Exclusive Deals!
🔍 Check current pricing and Prime availability on Amazon.ca for all seven bags reviewed in this guide. Prices are subject to change — always verify at checkout. Gear up right, pack smart, and enjoy every paddle-stroke.
Recommended for You
- Best Compression Dry Bag for Sleeping Bag: 7 Top Picks for Canada 2026
- 7 Best 60L Dry Bags for Canoe Camping in Canada (2026)
- 7 Best Dry Bags for a Multi-Day Kayak Trip in Canada (2026)
Disclaimer: This article contains affiliate links. As an Amazon Associate, I earn from qualifying purchases. If you purchase products through these links, we may earn a small commission at no additional cost to you.
✨ Found this helpful? Share it with your friends! 💬🤗
