In This Article
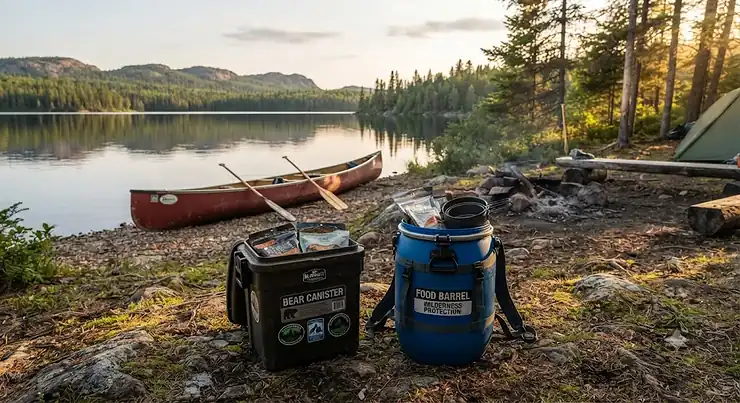
Somewhere around your third portage, soaked to the collarbone and squinting at a map that insists the next lake is “just over there,” you’ll ask yourself the question every canoe tripper eventually asks: bear canister vs food barrel canoe camping — which one is actually going in the boat? It’s not a trivial choice. Bear canister vs food barrel canoe camping decisions shape how you pack, how you sleep, and whether a curious 300-pound visitor turns your week into a story worth telling or a trip worth forgetting. A bear canister is a rigid, IGBC-certified container engineered specifically to defeat a bear’s claws, teeth, and patience, while a food barrel is a waterproof plastic drum built for portaging and dry storage — tough on rain, but not certified against bears. Understanding that distinction, before you’re standing in an outfitter aisle in Huntsville or Nolalu, saves you money, weight, and a genuinely bad night.
This guide leans on real product specifications, aggregated review sentiment from actual paddlers, and Ontario and national park guidance — not marketing copy. We’ve pulled together seven real, purchasable options spanning budget, mid-range, and premium tiers, compared them head-to-head, and built out practical guides for setup, packing, and picking the right system for your specific route. Whether you’re heading into Algonquin, Killarney, Quetico, or the Georgian Bay coastline, the goal here is the same: keep your food (and the local bear population) exactly where they belong.
Quick Comparison Table: bear proof food storage canoe trip Options at a Glance
| Container | IGBC Bear-Certified? | Waterproof? | Approx. Weight | Best For |
| BearVault BV500 Journey | Yes | No (splash-resistant only) | 1.16 kg | Week-long solo or duo trips |
| Counter Assault Bear Keg | Yes | No | 1.65 kg | Grizzly-adjacent or high-bear-density routes |
| RBW 60L Barrel | No | Yes | 3.6 kg | Group trips, gear-heavy expeditions |
| Ursack Major | Yes (soft-sided) | Water-resistant | 0.25 kg | Ultralight solo trippers |
Looking at this table, the split becomes obvious fast: certified bear resistance and true waterproofing almost never live in the same container. A canister like the BV500 will frustrate a black bear for the better part of an hour, but it won’t survive a capsize with your sleeping bag inside it the way a barrel will. For bear proof food storage canoe trip planning, the real decision usually comes down to which risk worries you more on your specific route — a hungry bear, or a swamped canoe.
💬 Just one click — help others make better buying decisions too!😊
💬 Already planning your route? Save this comparison and share it with your paddling group before the trip — one click helps every canoe camper make a smarter call.
Top 7 Bear Canisters and Food Barrels for Canoe Camping: Expert Analysis
1. BearVault BV500 Journey — best all-around bear canister for week-long trips
The BV500 Journey has become something close to the default choice for backcountry trippers, and there’s a practical reason for that beyond brand recognition. Its 700-cubic-inch (11.5 L) capacity holds five to seven days of food for one person, and the clear polycarbonate walls mean you’re not fishing blind for a granola bar at 6 a.m. The tool-free, twist-and-press lid opens with bare hands, which matters more than it sounds like it should when your fingers are cold and stiff from a dawn paddle. Based on the spec comparison against smaller BearVault models, the BV500 trades a bit of packability for genuinely useful capacity — worth it for anyone doing five-plus days without a resupply. Reviewers consistently report that the flat lid doubles as a passable camp stool, and that the smooth, rounded shell gives a bear nothing to grip, bite, or lever open. The main complaint in aggregated feedback is the awkward, wide 11.5 L footprint, which doesn’t lie flat in narrower packs or barrel openings — something to check before you buy if you’re hoping to nest it inside a barrel for water protection.
Pros:
- ✅ IGBC-certified and accepted in nearly every Canadian and U.S. park
- ✅ Tool-free opening works with cold, wet hands
- ✅ Clear walls make meal planning fast and simple
Cons:
- ❌ Not waterproof — needs a dry bag liner in a canoe
- ❌ Bulky 11.5 L shape doesn’t fit sideways in smaller packs
Expect to pay in the C$150-190 range at the time of research; check current price before buying, since availability shifts seasonally. For solo or two-person trips over five days, this is one of the strongest value propositions in the certified-canister category.
2. BearVault BV450 Jaunt — lightest certified canister for weekend trips
Where the BV500 is built for the long haul, the BV450 Jaunt is BearVault’s answer to the weekend warrior. At 440 cubic inches (7.2 L) and just over two pounds, it comfortably holds two to three days of food and, with careful packing, can stretch to four. What most buyers overlook about this model is that its smaller diameter actually makes it easier to wedge into odd corners of a canoe pack or lash externally with straps — a real advantage on portage-heavy routes where every awkward bulge costs you balance. The same tool-free lid system from the BV500 carries over here, though reviewers note it demands a bit more finger strength in cold, damp conditions than the larger model’s wider opening. Aggregated review sentiment across outdoor retailers is overwhelmingly positive on durability, with multiple seasons of hard use reported without cracking or warping. On paper, this canister is really a numbers game: less capacity buys you less weight and better packability, which is exactly the trade a weekend tripper wants.
Pros:
- ✅ Compact size fits into more pack shapes and boat nooks
- ✅ Proven multi-season durability in real-world reports
- ✅ Doubles as a stable camp stool or side table
Cons:
- ❌ Tight capacity for trips beyond three to four days
- ❌ Cold-weather grip needed to twist the lid open
Priced around C$110-140 at press time, prices may vary by retailer, so check current price. This is the canister to reach for on short shoulder-season trips into Killarney or the Massasauga where every gram in the barrel harness matters.
3. Counter Assault Bear Keg — toughest option for serious grizzly country
If the BV500 is the everyday commuter, the Bear Keg is the armoured truck. At roughly 716 cubic inches (11.7 L) and about 1.65 kg, it’s noticeably heavier than the BearVault line, and that weight is the whole point. The opaque, bright-yellow polymer shell removes visual curiosity from the equation entirely — a bear can’t see food it can’t see, full stop — and the coin-or-screwdriver locking lid adds a mechanical step that’s tripped up even persistent, “professional” problem bears in reported encounters. Here’s what to weigh: this canister is genuinely built for grizzly-adjacent terrain and heavily human-habituated black bear zones, the kind of route where a Counter Assault Bear Keg or bear spray from the same manufacturer earns its keep. Reviewers consistently praise its bombproof feel and near-total peace of mind, while the recurring critique is exactly what you’d expect — it’s heavy, it’s bulky, and the coin-lock system is genuinely inconvenient if you’ve misplaced your multi-tool.
Pros:
- ✅ Opaque shell removes visual bear curiosity entirely
- ✅ Widely trusted in high-bear-density and grizzly-adjacent zones
- ✅ Nearly indestructible polymer shell in field reports
Cons:
- ❌ Heaviest canister in this lineup by a meaningful margin
- ❌ Requires a coin or screwdriver — no tool-free opening
Expect a price somewhere in the C$180-220 range, prices fluctuate so always check current price before ordering. This is the canister for the Georgian Bay coastline routes with a known history of nuisance bears and thin tree cover for hanging.
4. UDAP No-Fed-Bear — budget-friendly IGBC-certified pick
Not every trip needs the heaviest, most expensive option in the lineup, and that’s exactly the niche the UDAP No-Fed-Bear fills. It’s IGBC-approved — meaning it has cleared the same 60-minute captive-bear testing standard as the pricier models — while landing at a noticeably lower price point. Based on the spec comparison, you’re trading some refinement (a slightly clunkier coin-lock lid, a plainer shell finish) for the core function that actually matters: certified bear resistance. Reviewers consistently note that the straightforward, no-frills design holds up fine over repeated trips, and that it’s a smart way to outfit a family or group without buying four premium canisters at full price. What most buyers overlook here is that “budget” in this category still means genuinely tested and approved — it’s not a compromise on safety, just on convenience features.
Pros:
- ✅ IGBC-certified at a noticeably lower price point
- ✅ Straightforward design with proven field durability
- ✅ Smart option for outfitting multiple family members
Cons:
- ❌ Coin-lock lid is less convenient than tool-free designs
- ❌ Smaller capacity than premium canisters in this class
Look for it in the C$90-120 range at the time of research; as always, check current price since retailer stock varies. It’s the pragmatic choice for occasional canoe campers who want real certification without the premium price tag.
5. Ursack Major — lightest soft-sided alternative for ounce-counters
The Ursack Major throws out the entire hard-sided-canister concept and replaces it with a bag woven from Spectra, a fabric with a strength-to-weight ratio that borders on absurd. At roughly 250 grams for a 15 L capacity, it’s a fraction of the weight of anything else on this list — which is exactly why ounce-counting canoe trippers keep bringing it up. Rather than sitting loose at camp, it’s tied with a specific double-overhand knot to a tree or heavy anchor point away from your tent. Reviewers consistently note it holds up against determined chewing and clawing, though a bear that commits to the attempt can still crush the contents inside, so a rigid liner or Opsak is a smart pairing. Honest caveat worth stating plainly: the Ursack is not accepted everywhere a hard-sided canister is required, and several parks (particularly in the western U.S.) still mandate rigid canisters regardless of Ursack certification — always check local rules before relying on it exclusively.
Pros:
- ✅ Dramatically lighter than any hard-sided canister here
- ✅ Packs down to almost nothing when empty
- ✅ IGBC-approved for black bear resistance
Cons:
- ❌ Contents can be crushed even when the bag itself resists
- ❌ Not accepted as a substitute where hard canisters are mandated
Budget roughly C$130-160, prices may vary between outdoor retailers. This is a strong pick for solo, ultralight canoe-camping routes where portages are long and every kilogram is felt in your shoulders.
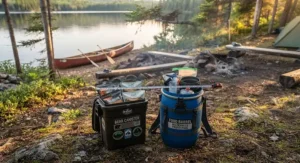
6. Recreational Barrel Works 60L Barrel — biggest waterproof hauler for group trips
Now we shift categories entirely. The RBW 60L Barrel is the classic “blue barrel” (also available in orange and red) that’s been a fixture of Canadian canoe tripping for over two decades, and at 60 litres of capacity, it’s built to swallow a week-plus of food for a group, or a full kit of gear for one very over-prepared paddler. What most buyers overlook about this option is that the air-tight lid and metal snap-closure aren’t marketed as bear protection — they’re there to survive a capsize, a rainstorm, or a dunking while loading the canoe, and on that front, the barrel does its job exceptionally well. Reviewers consistently praise the folding external handles for making portages more manageable, especially when paired with an optional harness system that converts the barrel into something closer to a backpack. The honest catch, and it’s an important one: this barrel is not IGBC-certified and is not bear-resistant in any tested sense — Ontario Parks staff have documented barrels destroyed by determined bears, so this container still needs to be hung or otherwise secured away from camp in bear country.
Pros:
- ✅ Genuinely waterproof — survives capsizes and downpours
- ✅ Massive 60 L capacity for group or extended trips
- ✅ Doubles as a camp table, cutting board, or stool
Cons:
- ❌ Not bear-resistant or IGBC-certified in any way
- ❌ Heaviest and bulkiest option in this entire lineup
Expect a price in the C$230-280 range at the time of research, and check current price given periodic shipping and material cost changes. This is the barrel for canoe-tripping groups prioritizing dry storage over solo bear defence, ideally paired with a proper hang or a bear-aware campsite choice.
7. Recreational Barrel Works 30L Barrel — compact waterproof barrel for solo paddlers
The 30L sibling scales the same design down to something a single paddler or couple can manage without a dedicated harness. At 2 kg empty and roughly half the footprint of its bigger sibling, it’s the barrel that fits behind a canoe seat or wedges neatly into a smaller solo boat without throwing off your trim. Based on the spec comparison, this is the more sensible pick for shorter trips (three to five days) or as a secondary dry-storage container for a first-aid kit and electronics alongside a bear canister for the actual food. Reviewers consistently describe the wide, 24.5 cm opening as genuinely easy to pack and unpack compared to narrower dry bags, and the same air-tight lid and snap-closure keep water out reliably even after repeated dunkings. As with its larger sibling, the honest limitation stands: this is a waterproofing solution, not a bear deterrent, so treat it the same way you’d treat any un-certified container in bear territory.
Pros:
- ✅ Compact footprint fits smaller solo and tandem canoes
- ✅ Wide opening makes packing noticeably easier than dry bags
- ✅ Reliable air-tight seal even after repeated dunkings
Cons:
- ❌ No bear resistance whatsoever — hanging still required
- ❌ Limited capacity for trips longer than about five days
Pricing generally falls in the C$150-190 range; as always, check current price since these barrels are sold in a few bundle configurations. It’s a smart secondary container even for paddlers who ultimately choose a bear canister as their primary food storage.
Practical Usage Guide: Setting Up Your Food Storage System
Getting a canister or barrel is only half the job — how you use it in the first thirty days on the water determines whether it actually works. Start by packing calorie-dense, low-volume food first (nut butters, dehydrated meals, freeze-dried proteins) since canister space is genuinely tight; bulky cereal boxes and canned goods eat volume disproportionately to their calories. Before you ever leave the driveway, do a dry run: pack the canister or barrel completely with your actual trip food and confirm it closes properly under full load, since a lid that seals easily half-empty can behave differently when packed to the brim. On the water, treat your dry bag liner (for a canister) as non-negotiable — canisters are splash-resistant at best, and a soaked sleeping bag ruins a trip faster than a curious bear ever will. At camp, the golden rule from Parks Canada and provincial guidance alike is distance: store your container at least 100 metres from your tent, cooking area, and any well-used game trail, on flat ground where it can’t be batted downhill into water. A common first-timer mistake is tying a rope to the canister “just in case” — don’t. An anchored container gives a bear leverage to drag and pry; a loose one just gets pushed around and eventually abandoned. Finally, build a simple maintenance habit: rinse and fully dry your container after every trip, inspect the locking mechanism and gasket for cracks each spring, and plan to replace any hard-sided canister after five to seven years of regular use, per IGBC guidance.
Real-World Scenarios: Which Canoe Trippers Should Choose What
Picture three different paddlers heading out this summer. First, there’s the solo weekend tripper doing a quick three-day loop through Killarney with minimal food weight and a small solo canoe — for her, the BearVault BV450 Jaunt or the Ursack Major make the most sense, since both minimize bulk without sacrificing certified bear resistance on a short trip. Second, consider a family of four heading into Algonquin’s interior for a week, splitting gear and food across two canoes — here, a mixed approach shines: a BV500 Journey or two for food, paired with an RBW 30L Barrel for electronics, first-aid supplies, and dry clothing that doesn’t need bear certification but absolutely needs to stay dry. Third, picture a group of six doing an extended Georgian Bay coastal trip through a corridor with well-documented, habituated problem bears and almost no mature trees for a proper hang — this is exactly the scenario the Explore Magazine “Happy Camper” columnist described choosing a Counter Assault Bear Keg for, precisely because thin coastal tree cover rules out hanging as a fallback option. In each case, the deciding factors are the same: trip length, group size, tree cover for hanging as backup, and the documented bear activity level of the specific route — not just brand loyalty or whichever container a friend happened to recommend.
How to Choose Between a Bear Canister and a Food Barrel
- Check the park’s actual rules first. Some Canadian and U.S. parks mandate certified hard-sided canisters outright; others simply recommend proper food storage without specifying a container type — your choice should start with the regulation, not the gear review.
- Assess tree cover on your route. If mature, sturdy trees are scarce (coastal Georgian Bay, some northern routes), a certified canister becomes far more valuable since hanging isn’t a reliable backup.
- Weigh trip length against capacity. Multi-day trips over five days lean toward larger canisters like the BV500 or a barrel-plus-canister combination; short trips favour compact, lighter options.
- Factor in known bear activity. Routes with documented habituated bears (checked via park bulletins or ranger stations) justify the extra weight of a premium, opaque canister like the Bear Keg.
- Decide how much you value waterproofing versus certification. If your route has technical whitewater or a real capsize risk, a barrel’s waterproof seal may outweigh the appeal of bear certification for non-food gear.
- Budget realistically across your whole group. A UDAP No-Fed-Bear per person can be more cost-effective for a family than one premium canister each.
- Plan for combination systems. Many experienced canoe trippers don’t pick one or the other — they use a certified canister for food and a barrel for everything else that just needs to stay dry.
food barrel vs bear canister weight: The Real Numbers
This is where theory meets the actual weight sitting on your shoulders during a portage, so let’s put the numbers side by side.
| Container | Weight (empty) | Capacity | Weight per Litre |
|---|---|---|---|
| BearVault BV450 Jaunt | ~0.95 kg | 7.2 L | ~0.13 kg/L |
| BearVault BV500 Journey | ~1.16 kg | 11.5 L | ~0.10 kg/L |
| RBW 30L Barrel | ~2 kg | 30 L | ~0.07 kg/L |
| RBW 60L Barrel | ~3.6 kg | 60 L | ~0.06 kg/L |
The comparison reveals something counter-intuitive: barrels are actually more weight-efficient per litre of storage than canisters, largely because they’re built for raw volume rather than defeating bear claws. What most buyers overlook about food barrel vs bear canister weight comparisons is that this efficiency comes at the direct cost of certification — you’re paying in kilograms for the reinforced walls and locking mechanisms that make a canister bear-resistant in the first place. For a canoe trip where you’re portaging the container yourself rather than a barrel harness taking the strain, that per-litre efficiency matters less than the raw kilograms on your back; a BV450 at under a kilogram will always feel lighter on a portage trail than a 60L barrel, even if the barrel technically stores more per gram.
Common Mistakes When Storing Food on a Canoe Trip
Even experienced paddlers slip up here, and the mistakes tend to repeat across trip reports. The first is storing scented non-food items — toothpaste, sunscreen, bug spray — in the tent vestibule “because it’s not really food,” when bears absolutely cannot tell the difference and will investigate anyway. The second is choosing a campsite based on view or firewood availability without checking for fresh bear sign (scat, claw marks, overturned rocks), a habit the Friends of Algonquin Park’s black bear safety guidance specifically flags as a preventable cause of camp visits. The third is cooking and eating right next to the tent instead of well away from it, which concentrates food smells exactly where you’ll be sleeping. The fourth is assuming a barrel equals bear protection simply because it’s rigid plastic — as covered above, it isn’t certified, and Killarney Park staff keep a destroyed barrel on display at the gatehouse specifically to make that point. The fifth, and maybe the most common, is skipping the 100-metre storage distance because the “right” spot is inconvenient at dusk after a long paddling day — a shortcut that, more than any gear choice, is what actually invites a nighttime visit.
Parks food storage rules camping: What Canadian Parks Actually Require
Rules vary meaningfully by jurisdiction, and checking them before your trip isn’t optional homework — it’s often a legal requirement tied to your permit. Ontario Parks’ own guidance on bear-resistant infrastructure describes several parks — Frontenac, Sleeping Giant, and The Massasauga among them — now installing food lockers at select backcountry or walk-in sites, though coverage varies park to park, so confirming ahead through your permit reservation is essential. Algonquin Provincial Park doesn’t mandate a specific storage container for backcountry sites, but its posted rules do require every campsite to stay clean and free of attractants for wildlife, bears included, at all times, which functionally means proper storage regardless of your chosen container. South of the border, several U.S. National Parks and National Forests go further, requiring IGBC-certified hard-sided canisters outright regardless of tree cover or local bear activity — a rule that would immediately disqualify an un-certified barrel as your sole food storage method. For a deeper dive into how Ontario approaches bear-human conflict prevention broadly, the province’s Bear Wise program is a genuinely useful resource, even though it’s framed primarily around residential and cottage-country contexts rather than backcountry tripping specifically. The practical takeaway: never assume your last trip’s storage rules apply to this year’s route — regulations change, and enforcement varies by region and season.
wildlife safe camping: It’s Not Just About Bears
Bears get most of the attention, understandably, but a genuinely wildlife safe camping approach accounts for the full cast of animals your food storage choice affects. Raccoons are notoriously dexterous and have been documented working open poorly-latched coolers and barrels with an efficiency that would honestly be impressive if it weren’t so frustrating at 2 a.m. Squirrels, chipmunks, and mice can chew through soft-sided storage (a real consideration for Ursack users, though the Spectra fabric resists this far better than a standard stuff sack) and will happily nest inside an improperly sealed barrel over a season if it’s left in a shed. Ravens and gulls, particularly common on Georgian Bay and other exposed shoreline routes, have learned to associate canoe campsites with easy pickings and will investigate anything left uncovered, even briefly. The broader ecological point matters too: every time wildlife successfully accesses human food, it reinforces a behaviour pattern that makes that animal bolder around the next group of campers — which is precisely why parks treat food storage as conservation infrastructure, not just personal convenience. Choosing a properly sealed, correctly stored container protects your trip, but it also protects the animal from becoming the kind of “problem” individual that wildlife managers eventually have to relocate or, in worst cases, destroy.
backcountry food hanging: Does the Classic Method Still Work?
The traditional bear hang — food suspended between two trees, ideally four metres up and equally far from either trunk — remains a legitimate, cost-free option in many parts of Canada, particularly in areas with limited human-bear conflict history and reliable mature tree cover. It has real limitations, though, and they’re worth being honest about. Hanging requires suitable trees, which simply don’t exist on many exposed Georgian Bay and northern lake routes where forest cover is sparse or stunted. It also requires a level of throwing accuracy and rope-management skill that a lot of paddlers, fairly, don’t have dialed in after a twelve-hour travel day. Perhaps most importantly, determined and habituated bears in heavily-trafficked areas have learned to defeat improperly executed hangs — some U.S. wilderness areas have documented specific bears breaking into imperfect hangs so consistently that hard-sided canisters became mandatory regardless of tree availability. The honest comparison: a hang done correctly, with adequate height and horizontal distance from the trunk, works well in low-conflict zones and costs nothing beyond rope you already own; a certified canister works reliably everywhere, including treeless shorelines, but costs money and adds weight. Most experienced trippers treat these as complementary rather than competing — hanging when conditions genuinely support it, canistering when they don’t.
bear canister regulations: What’s Actually Required and Where
Regulatory patchwork is the honest description here, and it’s worth checking specifics before every trip rather than assuming last year’s rules still apply. In Canada, most provincial and national parks recommend rather than mandate a specific container type for canoe-accessible interior sites, focusing regulatory language instead on keeping campsites free of attractants — Algonquin’s rules are a representative example of this approach. Certain U.S. National Parks and National Forests, by contrast, explicitly require IGBC-certified hard-sided canisters, and rangers do check; a barrel, however sturdy, would not satisfy that requirement even though it’s genuinely waterproof and portage-friendly. The Interagency Grizzly Bear Committee’s testing standard itself — a 60-minute captive-bear resistance trial — is the certification baseline referenced across nearly every product in this guide, and it’s a useful shorthand: if a container doesn’t carry IGBC or SIBBG approval, treat it as unverified for bear resistance regardless of how tough the marketing copy claims it is. The practical rule for Canadian canoe trippers: check your specific park’s current backcountry regulations at the time of permit booking, since requirements can and do shift as bear activity patterns change year to year.
✨ Ready to Gear Up for Your Next Trip?
🐻 Whichever system fits your route, don’t wait until the week before departure to order — check current availability now so you’re not scrambling for a canister or barrel the night before you leave.
Long-Term Cost and Maintenance: What You’ll Actually Spend Over Years
A canister or barrel is rarely a one-trip purchase, so it’s worth thinking in terms of cost per season rather than sticker price alone. IGBC-certified canisters generally last five to seven years of regular use before the locking mechanism or shell integrity degrades enough to warrant replacement, per manufacturer and IGBC guidance — spread the C$110-220 purchase price across that lifespan, and you’re looking at roughly C$20-35 per season for a container that gets used on two or three trips a year. Barrels tend to last considerably longer structurally, since they’re not subject to the same wear on locking mechanisms, though gaskets and snap-closures should be inspected annually and replaced parts are generally available from the manufacturer rather than requiring a full barrel replacement. The maintenance itself costs little beyond time: a rinse and full air-dry after each trip, an annual gasket inspection, and storing the container somewhere it won’t bake in direct summer sun for months, which accelerates UV degradation in the plastic shell. Where the real long-term cost shows up is in choices, not gear: skipping a proper container in favour of “just being careful” occasionally works out fine, but the one time it doesn’t can cost you an entire trip’s food supply, a damaged pack, or in the worst documented cases, a bear that has to be destroyed after repeated food-conditioning — a cost no gear budget line item captures, but one worth weighing honestly all the same.
FAQ
❓ Do I need a bear canister for canoe camping in Ontario?
❓ Can I use a regular canoe barrel instead of a bear canister?
❓ How far should a bear canister or barrel be stored from camp?
❓ Are bear canisters heavier than food barrels for the same capacity?
❓ What is the best bear canister for a week-long canoe trip?
Conclusion
Bear canister vs food barrel canoe camping isn’t really a question with one universal winner — it’s a question that depends on your route’s tree cover, your park’s specific regulations, your group size, and how much weight you’re realistically willing to carry across a portage trail. A certified canister buys you genuine bear resistance and peace of mind on routes with sparse trees or known problem bears; a waterproof barrel buys you dry gear and massive capacity for group trips, provided you’re still willing to hang it or store it properly. Plenty of experienced canoe trippers, honestly, end up running both — a canister for food, a barrel for everything else that just needs to stay dry through a capsize or downpour. Whichever direction you land on, the underlying habits matter more than the container: proper distance from camp, a clean cooking area, and honest awareness of your specific route’s bear activity will do more for your safety than any single piece of gear ever could.
✨ Found this helpful? Share it with your paddling group before your next trip! 💬🤗
Recommended for You
- Food Safe Canoe Barrel Guide: 7 Bear-Proof Picks for 2026
- Best 60L Canoe Barrel in Canada 2026: Top 7 Picks Reviewed
- Best 30L Canoe Barrel Canada 2026: 7 Top Picks Reviewed
Disclaimer: This article contains affiliate links. As an Amazon Associate, I earn from qualifying purchases. If you purchase products through these links, we may earn a small commission at no additional cost to you.
✨ Found this helpful? Share it with your friends! 💬🤗
