In This Article
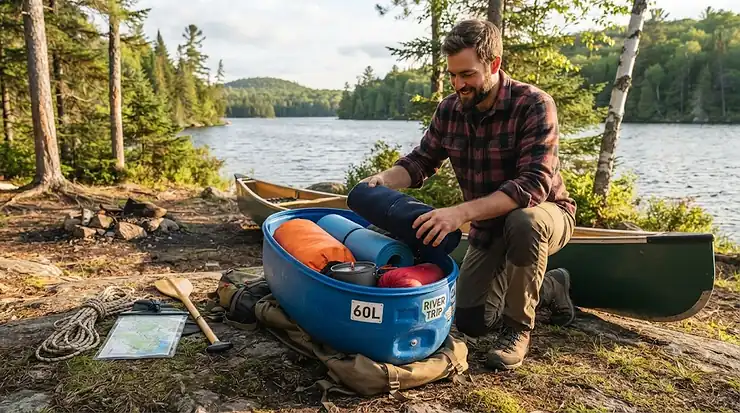
Somewhere around your third portage, you will learn a hard truth: a canoe barrel is either your best friend or your worst enemy, and the difference comes down entirely to how you pack it. Learning how to pack a canoe barrel for a portage trip isn’t about cramming things in until the lid barely snaps shut — it’s a small logistics puzzle that determines whether you’re gliding down the trail or staggering under a barrel that’s decided to shift its centre of gravity every third step. A canoe barrel, in the simplest sense, is a sealed, food-grade HDPE drum — usually 30 or 60 litres — that keeps food and gear dry, critter-resistant, and buoyant if your canoe ever goes for an unplanned swim.
Most first-timers make the same mistakes: heavy items on top, food mixed with hardware, and zero thought given to how the load rides once it’s strapped to a harness on their back. This guide walks through the entire system — the barrel itself, the harness that carries it, and the internal organizers that keep chaos at bay — using real gear you can actually find on amazon.ca, not vague “just pack smart” advice. We’ll cover packing order, waterproofing your food properly (a step Health Canada takes seriously, since perishables left too long at the wrong temperature spoil fast even in cool weather), and how to balance the load so your shoulders thank you by day three, not curse you by kilometre one.
Whether you’re headed into Algonquin, Killarney, or a quieter Shield lake nobody’s put on Instagram yet, the principles are the same. Get the barrel packing right once, and every portage after that gets a little easier.
Quick Comparison Table: Canoe Barrel Packing Gear at a Glance
| Product | Type | Price Range (CAD) | Best For |
|---|---|---|---|
| RBW 60L Canoe Barrel | Main barrel | around C$95–C$110 | Multi-day trips, groups |
| RBW 30L Canoe Barrel | Main barrel | around C$80–C$90 | Solo or weekend trips |
| RBW Expedition Barrel Harness | Carrying system | around C$120–C$130 | Long or frequent portages |
| RBW Minimalist Barrel Harness | Carrying system | around C$40–C$50 | Budget-conscious trippers |
| RBW Barrel Bucket with Lid | Internal organizer | around C$20–C$25 | Keeping food visible & sealed |
| RBW Barrel Kitchen Organizer | Internal organizer | check current price | Cook-kit chaos control |
| RBW 60L Barrel Cooler Insert | Insulated insert | check current price | Perishables on early trip days |
Looking at this lineup, the pattern is pretty clear: the barrel is just the shell, and the harness and internal organizers are what actually determine how bearable your portage day is. A 60L barrel with no harness is basically a plastic drum you’re expected to hug for two kilometres — not something anyone should attempt twice. Budget packers can get away with the 30L barrel and Minimalist harness combo, while anyone doing back-to-back portages over uneven terrain will feel the difference the Expedition harness’s hip belt makes almost immediately.
💬 Just one click — help others make better packing decisions too!
Top 7 Canoe Barrel Packing Products: Expert Analysis
1. Recreational Barrel Works 60L Canoe Barrel — the workhorse for multi-day trips
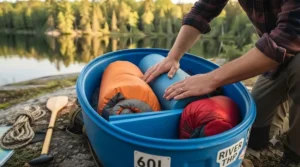
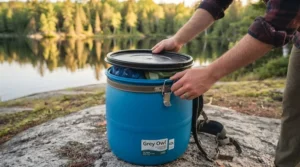
The 60L barrel is Recreational Barrel Works’ flagship, and it earns that spot honestly. Standing 62 cm tall with a 39 cm diameter, it holds roughly 16 US gallons — enough food and gear for a group on a five- to seven-day trip without needing a second barrel. The airtight lid with a metal snap-closure ring means the “waterproofing” question mostly answers itself for whatever’s inside, and the food-grade BPA-free HDPE construction means it won’t leach anything unpleasant into your oatmeal over a week of sun exposure. Based on the spec comparison against soft-sided packs, the rigid shell is the real differentiator: nothing inside gets crushed, punctured, or chewed through by a curious rodent at 2 a.m.
Reviewers consistently report that the barrel’s dual role as a camp stool, cutting board, and packing surface makes it earn its keep beyond just storage — a detail Amazon listings rarely emphasize but trippers mention constantly in aggregated feedback. Who should buy this: groups of two or more heading out for four-plus days, or anyone tired of soggy food packs after one bad rain squall. Solo weekend paddlers will find it oversized; skip ahead to the 30L version below.
Pros:
- ✅ Genuinely airtight lid keeps food and gear bone dry
- ✅ Doubles as a camp stool, table, or cutting board
- ✅ Floats even fully loaded if the canoe capsizes
Cons:
- ❌ Nearly 4 kg empty before you add a single item
- ❌ Rigid cylinder shape wastes some canoe hull space
At around C$95–C$110 at the time of research, the 60L barrel isn’t the cheapest option on this list, but for trips longer than three days it’s arguably the best value here — one barrel replaces what would otherwise be two or three soft packs, plus you’re not gambling on a dry bag’s roll-top seal holding for a week straight.
2. Recreational Barrel Works 30L Canoe Barrel — best for solo trippers and weekend outings
Where the 60L is built for expeditions, the 30L barrel is built for the rest of us — a weekend trip, a solo paddle, or as a dedicated first-aid-and-electronics barrel on a bigger group outing. At 52 cm tall with a 31 cm diameter, it’s noticeably easier to wedge between thwarts or tuck behind a seat, and at roughly 2 kg empty, it’s about half the dead weight of its bigger sibling. The same gasketed lid and metal closure ring carry over, so you’re not sacrificing waterproofing for the smaller size.
What most buyers overlook about this barrel is that its narrower opening — about 32.5 cm at the widest point on the smaller models — actually forces better packing discipline. You can’t just toss things in loosely; you have to think about order, which, as we’ll cover in the packing guide below, is exactly the habit worth building anyway. Aggregated review sentiment for RBW’s smaller barrels skews heavily positive, with buyers frequently noting the barrel survived accidental drops during loading without a crack. This one’s for the weekend warrior, the solo canoe camper, or anyone using it as a secondary barrel for valuables and meds rather than the whole trip’s food supply.
Pros:
- ✅ Compact size slides easily between thwarts on tandem trips
- ✅ Lighter empty weight than the 60L for solo trippers
- ✅ Same food-grade HDPE and gasketed lid as the bigger barrel
Cons:
- ❌ Tight capacity for trips longer than four or five days
- ❌ Narrower opening makes packing bulky items awkward
Priced in the C$80–C$90 range at the time of research, the 30L is only marginally cheaper than the 60L, which is worth noting — if you’re on the fence and might extend future trips, the extra volume of the 60L is often the smarter long-term buy.
3. Recreational Barrel Works Expedition Barrel Harness — best for long or frequent portages
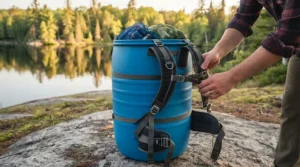
A barrel without a harness is just a very stubborn suitcase. The Expedition Barrel Harness is RBW’s answer, built from 1000 denier nylon and weighing about 1.2 kg, and it fits 60L, 30L, and even 20L barrels interchangeably. What separates this from a bargain-bin harness is the padding — generous cushioning across the shoulder straps, hip belt, and back panel — plus multiple attachment points for the shoulder adjusters, which matters a lot if you’re taller or shorter than “average outdoor gear average.”
Here’s what the spec sheet won’t tell you, but reviewers note repeatedly: the hip belt is the feature that actually changes how a portage feels. Shifting even 30–40% of a loaded barrel’s weight onto your hips instead of your shoulders is the difference between a manageable 500-metre carry and one that leaves you sore for two days. The webbing strap across the barrel’s top is a small but clever touch — clip a PFD or rain jacket there and you’ve turned two carries into one. This harness is for anyone doing repeated or lengthy portages, multi-day trips, or who’s simply done improvising with rope and regret.
Pros:
- ✅ Padded hip belt actually transfers weight off your shoulders
- ✅ Multiple strap adjustment points fit a wide range of body sizes
- ✅ Top webbing strap secures a PFD or jacket for single-carry trips
Cons:
- ❌ Costs nearly as much as the barrel itself
- ❌ Bulkier to pack flat than a minimalist harness
At around C$120–C$130 at the time of research, this is a meaningful investment, but weighed against years of use, the cost-per-portage drops fast — especially compared to a chiropractor visit after a season of shoulder-only carries.
4. Recreational Barrel Works Minimalist Barrel Harness — best budget harness
Not everyone needs — or wants to pay for — a fully padded expedition harness, and that’s exactly the gap the Minimalist Barrel Harness fills. It’s a simpler four-handle design that fits 60L, 30L, and 20L barrels, built with long yellow securing straps for balancing the load against other packs during a portage. On paper, this means you’re trading comfort padding for weight and cost savings, and that trade makes sense for shorter portages or occasional trippers who aren’t logging kilometres of trail every trip.
Aggregated reviewer sentiment is more mixed here than with the Expedition harness — some trippers appreciate the simplicity and lighter pack-down size, while others report the lack of a hip belt becomes noticeable on portages longer than 500 metres. That’s a fair trade-off to understand going in rather than discover on the trail. This harness suits budget-conscious paddlers, casual weekend trippers, or anyone who mainly deals with short portages between lakes rather than the long interior slogs found in bigger wilderness parks.
Pros:
- ✅ Noticeably lighter and cheaper than the full Expedition harness
- ✅ Fits 60L, 30L, and 20L barrels interchangeably
- ✅ Simple four-handle design is easy to rig in the dark
Cons:
- ❌ Thin padding gets uncomfortable on portages over 500 metres
- ❌ Lacks a hip belt, so shoulders take most of the load
At around C$40–C$50 at the time of research, this is roughly a third of the Expedition harness’s price — a genuinely solid entry point if you’re building out a barrel system on a budget and can live with the reduced comfort on longer carries.
5. Recreational Barrel Works Barrel Bucket with Lid — best for keeping food visible and sealed
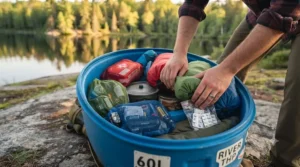
If you’ve ever dug through a barrel elbow-deep trying to find the coffee, the Barrel Bucket with Lid solves that specific headache. Made from heavy 200D pack cloth with a zippered lid and an attached strap handle, it’s designed to lift out with one hand while keeping contents from spilling mid-carry — a small feature that matters more than it sounds like when you’re pulling gear out on an uneven, bug-infested portage trail. It’s sized for the 20/30L range, with a larger version available for 60L barrels.
Based on the spec comparison with loose packing (just tossing food bags directly into the barrel), the practical interpretation is straightforward: an organizer like this turns “digging” into “grabbing.” Reviewers frequently mention that being able to see and access food quickly at the bottom of a barrel — rather than fishing blind — genuinely speeds up camp setup after a long day. This is best suited to anyone who’s tired of unpacking an entire barrel just to find the salt, and it pairs especially well with the waterproofing strategy discussed later in this guide.
Pros:
- ✅ Zippered lid stops contents from spilling mid-carry
- ✅ Pull-strap handle lets you lift it out with one hand
- ✅ Keeps small items visible instead of buried at the barrel bottom
Cons:
- ❌ Only sized for the 60L barrel’s upper section, not full depth
- ❌ Fabric pack cloth needs occasional hand-washing to stay fresh
At around C$20–C$25 at the time of research, this is one of the cheapest upgrades on this list relative to how much daily frustration it removes — arguably the best value-per-dollar item in the whole system.
6. Recreational Barrel Works Barrel Kitchen Organizer — best for cook-kit chaos
Anyone who’s had a bag of loose cutlery, a stove igniter, and three half-used spice packets rattling around a barrel knows exactly why this exists. The Kitchen Organizer has gusseted sections that separate small cooking items, and it rolls flat when not in use, so it doesn’t eat much barrel space of its own. It also clips onto the barrel harness at camp, meaning it can double as a hanging kitchen station once you’re set up for the night.
What most buyers overlook is that a dedicated kitchen organizer does more than keep things tidy — it protects your stove’s more delicate components (igniters, small screws, fuel line fittings) from getting crushed under heavier gear during transport. If you can’t verify current stock for this exact model, similar gusseted organizer rolls from other outdoor brands serve the same function and are worth considering as an alternative. This is best for cooks who bring a real kitchen kit on trips — spices, a proper knife, backup stove parts — rather than the “one pot and a lighter” crowd.
Pros:
- ✅ Gusseted sections separate spices, utensils, and stove parts
- ✅ Rolls flat for storage when you’re not on the water
- ✅ Clips directly onto the barrel harness at camp for quick access
Cons:
- ❌ Availability is inconsistent — often listed as out of stock
- ❌ Adds one more item to track amid gear organization
Pricing fluctuates with availability, so check current price before assuming this exact model is in stock; when available, it typically sits in the same low-to-mid range as the Barrel Bucket organizer above.
7. Recreational Barrel Works 60L Barrel Cooler Insert — best for stretching perishables
For anyone who wants real food on day one and two — not just dehydrated meals from the start — the 60L Barrel Cooler insert is the piece that makes that possible. It’s an insulated, walled liner sized to fit inside a 60L barrel, with a hinged zippered lid that keeps cold air from escaping every time you check on frozen steaks or bacon. It’s also machine washable, which matters more than people expect once raw meat juice inevitably finds its way onto fabric.
Here’s the honest analysis: this insert doesn’t replace ice or frozen gel packs — it slows heat transfer, buying you an extra day or two before food crosses into the temperature danger zone Health Canada warns about for outdoor food safety. Reviewers who use it for the first 48 hours of a trip, then switch to shelf-stable meals afterward, seem to get the best of both worlds. It’s best for trip planners who front-load a menu with fresh proteins, or families who don’t want to eat dehydrated meals from the very first night.
Pros:
- ✅ Insulated walls stretch the life of frozen meat by a full day or two
- ✅ Hinged zippered lid keeps cold air in during quick barrel checks
- ✅ Machine washable liner handles inevitable food spills
Cons:
- ❌ Eats into usable barrel volume for other gear
- ❌ Still needs ice or frozen packs — it isn’t a powered cooler
Check current price for this insert, as stock and pricing shift more than the core barrels; when in stock, it’s a modest add-on cost relative to the extra couple of days of fresh food it buys you.
How to Pack a Canoe Barrel for a Portage Trip: A Step-by-Step Guide
Packing order matters more than most people expect, and it comes down to physics as much as convenience. Here’s the sequence that actually works on the trail:
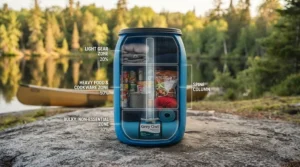
- Bottom layer — heavy, waterproof-tolerant items. Canned goods, a compact stove, tools, and anything dense and unaffected by moisture go first. This keeps your centre of gravity low, which stabilizes both the canoe and your harness once it’s on your back.
- Second layer — dry-bagged food. Individually waterproofed food bags (more on this below) sit next, organized by meal day if possible, so day one’s dinner isn’t buried under day five’s oatmeal.
- Middle layer — the kitchen organizer. Slot in a rolled kitchen kit here, where it’s protected from crushing but still reachable without unpacking everything.
- Upper-middle — soft, compressible gear. Clothing layers, a stuffed sleeping bag liner, or a rain jacket work well here because they can flex to fill awkward gaps around the barrel’s cylindrical shape.
- Top layer — daily-access items. A first-aid kit, bug spray, map case, headlamp, and snacks belong right under the lid, since these are the things you’ll want without a full unpack.
- Seal and check. Confirm the gasket seats evenly all the way around before snapping the metal closure ring — an uneven seal is the single most common cause of a “waterproof” barrel letting water in anyway.
- Attach the harness before you lift, not after. Rigging the harness while the barrel is already on your back is how shoulders get strained; set it up on the ground first.
A common first-30-days mistake is over-packing the barrel until the lid barely closes, which stresses the gasket seal over repeated trips. Another is forgetting to test-carry the loaded barrel around the yard before the actual trip — a five-minute check that saves you from discovering a painful harness fit two kilometres into a real portage.
A Canoe Trip Packing Guide for Every Paddler Type
Not every trip needs the same barrel setup, and matching your gear to your actual trip profile avoids both overpacking and, worse, underpacking. Here are three common scenarios:
The solo weekend paddler: Two nights, one person, minimal cooking beyond a one-pot dinner. A 30L barrel with the Minimalist harness covers this easily — the lighter harness weight matters more here since you’re carrying everything yourself with no one to trade off with. Total barrel weight loaded rarely exceeds 15–18 kg, well within comfortable single-carry range.
The tandem group on a five-day interior trip: Two paddlers, five days, real meals including some fresh food early on. This is the sweet spot for the 60L barrel paired with the Expedition harness and the Barrel Cooler insert for the first two days’ perishables. Splitting food and gear across one 60L barrel plus a soft pack for clothing keeps portage trips manageable — usually two carries per portage instead of three.
The family trip with kids: Multiple shorter portages, more frequent stops, and a premium on quick access to snacks and first aid. Here, a 30L barrel dedicated purely to first-aid, sunscreen, and snacks — kept separate from the main food barrel — means you’re not unpacking the whole system every time someone needs a bandage.
Common Canoe Barrel Packing Problems (And How to Fix Them)
Even seasoned trippers run into predictable snags. Here’s how to solve the most common ones:
Problem: The barrel won’t seal evenly. This usually means the gasket has debris on it or the barrel is overpacked so the lid can’t seat flush. Wipe the gasket clean before every trip and resist packing past the point where the lid closes without real pressure.
Problem: The barrel rolls around in the canoe. Barrels are cylindrical for a reason — they’re not naturally stable cargo. Wedge the barrel against a thwart or another pack, and use a lashing strap through the barrel’s handles to a thwart if you’re running any rough water.
Problem: Everything shifts to one side on the harness. This is almost always a packing-order issue rather than a harness fault — heavy items packed off-centre will pull the whole load sideways once it’s on your back. Repack with weight distributed evenly around the barrel’s circumference, not stacked to one side.
Problem: Food smells attract wildlife overnight. A sealed barrel helps, but it isn’t automatically bear-proof — as backcountry safety resources point out, standard barrel packs are food-storage containers, not certified bear canisters. A barrel with a harness is a practical choice for a long portage route, but you’ll still want to hang it overnight or use an approved storage locker where one is provided, following the food storage guidance discussed further in the safety section below.
How to Choose the Right Canoe Barrel Packing System
Picking the right combination of barrel, harness, and organizers comes down to a handful of practical questions:
- Trip length. Under three days, a 30L barrel is usually enough; four days or more, size up to the 60L.
- Group size. Solo and tandem paddlers can often manage with one barrel plus a soft pack; larger groups typically split into a food barrel and a gear barrel.
- Portage frequency and distance. If you’re facing multiple portages over 500 metres, the Expedition harness’s hip belt earns its higher price fast.
- Menu plan. Trips with fresh food on day one or two benefit noticeably from adding the insulated cooler insert.
- Budget. The Minimalist harness and a base barrel cover the essentials; organizers are worthwhile upgrades, not must-haves, for a first trip.
- Existing gear. If you already own soft packs for clothing, a single food barrel might be all you need to add rather than building a full barrel-only system.
- Storage and transport. Barrels take up more rigid space in a vehicle and at home than collapsible dry bags — worth considering if you’re tight on storage between trips.
Organizing Gear in a Canoe Barrel: A System That Actually Works
Organizing gear in a canoe barrel is less about fancy equipment and more about consistent zones. Think of the barrel’s interior in thirds: a bottom third for dense, rarely-needed items; a middle third for the bulk of your food and clothing; and a top third reserved exclusively for things you’ll want without unpacking everything else. Internal organizers like the Barrel Bucket or Kitchen Organizer aren’t strictly necessary, but the practical interpretation of using them is simple — they turn “dig until you find it” into “reach and grab,” which matters far more on a rainy, bug-heavy evening than it sounds like on paper.
A trick many experienced trippers use: colour-code or label dry bags by day or category (breakfasts, dinners, snacks, first aid) so you’re not opening every bag to identify contents. Combined with a barrel bucket organizer sitting near the top, this cuts unpacking time at camp dramatically — often the difference between having dinner started in ten minutes versus thirty.
Waterproofing Food for Canoe Camping: What Works and What Doesn’t
A sealed barrel keeps rain and splashes out, but that’s not the same as keeping every individual food item dry inside it — condensation, spills, and the occasional imperfect seal all happen. Waterproofing food for canoe camping starts at the individual bag level: repackage anything in cardboard or paper (cereal, crackers, pasta boxes) into resealable freezer bags or dedicated dry sacks before it ever goes near the barrel. Double-bagging particularly moisture-sensitive items like flour, sugar, and coffee is worth the extra thirty seconds of effort.
Temperature matters just as much as moisture. Canada’s food safety guidelines note that bacteria multiply quickly once food sits between roughly 4 °C and 60 °C, and that rule doesn’t pause just because you’re five days into a canoe trip instead of standing in a kitchen. This is exactly why the insulated Barrel Cooler insert earns its spot on this list: it’s not a luxury item, it’s a practical extension of basic food safety once you’re days away from a fridge. For non-perishables, a well-sealed barrel plus individually bagged dry goods is genuinely sufficient — no need to over-engineer what doesn’t need it.
Portage Load Balance: Getting Weight Distribution Right
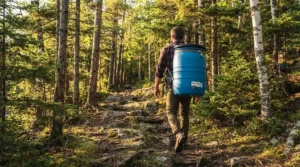
Portage load balance is where good intentions meet actual physics. A loaded barrel that’s heavier on one side — even by a kilogram or two — will twist against your hips with every step, turning a manageable carry into an exhausting one. The fix starts inside the barrel: distribute dense items around the circumference rather than stacking them in one spot, and keep the heaviest gear centred low rather than off to one side.
Once the barrel’s on the harness, the hip belt (where you have one) should carry roughly a third to nearly half of the total load, not the shoulders. If you’re using the Minimalist harness without a hip belt, compensate by keeping total loaded weight lower — closer to 18–20 kg rather than pushing toward 25 kg or more, which the Expedition harness’s padded system handles far more comfortably. For groups carrying multiple barrels and packs across one portage in relays, alternating who carries the heaviest item each trip also prevents any one person’s shoulders from bearing the brunt of an unevenly distributed group load.
Canoe Barrel vs Traditional Canoe Packs: Benefits Comparison
| Factor | Canoe Barrel System | Traditional Soft Pack |
|---|---|---|
| Waterproofing | Excellent — sealed HDPE shell | Depends on liner quality |
| Rigidity/crush protection | High — rigid shell | Low — contents can be crushed |
| Weight (empty) | Heavier (2–4 kg) | Lighter |
| Packing flexibility | Limited by cylindrical shape | Flexible, moulds to canoe hull |
| Doubles as furniture | Yes — stool/table | No |
| Wildlife resistance | Moderate — sealed, not certified bear-proof | Low unless using a certified canister |
The comparison above makes the trade-off clear: barrels win decisively on waterproofing and crush protection, which is exactly why they’ve become the default for food storage on Canadian canoe trips, but they concede some packing flexibility and add empty weight compared to a well-built soft pack. Most experienced trippers land on a hybrid approach — one barrel for food, one or two soft packs for clothing and sleeping gear — rather than going all-in on either system.
✨ Don’t Miss These Exclusive Deals!
🔍 Take your portage packing to the next level with these carefully selected products. Click on any highlighted item to check current pricing and availability. These tools will help you build a barrel system your whole crew will thank you for.
Long-Term Cost & Maintenance of Your Barrel System
A quality barrel and harness aren’t a one-trip purchase — they’re closer to a decade-plus investment if maintained properly. RBW’s barrels and harnesses are widely used by outfitters and rental fleets, which is a reasonable proxy for how much abuse the gear can absorb over repeated seasons. Maintenance is minimal: rinse the barrel interior after every trip, dry it fully before storage to avoid mildew, and periodically check the gasket for cracking or debris buildup that could compromise the seal.
Thinking in terms of cost-per-trip changes the math considerably. A barrel-and-harness combo costing roughly C$200–C$240 combined, used across even ten trips over several years, works out to C$20–C$24 per trip — cheaper than a single night’s hotel stay, for a system that protects thousands of dollars in food and gear each time. Replacement parts like gaskets, handles, and closure rings are also sold individually, meaning a worn component doesn’t force a full replacement.
Safety, Bears, and Backcountry Food Storage Regulations
This is the section people skip and then regret skipping. A sealed barrel is genuinely useful for keeping wildlife out of your food, but it is not automatically a certified bear-resistant container, and Ontario’s own backcountry guidance is direct about this distinction: the standard food storage container for Ontario canoe trips is the 60L barrel pack, yet a standard barrel pack on its own is not considered bear-proof. That means the barrel handles moisture and everyday critters well, but a determined bear can still get into one if it’s simply left on the ground overnight.
The practical fix most experienced trippers use is combining the barrel with a proper overnight hang. Algonquin’s own backcountry rules call for food to be hung at least 4 metres off the ground and roughly 2 metres away from the tree trunk, kept well clear of your tent, cooking area, and canoe storage. Some parks provide bear-resistant lockers at select backcountry sites, but you shouldn’t assume one will be there — check with the specific park ahead of time. For a full breakdown of hang techniques and storage locker locations by park, Ontario Parks’ own backcountry team has published detailed guidance worth reading before any multi-day trip: Ontario Parks’ guide to backcountry food storage covers rope length, hang height, and locker availability park by park.
Features That Actually Matter (And Those That Don’t)
Marketing copy on outdoor gear tends to oversell certain features while glossing over the ones that genuinely change your trip. Here’s an honest filter:
Actually matters: a gasket that seats evenly every time, a harness with a real hip belt for anything over 20 kg, and internal organizers that reduce unpacking time at camp.
Doesn’t matter as much as it sounds: colour of the barrel (blue, red, yellow — all identical in function), and marginal weight differences between harness brands measured in grams rather than hundreds of grams.
Overhyped: claims of a barrel being fully “bear-proof” rather than bear-resistant — as covered above, that distinction has real safety implications and shouldn’t be glossed over by a product listing.
Underrated: the top webbing strap on a good harness, which quietly turns a two-carry portage into a one-carry portage by letting you clip on a PFD or jacket.
Frequently Asked Questions
❓ How many days of food can fit in a 60L canoe barrel?
❓ Do canoe barrels really float if the canoe tips over?
❓ Is a canoe barrel better than a dry bag for a portage trip?
❓ How do you keep a canoe barrel from smelling like food between trips?
❓ Can two people share one 60L canoe barrel on a portage trip?
Conclusion
Learning how to pack a canoe barrel for a portage trip really comes down to three habits: pack in a deliberate order rather than tossing things in, waterproof your food at the individual-bag level rather than trusting the barrel alone, and pay real attention to load balance once the barrel’s on your back. None of this requires expensive gear — a basic 30L barrel and a simple harness will get a weekend trip done just fine — but understanding the why behind each step means you’ll actually enjoy the portages instead of dreading them.
The right combination of barrel size, harness, and internal organizers depends entirely on your trip length, group size, and how many portages stand between you and your next campsite. Start with the basics, add organizers as you figure out your own packing quirks, and don’t skip the bear-safety step just because the barrel feels secure — that one detail matters more than almost anything else covered here. For a broader look at how canoe packs and barrel harnesses stack up against each other in real trip use, Paddling Magazine’s annual gear roundup is a solid next read before your next trip.
Recommended for You
- Bear Canister vs Food Barrel Canoe Camping: 7 Picks (2026)
- Food Safe Canoe Barrel Guide: 7 Bear-Proof Picks for 2026
- Best 60L Canoe Barrel in Canada 2026: Top 7 Picks Reviewed
Disclaimer: This article contains affiliate links. As an Amazon Associate, I earn from qualifying purchases. If you purchase products through these links, we may earn a small commission at no additional cost to you.
✨ Found this helpful? Share it with your friends! 💬🤗
