
In This Article
Somewhere between the put-in and your first swamped gunwale, you’ll learn the hard way that a canoe is basically a very long, very tippy bathtub. How to protect your camera on a canoe trip comes down to one simple idea: put a dedicated waterproof barrier — a hard case, a dry bag, or a sealed housing — between your gear and the lake, and secure that barrier to the boat so a capsize doesn’t turn into a funeral for your memory card. Cameras and canoes have a complicated relationship. One is expensive, electronic, and allergic to moisture. The other spends its whole life balanced on top of moisture, occasionally flipping over just to keep you humble.
We’ve spent this guide digging through real product specs, verified retailer listings, and aggregated review sentiment from paddlers who’ve actually dunked their gear (on purpose and by accident) so you don’t have to learn these lessons the expensive way. Whether you’re running a mirrorless camera down a Class II stretch of the French River or just trying to keep a GoPro alive through a rainy weekend in Algonquin, there’s a case built for your specific brand of chaos. We’ll walk through seven real options across budget, mid-range, and premium tiers, compare GoPro dry cases against soft dry bags head-to-head, and cover the packing, portaging, and paddling habits that actually keep gear dry over a multi-day trip — not just for one photogenic afternoon.
One quick note before we dive in: prices shift constantly on Amazon.ca, so every figure below is a rough range based on research at the time of writing, not a locked-in quote. Always check current pricing before you buy.
Quick Comparison Table
| Product | Type | Price Range (CAD) | Best For |
|---|---|---|---|
| Pelican 1200 Protector Case | Hard case | around C$130–C$175 | DSLR/mirrorless bodies needing crush protection |
| DiCAPac WP-S10 Waterproof Case | Soft shoot-through pouch | C$60–C$95 range | Shooting while sealed, in-canoe photography |
| SealLine Baja 20L Dry Bag | Roll-top dry bag | C$55–C$85 range | General gear storage, budget all-rounder |
| GoPro Protective Housing | Action cam dive housing | C$55–C$80 range | Deep submersion, whitewater, underwater shots |
| Sea to Summit Big River Dry Bag | Abrasion-resistant dry bag | C$45–C$110 range (size-dependent) | Multi-day trips, lash-to-thwart storage |
| Watershed Ocoee Dry Duffel | Submersible ZipDry duffel | C$220–C$320 range (with liner kit) | Premium camera protection, guided/pro use |
| Aquapac Stormproof Camera Case | Small floating pouch | under C$50 | Point-and-shoots, phones, quick day trips |
Looking at the spread above, the price gap between the Aquapac Stormproof Camera Case and the Watershed Ocoee Dry Duffel roughly maps to how much submersion protection you’re buying — a splash-rated pouch versus a genuinely airtight, fully submersible duffel. Paddlers running calm cottage-country lakes can usually get away with the cheaper end of this table, while anyone tackling moving water, rapids, or overnight portages should budget toward the middle or top. Notice, too, that three of the seven — the SealLine Baja 20L Dry Bag, the Sea to Summit Big River Dry Bag, and the Watershed Ocoee Dry Duffel — aren’t camera-specific at all; they’re general dry bags that happen to be the go-to choice among canoe-tripping photographers because a well-sealed dry bag beats a mediocre “camera case” every time.
💬 Just one click — help others make better buying decisions too!😊
Top 7 Camera Protection Products: Expert Analysis
1. Pelican 1200 Protector Case — bombproof crush protection for DSLR bodies
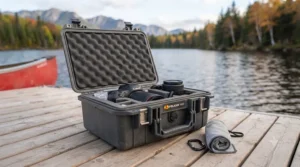
The standout here isn’t waterproofing alone — plenty of soft bags are waterproof — it’s that the Pelican 1200 Protector Case shrugs off drops, gunwale knocks, and getting stepped on mid-portage. Interior dimensions run roughly 9.25 x 7.12 x 4.12 inches, sealed with a tongue-and-groove o-ring fit and an automatic pressure equalization valve, and the Pick N’ Pluck foam lets you carve a custom cavity for a body and one lens. Based on the spec comparison with soft dry bags, this is the only case on our list rated to survive being sat on, dropped from a canoe onto rock, or used as an improvised camp stool — a genuine structural advantage for anyone canoeing rocky Canadian Shield rivers where portages mean scrambling over granite. Reviewers consistently report that the case is genuinely watertight even after extended dunking, though a few note it only fits one lens comfortably, so a body-plus-two-lenses kit will need a bigger model. What most buyers overlook is that this rigidity is a double-edged sword: it’s heavier and bulkier than a dry bag, and it floats but isn’t secured to anything by default, so you still need to lash it to a thwart.
Pros:
- ✅ Genuinely crushproof — survives drops and being stepped on
- ✅ Customizable foam fits a body and lens precisely
- ✅ Purge valve makes it easy to open after altitude or heat changes
Cons:
- ❌ Bulkier and heavier than a soft dry bag of similar capacity
- ❌ Only fits one lens comfortably in the standard 1200 size
At around C$130–C$175, the Pelican 1200 Protector Case is a solid mid-range investment for anyone who portages over rock more than they paddle flat water — the crush protection alone justifies the price over a bag that only handles moisture.
2. DiCAPac WP-S10 Waterproof Case — shoot-through housing you can use while sealed
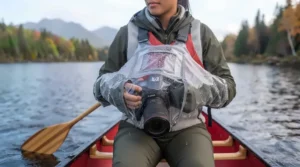
The standout feature of the DiCAPac WP-S10 Waterproof Case is that it’s a soft, flexible sleeve with a polycarbonate lens port, meaning you can operate camera controls and shoot photos without ever unsealing the bag — a real advantage for photographers who want images taken from inside the canoe. It’s rated to JIS IPX8 for use down to roughly 5 metres and uses a roll-and-velcro closure combined with a waterproof zip seal. Based on the spec comparison, this case trades the Pelican’s crush resistance for something soft dry bags can’t offer: functional access to your camera’s zoom and shutter while fully sealed against splash and rain. Reviewers consistently mention that image clarity through the polycarbonate window is solid in daylight but softens in low light, and that the neck strap makes it comfortable to keep the camera ready between shots rather than buried in a pack. A common complaint in user reviews is that the internal fit can feel loose on smaller mirrorless bodies, letting the camera shift inside the housing during a bumpy paddle.
Pros:
- ✅ Lets you shoot photos while the case stays fully sealed
- ✅ Floats if it goes overboard, reducing loss risk
- ✅ Compact and light enough to wear around your neck all day
Cons:
- ❌ Interior fit can feel loose on smaller camera bodies
- ❌ Image sharpness through the lens port softens in low light
Priced in the roughly C$60–C$95 range, the DiCAPac WP-S10 Waterproof Case is the pick for anyone whose priority is shooting from the canoe itself rather than just storing gear between stops.
3. SealLine Baja 20L Dry Bag — the reliable all-purpose workhorse
What most buyers overlook about the SealLine Baja 20L Dry Bag is that it isn’t marketed as a camera bag at all, yet it’s one of the most recommended dry bags among paddling photographers precisely because a properly sealed roll-top beats a flimsy dedicated “camera case.” Constructed from 1000D vinyl-coated polyester with a DrySeal roll-top closure and an attached D-ring, the Baja is built to handle repeated abuse from river running to portaging. Reviewers consistently note the closure is genuinely watertight when rolled correctly (three full rolls minimum), and the heavy-duty base resists punctures from rocks at the put-in. On paper this means you get expedition-grade waterproofing for less than most dedicated camera cases cost, provided you’re willing to pad your gear yourself — a padded camera cube or wrap inside the bag solves the lack of built-in cushioning. The trade-off is that without an insert, a camera can knock against other gear inside the bag during a bumpy carry.
Pros:
- ✅ Genuinely watertight roll-top seal, proven on river trips
- ✅ Heavy-duty 1000D vinyl resists abrasion and punctures
- ✅ D-ring lets you lash it securely to a canoe thwart
Cons:
- ❌ No internal padding — needs a separate camera insert or wrap
- ❌ 20L capacity is overkill if you’re only packing one camera body
Around C$55–C$85, the SealLine Baja 20L Dry Bag is the budget-conscious paddler’s best all-rounder, especially if you’re already packing a padded camera cube or towel to nest the gear inside.
4. GoPro Protective Housing — the official answer for deep submersion and whitewater
The GoPro Protective Housing, built for HERO13, HERO12, HERO11, HERO10, and HERO9 Black, stands out because it’s rated for use down to roughly 60 metres (196 feet) — dramatically deeper than the action camera’s own built-in water resistance, which tops out around 5–10 metres depending on the model. It ships with a skeleton backdoor for better audio capture on dry runs and a fully sealed backdoor for actual submersion, plus a mounting buckle and thumb screw compatible with the standard GoPro mount ecosystem. Here’s what to weigh: the housing exists specifically because most action cameras are only splash- and shallow-water-resistant out of the box, not built for sustained submersion, rapids, or being dragged behind a canoe on a pole mount. Reviewers consistently report the seal holds reliably through repeated dunking and even light rapids, though a handful mention that condensation can fog the lens if the camera goes from a hot car straight into cold river water without acclimating first. Given this is a first-party GoPro accessory rather than a third-party clone, fit and button access are precise.
Pros:
- ✅ Rated to roughly 60m — far deeper than the bare camera
- ✅ Precise official fit with full button and mount access
- ✅ Compatible with the entire GoPro mount accessory ecosystem
Cons:
- ❌ Only protects the camera itself, not memory cards or spare batteries
- ❌ Can fog in humidity swings without an anti-fog insert
At roughly C$55–C$80, the GoPro Protective Housing is essential — not optional — for anyone running rapids, mounting their action cam on a bow pole, or planning any shot where the camera might go fully underwater.
5. Sea to Summit Big River Dry Bag — the abrasion-resistant mid-tier choice
The standout feature of the Sea to Summit Big River Dry Bag is its 420-denier nylon shell laminated with TPU film, rated to a 10,000mm hydrostatic head — durable enough to survive being lashed to the outside of a canoe across a multi-day trip. The hypalon roll-top closure doesn’t wick moisture the way some cheaper vinyl closures can over time, and a white interior lining makes it easier to spot gear without unpacking everything onto a wet rock. Based on the spec comparison, this bag sits a notch above the SealLine Baja in abrasion resistance thanks to the triple-coated base, which matters if you’re dragging bags over granite portages rather than loading them gently from a dock. Reviewers consistently praise the oval base for resisting rolling on uneven ground, and note that the lash points make it easy to secure to a canoe’s centre thwart. The main caveat, honestly noted rather than glossed over, is that roll-top bags — including this one — aren’t designed for full submersion; they’re rain- and splash-proof at the seams but can seep if held underwater at the closure for an extended period.
Pros:
- ✅ 10,000mm hydrostatic head with tape-sealed, reinforced seams
- ✅ Triple-coated base resists abrasion on rocky portages
- ✅ White interior lining makes gear easy to spot and retrieve
Cons:
- ❌ Roll-top closure isn’t rated for full submersion
- ❌ Prices climb quickly for larger sizes suited to full kits
Spanning roughly C$45 to C$110 depending on size, the Sea to Summit Big River Dry Bag is the value pick for multi-day canoe camping trips where durability against rock and rope matters as much as keeping the rain out.
6. Watershed Ocoee Dry Duffel — the premium, genuinely submersible option
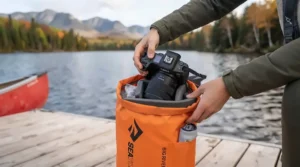
What sets the Watershed Ocoee Dry Duffel apart is its ZipDry closure — two interlocking rubber strips that press together to form an airtight, IPX8-rated seal, meaning this bag is actually built to be submerged, not just to resist rain. At roughly 10.5 litres (640 cubic inches) with rugged carrying handles, multiple lash points, and compression straps, it’s compact enough to tuck under a canoe seat or thwart. Reviewers consistently describe Watershed bags lasting a decade or more of regular use without seam failure, and the accessory ecosystem — a padded liner, a divider set, and a shoulder strap sold as the “Ocoee Photo Kit Plus” — effectively turns this dry bag into a purpose-built camera bag once assembled. Based on the spec comparison, the ZipDry seal genuinely outperforms roll-top closures on submersion resistance, which is exactly why it shows up repeatedly as the top recommendation among river photographers in independent gear reviews. A common complaint in user reviews is that the seal takes practice to close correctly in cold weather and needs occasional lubrication with the included protectant wipe to stay supple.
Pros:
- ✅ ZipDry seal is genuinely airtight and submersible (IPX8)
- ✅ Modular liner and divider system built specifically for cameras
- ✅ Exceptional long-term durability reported across years of use
Cons:
- ❌ Premium pricing, especially once you add the liner and divider kit
- ❌ ZipDry seal has a learning curve, especially with cold hands
At around C$220–C$320 once you add the photo liner kit, the Watershed Ocoee Dry Duffel is the case to buy if you’re carrying genuinely expensive glass and simply cannot afford a soaked sensor.
7. Aquapac Stormproof Camera Case — the lightweight budget floater
The Aquapac Stormproof Camera Case earns its spot as the lightest, cheapest option on this list — a small, flexible pouch designed for point-and-shoot cameras and phones rather than full-size DSLRs. Its standout feature is that it floats on its own thanks to trapped air in the seal, so a case that slips off a gunwale during a portage doesn’t automatically become a lake donation. On paper this means it’s the case to grab for casual day paddles where you’re mostly worried about rain and splash rather than a full capsize. Reviewers consistently note that the clear front window keeps images reasonably sharp for a compact camera or phone, and that the compact folded size makes it easy to clip to a PFD for constant access. What the spec sheet won’t tell you, but user reports suggest, is that it’s not built for repeated deep submersion or rough abrasion against rock — this is a rain-and-splash tool, not a whitewater tool, and pairing it with a GoPro or DSLR is a mismatch of protection level to gear value.
Pros:
- ✅ Floats independently if it goes overboard
- ✅ Lightest and cheapest option for casual day trips
- ✅ Compact enough to clip directly to a PFD
Cons:
- ❌ Not designed for full submersion or whitewater conditions
- ❌ Sized for compacts and phones, not DSLR or mirrorless bodies
At under C$50, the Aquapac Stormproof Camera Case is the entry point for casual paddlers who mostly need rain protection for a phone or compact camera on calm-water outings.
Top 7 Products at a Glance
| Product | Waterproof Rating | Fits | Best For | Price Range (CAD) |
|---|---|---|---|---|
| Pelican 1200 Protector Case | IP67, submersible | DSLR body + 1 lens | Crush + water protection | C$130–C$175 |
| DiCAPac WP-S10 Waterproof Case | IPX8 (~5m) | DSLR/mirrorless | Shooting while sealed | C$60–C$95 |
| SealLine Baja 20L Dry Bag | Splash/rain (roll-top) | Camera + accessories | Budget all-around storage | C$55–C$85 |
| GoPro Protective Housing | Submersible (~60m) | HERO9–13 Black | Whitewater, underwater | C$55–C$80 |
| Sea to Summit Big River Dry Bag | 10,000mm hydrostatic head | Camera + gear | Multi-day trip durability | C$45–C$110 |
| Watershed Ocoee Dry Duffel | IPX8, fully submersible | Camera + lenses (with liner) | Premium, guided/pro use | C$220–C$320 |
| Aquapac Stormproof Camera Case | Splash/rain, floats | Compact camera/phone | Casual day trips | under C$50 |
The pattern that jumps out here is that waterproof rating and price track closely, but not perfectly — the GoPro Protective Housing delivers deeper submersion protection for less money than the Watershed Ocoee Dry Duffel, simply because it’s protecting one specific compact device rather than a whole kit. If your budget tops out around C$100, the SealLine Baja 20L Dry Bag or Sea to Summit Big River Dry Bag paired with a padded insert will outperform a cheap “waterproof camera bag” that isn’t rated for anything beyond light rain.
✨ Ready to gear up? Check current availability on the case that matches your trip below.
What Is the Best Way to Protect Your Camera on a Canoe Trip?
The short answer, worth repeating as its own section since it’s the query most people actually type into Google: use a dedicated waterproof case or dry bag rated for at least splash/rain protection (IPX4 or higher for casual trips, IPX7–IPX8 for anything with rapids or deep water), and physically secure that case to the canoe with a lash strap or D-ring so a capsize doesn’t separate you from your gear. A waterproof enclosure’s degree of protection is measured using the international IP code standard, which is worth understanding before you shop, since marketing terms like “waterproof” are unregulated but IP ratings are independently testable. A case rated IPX7 survives 30 minutes at 1 metre depth; IPX8 means the manufacturer guarantees protection beyond that, often to several metres. Reading the actual rating, not just the word “waterproof” on the box, tells you whether a product is built for rain or for a swim.
How to Choose Camera Protection for a Canoe Trip
- Match the rating to the water, not the marketing. A calm cottage lake day trip needs splash protection; a river with any current or rapids needs a submersible IPX7/IPX8-rated case.
- Weigh crush protection against packability. Hard cases like the Pelican 1200 Protector Case survive drops and portage bumps that soft dry bags won’t, but they take up more space and add weight.
- Decide if you need to shoot while sealed. Cases like the DiCAPac WP-S10 Waterproof Case let you operate the camera through the housing; dry bags require unsealing to shoot, which is fine for storage-only trips.
- Check compatibility before buying. Action cam housings like the GoPro Protective Housing are model-specific — confirm your exact HERO number before ordering.
- Consider secondary storage for cards and batteries. Most camera cases protect the body but not loose accessories; a small secondary dry pouch for spare batteries and cards is cheap insurance.
- Budget for accessories on premium bags. The Watershed Ocoee Dry Duffel is genuinely excellent, but its full camera-protection potential requires the separately sold liner and divider kit.
- Always plan for a full capsize, not just rain. Even flat-water canoe trips occasionally tip; buy protection for the worst realistic scenario on your specific route, not the average day.
GoPro Dry Case vs Dry Bag for Canoe: Which Wins?
This is one of the most common points of confusion for paddlers new to camera protection, so it’s worth untangling directly. A GoPro dry case — like the official GoPro Protective Housing — is a rigid, form-fitted shell built around one specific camera model, engineered to maintain full button and mount access while submerged to significant depth. A general dry bag — like the SealLine Baja 20L Dry Bag or Sea to Summit Big River Dry Bag — is a flexible, roll-top or zip-sealed sack that protects whatever you put inside it from moisture, but doesn’t let you operate anything while sealed and offers no impact protection unless you add padding yourself.
For action cameras specifically, the housing usually wins: it’s purpose-built, keeps the camera mountable and operable, and is rated for genuine underwater use during rapids or intentional dunks for a shot. For DSLRs, mirrorless bodies, and general gear, a well-sealed dry bag often wins on flexibility and value — you’re not paying for underwater optical clarity you don’t need, and the bag doubles as storage for clothing or food on the same trip. Reviewers consistently note that combining both — an action cam in its official housing, tucked inside a larger dry bag for transport between shots — is the most common setup among experienced canoe photographers, since it covers both continuous submersion risk and general trip storage in one system.
| Factor | GoPro Dry Case | General Dry Bag |
|---|---|---|
| Best for | Action cameras, underwater/whitewater shots | DSLRs, mirrorless, general gear storage |
| Usable while sealed | Yes — full button access | No — must unseal to access gear |
| Submersion depth | Very deep (up to ~60m on official housings) | Shallow to moderate (roll-top: splash-rated) |
| Impact protection | Good — rigid shell | Minimal unless padded |
The takeaway from this comparison: don’t force a dry bag to do a housing’s job, or vice versa. Match the tool to the camera and the water, and use both together on serious multi-day trips.
Waterproofing Your Action Camera for Canoe Trips
Action cameras like the GoPro line are already splash- and shallow-water-resistant out of the box, which leads a lot of paddlers to skip a housing entirely — a mistake that shows up repeatedly in gear-failure stories on paddling forums. Based on the spec comparison, most bare action cameras top out around 5–10 metres of water resistance for short periods, which is fine for an accidental splash but not for sustained submersion, a hard capsize, or being mounted on a pole that dips underwater on purpose for a shot. Adding the GoPro Protective Housing extends that protection to roughly 60 metres and, just as importantly, seals the charging port and battery door against silt and sand, which cause more long-term camera failures on canoe trips than a single dunk ever does. Reviewers consistently mention that grit in the port seals is a slower, sneakier killer of action cameras than water itself — something a sealed housing prevents entirely. A quick freshwater rinse of the housing (never the bare camera) after every paddling day, followed by a full air-dry before the next use, keeps the seals supple and prevents the fogging that a handful of reviewers report after temperature swings.
Canoe Photography Tips: Getting the Shot Without Getting Wet
Getting genuinely good photos from a moving canoe means accepting a few trade-offs most land-based photographers never think about. First, shoot from a low, stable position — kneeling rather than sitting on the gunwale keeps your centre of gravity down and reduces the odds of a sudden lean tipping both you and the camera into the water. Second, use a wrist strap or PFD-clip tether on any camera that leaves its case, even briefly, since a single wave slap is enough to knock an ungripped camera overboard. Third, plan your shooting stops around calm water or eddies rather than trying to shoot mid-rapid, and use a housing rated for the conditions — the GoPro Protective Housing on a pole mount is a common trick for capturing whitewater from a genuinely safe distance rather than holding a bare camera over moving water. Ontario Parks’ guidance for backcountry canoe tripping is a useful companion resource here, since route difficulty and portage frequency directly affect how much handling your gear will realistically survive on a given trip. Finally, golden hour on still water produces the mirror-reflection shots most canoe photographers actually want — plan your paddling schedule around light, not just distance covered, if photography is a real trip priority rather than an afterthought.
Camera Gear Canoe Camping Tips: Packing, Portaging & Overnight Storage
Packing camera gear for a multi-day canoe trip is a different problem than a single day paddle, because your case needs to survive repeated loading, portaging, and overnight storage in a tent or vestibule, not just one crossing. Start by packing your camera case last and unpacking it first at each portage, so it’s never buried under heavier gear that could crush it during a bumpy carry. Use the case’s lash points — most quality dry bags and the Pelican 1200 Protector Case include them — to secure it to a canoe thwart rather than letting it slide loose in the hull, where it can be crushed by shifting packs or knocked overboard on a sharp turn. Overnight, keep the sealed case inside your tent rather than under a canoe or in a food-storage area, since temperature swings between a hot afternoon and a cold night can cause condensation inside a case that isn’t fully desiccated. A small silica gel packet tucked into a hard case like the Pelican helps manage this moisture swing over a multi-night trip. Finally, budget extra time at each portage for gear transitions — rushing the process of resealing a dry bag or reattaching a housing lid is where most preventable water damage actually happens, not during the paddling itself. MEC’s Algonquin Park canoe trip checklist is a solid general packing reference if you’re building out a full trip list around your camera protection plan.
Real-World Scenarios: Which Camera Case Fits Your Trip?
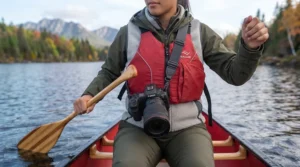
The weekend cottage paddler: if you’re taking a mirrorless camera out for a calm, two-hour paddle on a quiet lake with no rapids, the Aquapac Stormproof Camera Case or SealLine Baja 20L Dry Bag covers realistic risk without overspending — you’re mainly guarding against rain and the odd splash from a paddle stroke.
The multi-day backcountry tripper: someone spending four to seven nights in Algonquin or the Boundary Waters, carrying a DSLR across a dozen portages, should lean toward the Pelican 1200 Protector Case for crush protection or the Sea to Summit Big River Dry Bag for abrasion resistance — both are built for repeated rough handling, not just one crossing.
The whitewater action shooter: a paddler running Class II–III water who wants footage from a bow-mounted or pole-mounted angle needs the GoPro Protective Housing specifically — no soft bag can deliver mountable, operable protection at real submersion depths.
The working or semi-professional photographer: anyone carrying multiple lenses worth several thousand dollars on a guided canoe trip should budget for the Watershed Ocoee Dry Duffel with its padded liner kit — the ZipDry seal and modular interior are worth the premium when the gear inside costs more than the case itself many times over.
Common Mistakes When Buying Camera Protection for Canoeing
The single most common mistake is buying based on the word “waterproof” alone without checking the actual IP rating — a case that’s merely splash-resistant gets treated like a submersible one, right up until a capsize proves otherwise. A close second is undersizing: buyers pack a case tight enough that closing the seal properly (especially roll-top closures needing three full rolls) becomes physically difficult, which quietly compromises the seal every single time. Reviewers consistently flag a third mistake — buying a hard case for a trip that’s mostly about weight and portage distance, where a lighter dry bag would have served just as well without the extra bulk. A fourth mistake, particularly common with action cameras, is assuming the camera’s built-in water resistance is sufficient for a canoe trip’s actual conditions, then being surprised when grit or prolonged submersion causes port corrosion months later. Finally, many buyers skip securing the case to the boat entirely, treating the waterproofing as the whole solution — a sealed case that sinks to the bottom of a lake after a capsize is still a lost camera, just a dry one.
Camera Safety While Paddling: Rules, Regs & Best Practices
Canoeing in Canada falls under Transport Canada’s regulations for human-powered pleasure craft, and while camera gear itself isn’t regulated, the safety equipment you’re legally required to carry directly affects how you should plan for gear protection. Transport Canada’s guidance on operating human-powered craft confirms that a properly fitted Canadian-approved PFD is mandatory for every person aboard, and it’s worth noting that a PFD pocket or clip point is also a practical place to secure a small waterproof pouch like the Aquapac Stormproof Camera Case for constant access without ever setting the camera down in the boat itself. Beyond legal minimums, a few habits meaningfully reduce camera risk on the water: never shoot with a bare, uncased camera in a moving canoe, keep expensive gear low and centred in the hull rather than perched on a pack, and always test a new case’s seal in a sink or bathtub before its first real trip, since a manufacturing defect is far better discovered at home than mid-river. Cold-water immersion also degrades seal performance on cheaper cases over repeated seasons, so an annual seal check — inspecting for cracking, stiffness, or gaps — is worth the five minutes it takes before the paddling season starts.
Long-Term Cost & Maintenance of Waterproof Camera Gear
Sticker price only tells part of the story with camera protection, since maintenance requirements and replacement cycles vary a lot between case types. Hard cases like the Pelican 1200 Protector Case have essentially no consumable parts — the o-ring seal can last a decade with occasional silicone grease — making the higher upfront cost a genuinely long-term investment. ZipDry bags like the Watershed Ocoee Dry Duffel need periodic seal lubrication with the manufacturer’s protectant wipe to stay supple, a small recurring cost that’s easy to forget but cheap compared to the gear it protects. Roll-top dry bags such as the SealLine Baja 20L Dry Bag and Sea to Summit Big River Dry Bag are the lowest-maintenance option day to day, but their fabric and coating do degrade with UV exposure over years of seasonal use, meaning a five- to eight-year realistic lifespan for heavy users rather than a lifetime guarantee. Action cam housings like the GoPro Protective Housing need their o-ring cleaned of grit and sand after every trip near sandy shorelines, since a single trapped grain is the most common cause of seal failure on that style of case. Calculated per season of use, the premium options often work out cheaper per trip than repeatedly replacing budget gear that fails after two or three seasons of hard use — a useful reframe if the upfront price of the Watershed Ocoee Dry Duffel feels steep.
Features That Actually Matter (And Those That Don’t)
Cutting through the marketing noise: a genuine IP rating backed by an independent test standard matters far more than a manufacturer’s vague “waterproof” claim on the box — always look for the actual IPX number. Lash points and D-rings matter enormously for canoe use specifically, since a case that can’t be secured to the boat is only solving half the problem. A purge valve, found on the Pelican 1200 Protector Case, matters if you’re driving to altitude before your trip, since it prevents pressure buildup from making the case difficult to open. On the other hand, flashy accessory bundles — extra filters, mounts, or carrying straps thrown in “free” with cheaper third-party GoPro housings — rarely add real value and often signal the manufacturer is competing on bundled extras rather than seal quality. Similarly, camouflage or novelty colourways don’t affect protection at all, though a bright colour like the safety orange offered on the Watershed Ocoee Dry Duffel does have a real practical benefit: it’s easier to spot floating in dark water if it comes loose during a capsize.
Frequently Asked Questions
❓ What's the best waterproof case for a camera on a canoe trip?
❓ Is a dry bag enough to protect a camera while canoeing?
❓ Can I use a regular camera bag for canoeing?
❓ How do I keep my GoPro dry on a canoe trip?
❓ What IP rating do I need for canoe photography?
Conclusion
Protecting a camera on a canoe trip isn’t complicated once you match the case to the actual conditions you’ll paddle, rather than buying whatever’s labelled “waterproof” at the lowest price. Casual cottage paddlers can get by with something as simple as the Aquapac Stormproof Camera Case, while multi-day trippers hauling expensive glass across granite portages are better served by the crush resistance of the Pelican 1200 Protector Case or the submersible reliability of the Watershed Ocoee Dry Duffel. Action camera users chasing whitewater shots need the GoPro Protective Housing specifically — no general dry bag substitutes for a purpose-built, mountable housing rated for real depth. And for general gear storage on any trip, a well-sealed dry bag like the SealLine Baja 20L Dry Bag or Sea to Summit Big River Dry Bag remains the flexible, budget-friendly backbone that most experienced canoe photographers build their kit around. Whatever you choose, the two habits that matter most cost nothing: test the seal before you trust it on the water, and lash the case to the boat every single time, not just on the days the forecast looks rough.
Disclaimer: This article contains affiliate links. As an Amazon Associate, I earn from qualifying purchases. If you purchase products through these links, we may earn a small commission at no additional cost to you.
Recommended for You
- Waterproof Camera Bag for Kayaking: 7 Picks That Won’t Let You Down (2026)
- Waterproof Phone Pouch For Canoe Tripping: 7 Top Picks (2026)
- Waterproof Phone Case for Kayaking: 7 Top Picks for 2026
✨ Found this helpful? Share it with your friends! 💬🤗
