
In This Article
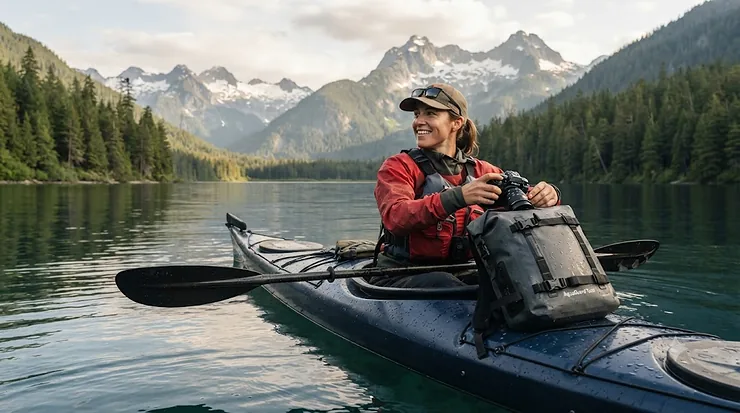
Somewhere between the put-in and the first set of riffles, every paddling photographer asks the same nervous question: what happens if I flip? A waterproof camera bag for kayaking is a sealed, submersion-rated carrier — usually a roll-top dry bag, a duffel with a welded zipper, or a hard case — built to keep cameras, lenses, and batteries bone-dry even during a full capsize. It’s not the same thing as a “water-resistant” bag, which shrugs off spray but drowns in a swim. That distinction matters more than almost anything else on this list, and we’ll come back to it constantly.
Here’s the thing nobody tells you at the outdoor shop: the right bag depends less on your camera and more on your boat, your route, and how often you actually need to reach your gear mid-paddle. A sea kayaker threading rock gardens on the Bay of Fundy has different needs than a canoeist portaging between Algonquin lakes with a DSLR bouncing around in the bow. This guide breaks down seven real, currently available options — from budget dry-bag sets under C$35 to submersible duffels north of C$200 — with honest analysis of who each one actually suits, drawn from real product specs and aggregated review sentiment rather than marketing copy. Water protection is measured using the international IP Code rating system, and understanding it is the single fastest way to stop guessing and start comparing bags on equal footing — more on that shortly.
By the end, you’ll know exactly which category of bag fits your paddling style, what “waterproof” actually guarantees versus what it merely implies, and where your money is genuinely well spent versus where you’re paying for a logo.
Quick Comparison Table: Waterproof Camera Bags for Kayaking at a Glance
| Bag | Style | Waterproof Rating | Price Range (CAD) | Best For |
|---|---|---|---|---|
| Watershed Ocoee Dry Duffel | Submersible duffel | IPx7 (full submersion) | C$180-230 | Tight kayak cockpits, whitewater |
| OverBoard Pro-Sports SLR Camera Bag 15L | Roll-top backpack-style | IPX6 (heavy submersion) | C$140-180 | All-round DSLR day trips |
| Earth Pak Waterproof Dry Bag Backpack | Backpack dry bag | IPX6 | C$60-90 | Long portages, budget multi-day |
| Pelican Marine Water-Resistant Case | Hard-shell case | IP67-IP68 (line-dependent) | C$130-170 | Impact protection, boat storage |
| DiCAPac WP-S3 Waterproof Case | Shoot-through housing | JIS IPX8 (5m depth) | C$90-120 | Shooting mirrorless mid-paddle |
| NRS Expedition DriDuffel | Heavy-duty duffel | Fully submersible, TRU Zip | C$190-250 | Multi-day river expeditions |
| HEETA 5-Pack Dry Bag Set | Multi-bag roll-top set | IPX6 (varies by size) | C$25-35 | Splitting gear across small bags |
Looking at this spread, the split really comes down to access versus armour. The Watershed Ocoee Dry Duffel and NRS Expedition DriDuffel trade quick access for bomber, fully submersible protection — ideal when your camera stays packed away between shots. The DiCAPac WP-S3 flips that entirely, letting you shoot while your gear is technically still sealed, which no duffel on this list can do. Meanwhile, the HEETA 5-Pack and Earth Pak options prove that budget-conscious paddlers don’t need to sacrifice real waterproofing, just some of the extra padding and organizational features found on pricier bags.
💬 Just one click — help others make better buying decisions too!😊
Top 7 Waterproof Camera Bags for Kayaking: Expert Analysis
1. Watershed Ocoee Dry Duffel — fully submersible duffel built for tight kayak cockpits
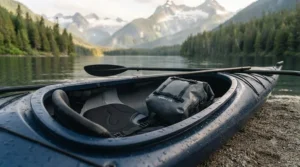
The Watershed Ocoee Dry Duffel earns its reputation from a genuinely clever design: it’s sized specifically to wedge behind a kayak seat or under a deck, somewhere most duffels simply won’t fit. That compact footprint is the whole point — it’s a 10-litre bag punching well above its size class.
What separates this from a standard roll-top is Watershed’s proprietary ZipDry seal, a welded closure that behaves more like a giant freezer-bag seam than a traditional rolled top. Combined with a rated IPx7 submersion standard, it means the bag can go fully underwater during a roll or a swim and still keep contents dry, not just “mostly dry.” Reviewers on Watershed’s own product pages and independent paddling retailers consistently describe multi-year, near-daily use without seal failure, with several noting their original bag lasted a decade before replacement.
Based on the spec comparison with lighter roll-tops, this is the bag for paddlers who prioritize total submersion confidence over frequent camera access — sea kayakers in surf zones, whitewater boaters, and anyone who’s already had a “waterproof” bag betray them once. The tradeoff is real: getting a camera in and out mid-paddle is awkward, so this suits gear that stays packed until you reach shore.
Pros:
- ✅ True IPx7 submersion rating, field-proven over years
- ✅ Compact duffel shape fits tight cockpit spaces
- ✅ ZipDry seal resists sand and grit better than roll-tops
Cons:
- ❌ Slow to open — not built for quick mid-paddle access
- ❌ No internal padding included; needs a liner for camera bodies
Priced around C$180-230 depending on size and colour, the Ocoee sits at the premium end of duffels, but for paddlers who’ve already lost gear to a failed seal once, the value case makes itself.
2. OverBoard Pro-Sports Waterproof SLR Camera Bag 15L — best all-round roll-top for DSLR kits
The OverBoard Pro-Sports Waterproof SLR Camera Bag is purpose-built rather than adapted — it’s one of the few bags on this list designed from the ground up specifically for camera gear rather than general outdoor use. The 15-litre version comfortably swallows a mid-size DSLR body with a couple of lenses attached or detached.
Its HF-welded seams and roll-top closure put it in the same IPX6 territory as most quality dry bags — reliable against splashes, heavy rain, and brief dunking, though OverBoard itself distinguishes this “quick submersion” tier from bags meant for prolonged, deep immersion. Inside, a scratch-resistant lining and elasticated pockets (two in the 15L size) do something most generic dry bags skip entirely: they actually organize gear instead of just containing it, which matters when you’re digging for a specific lens with cold fingers.
What most buyers overlook about this model is that its shoulder strap and grab handle make it double as a genuinely usable day bag once you’re off the water — not every dry bag survives the transition from “boat gear” to “everyday carry” gracefully. Paddling photographers on forums like DPReview repeatedly cite the OverBoard SLR bag as a trusted middle-ground option for sea kayaking, often mentioning it alongside camera inserts from brands like Domke for extra internal structure.
Pros:
- ✅ Purpose-built camera organization, not a repurposed dry bag
- ✅ HF-welded seams hold up against sand and salt spray
- ✅ Doubles as a comfortable carry bag off the water
Cons:
- ❌ IPX6, not full submersion — avoid deep or prolonged dunking
- ❌ 15L size is snug for full-frame bodies with large zoom lenses
Expect to pay in the C$140-180 range for the 15L version, with the smaller 7L model running lower — a fair mid-tier price for a bag that doesn’t force you to choose between protection and usability.
3. Earth Pak Waterproof Dry Bag Backpack — best budget backpack for long portages
Where the Ocoee and OverBoard bags focus on the water itself, the Earth Pak Waterproof Dry Bag Backpack is built for what happens between put-ins — the actual carrying. Available in multiple sizes up to 35L and 55L, it’s aimed at paddlers who need to haul a full kit (body, several lenses, tripod, personal gear) across portages, not just protect it while afloat.
The IPX6-rated roll-top construction is standard dry-bag territory, but the ergonomic padded backpanel, contoured shoulder straps, and sternum strap are where this bag actually differentiates itself. Aggregated reviewer feedback consistently praises the carry comfort on longer hauls compared to standard dry bags, which tend to become genuinely painful once loaded past 20 pounds — a detail spec sheets rarely mention but your shoulders will.
Here’s what to weigh: this is a pure dry bag, meaning there’s no internal padding for camera bodies out of the box. Photographers carrying it typically add a padded camera cube or wrap gear in a towel, a trick borrowed from expedition paddlers long before purpose-built camera dry bags existed. For anyone doing multi-lake canoe routes where the bag spends as much time on your back as in the boat, that portage comfort is arguably more valuable than a few extra millilitres of waterproof certainty.
Pros:
- ✅ Genuinely comfortable for long portages, unlike most dry bags
- ✅ Multiple size options scale from day trips to expeditions
- ✅ Roomy enough for a full DSLR kit plus personal gear
Cons:
- ❌ No built-in camera padding — needs an insert or wrap
- ❌ Standard backpack straps, not a heavy-duty rated harness
Sitting around C$60-90, the Earth Pak backpack is one of the more budget-friendly entries here relative to its capacity, which explains why it shows up so often in “best for kayaking photography” roundups aimed at newer paddlers.
4. Pelican Marine Water-Resistant Case — toughest hard-shell impact protection
Every bag on this list so far is soft-sided, which means every one of them protects against water but does very little against a hard knock — a dropped paddle, a gear pile shifting in rough water, a boat scraping a rock. The Pelican Marine Water-Resistant Case line solves a different problem entirely: crush and impact protection with water sealing layered on top, not the other way around.
Built from polymer with a gasketed seal and rated in the IP67-IP68 range depending on the specific model, these cases use customizable foam inserts, which is the real differentiator. You’re not wrapping a camera in a towel and hoping — you’re cutting foam to the exact shape of your body and lenses, which matters enormously if your kit includes anything fragile or oddly shaped like a long telephoto.
Based on the spec comparison with soft dry bags, the tradeoff is obvious: hard cases are heavier, bulkier, and far less packable in a loaded kayak’s limited hatch space. Reviewers frequently note this exact limitation for kayak fishing and touring use, where every litre of hatch volume counts. What most buyers overlook is that hard cases genuinely excel for shore storage and vehicle transport, not necessarily for the on-water leg of the trip — many paddlers actually pair a hard case for the car and trailhead with a soft dry bag for the boat itself.
Pros:
- ✅ Genuine impact and crush protection, not just water sealing
- ✅ Customizable foam inserts fit gear precisely
- ✅ IP67/IP68-rated sealing depending on model
Cons:
- ❌ Bulky and rigid — eats hatch space in smaller kayaks
- ❌ Heavier than any soft dry bag of equivalent capacity
Pricing runs roughly C$130-170 depending on size, putting it mid-pack — reasonable for buyers who value crush protection as much as waterproofing and don’t mind the added bulk.
5. DiCAPac WP-S3 Waterproof Case — best for shooting mirrorless gear mid-paddle
Every bag so far assumes your camera stays sealed away until you reach shore. The DiCAPac WP-S3 Waterproof Case breaks that pattern completely — it’s a soft-sided, shoot-through housing that lets you operate camera controls, zoom, and shutter release while the camera stays inside the sealed bag. For a mirrorless waterproof bag built around actually shooting on the water, rather than just surviving it, this is close to the only game in town at this price point.
Rated to JIS IPX8 (roughly 5 metres depth) and built from PVC, TPU, ABS, and silicone with a rolled touch-fastener seal, it’s genuinely rated for accidental submersion, not just splashes. The polycarbonate lens port accommodates lenses up to 65mm in diameter and 68mm in length — a real constraint worth checking against your specific mirrorless lens before buying, since larger zooms simply won’t fit through the port. It’s compatible with a wide range of compact mirrorless bodies from Sony, Fujifilm, Olympus, Panasonic, and Canon’s EOS M line, though full-frame bodies with larger lenses will need the DSLR-sized DiCAPac variant instead.
Independent long-term reviews describe the WP-S3 and its DSLR sibling surviving repeated ocean kayaking and whitewater use over multiple seasons without leaks, with users specifically praising the ability to keep shooting through building weather instead of packing the camera away at the first splash. The honest caveat: image quality through the plastic port is measurably softer than shooting bare, and reviewers note a mild risk of internal fogging on hot days if the camera runs warm for extended periods.
Pros:
- ✅ Shoot through the housing without unsealing the bag
- ✅ JIS IPX8-rated to roughly 5 metres of submersion
- ✅ Floats if dropped, thanks to sealed-air construction
Cons:
- ❌ Lens port limited to 65mm diameter, 68mm length
- ❌ Slight image softness and fogging risk versus bare shooting
At around C$90-120, the WP-S3 slots into the mid-budget tier, and for photographers who genuinely want to shoot while paddling rather than stop and unpack, it’s arguably the most functionally unique bag on this entire list.

6. NRS Expedition DriDuffel — heaviest-duty duffel for multi-day river trips
Built for the kind of trips where gear failure isn’t an inconvenience but a real problem, the NRS Expedition DriDuffel is a fully submersible, expedition-grade duffel available in sizes from 12L up to 105L. For photographers packing not just a camera but supporting gear for a multi-day river trip, the wide-mouth access and burly build quality explain why this bag shows up repeatedly in professional paddling-media gear guides.
The waterproof TRU Zip zipper and heavy-duty TPU-coated nylon construction give it a genuinely different feel from lighter roll-tops — this is a bag meant to be dragged over rocks and lashed to a raft frame for a week straight, not babied. Integrated webbing chains provide multiple lash-down points, while the shoulder strap and dual haul handles mean it can be carried like a duffel or worn like a pack depending on the portage. Paddling Magazine’s own editorial team has specifically called out NRS’s DriDuffel line for expedition river use, citing its easy-access wide mouth as a meaningful advantage over narrow roll-top openings when digging for gear at camp.
What the spec sheet won’t tell you, but experienced river guides note, is that the TRU Zip system — while faster to open than a roll-top — needs occasional lubrication and careful cleaning to keep grit from compromising the seal over a multi-week season. For a single weekend trip, that’s a non-issue; for a professional guide running dozens of trips a year, it’s routine maintenance.
Pros:
- ✅ Wide-mouth zipper access beats roll-tops for digging through gear
- ✅ Expedition-grade TPU-coated nylon survives rough handling
- ✅ Multiple lash points for secure raft or kayak deck attachment
Cons:
- ❌ TRU Zip needs periodic lubrication to maintain the seal
- ❌ Larger sizes are overkill and pricier than most solo kayakers need
Expect to pay roughly C$190-250 for a mid-size Expedition DriDuffel, making it one of the pricier entries here — justified mainly for multi-day trips rather than casual day paddles.
7. HEETA 5-Pack Dry Bag Set — smartest budget system for splitting up gear
Not every camera kit needs one big bag — sometimes the smarter move is several small ones. The HEETA 5-Pack Dry Bag Set takes that approach literally, bundling multiple roll-top dry bags of varying sizes into a single budget-friendly package, letting you separate camera bodies, lenses, batteries, and cables into their own sealed compartments.
This matters more than it sounds: dense, fragile gear like lens glass shouldn’t be jostling against a camera body in transit, and splitting kit across several small bags means losing one bag overboard doesn’t mean losing everything. Each bag in the set carries an IPX6-style roll-top rating suitable for splash and brief-submersion protection, appropriate for calm-water kayaking and canoeing rather than whitewater or open-ocean surf conditions.
Reviewers consistently point to the value proposition here — getting five functional dry bags for the price of one mid-tier single bag — as the main appeal, particularly for beginner paddling photographers building a kit without committing to expensive gear before they know how often they’ll actually use it. The honest tradeoff is durability: thinner material and simpler seals than premium single-bag options mean this set suits occasional use better than daily guiding work.
Pros:
- ✅ Multiple bags let you separate and protect individual items
- ✅ Excellent value — five bags for roughly one mid-tier bag’s price
- ✅ Lightweight and packable for minimalist kayak setups
Cons:
- ❌ Thinner material than premium single-bag options
- ❌ Not rated for prolonged submersion or whitewater conditions
At around C$25-35 for the full set, this is the most accessible entry point on the list — a smart starting point for anyone unsure how serious their kayaking photography habit is about to become.
Top 7 Products: Full Spec Comparison
| Bag | Approx. Capacity | Closure Type | Access Speed | Price Range (CAD) | Best For |
|---|---|---|---|---|---|
| Watershed Ocoee Dry Duffel | 10L | ZipDry weld | Slow | C$180-230 | Submersion confidence |
| OverBoard Pro-Sports 15L | 7L / 15L | Roll-top | Moderate | C$140-180 | Balanced DSLR use |
| Earth Pak Backpack | 20L-55L | Roll-top | Moderate | C$60-90 | Portage comfort |
| Pelican Marine Case | Varies by model | Hard-shell latch | Moderate | C$130-170 | Impact protection |
| DiCAPac WP-S3 | Single-body | Touch-fastener | Fast (shoot-through) | C$90-120 | Mirrorless shooting |
| NRS Expedition DriDuffel | 12L-105L | TRU Zip | Fast | C$190-250 | Multi-day expeditions |
| HEETA 5-Pack | Varies (set) | Roll-top | Moderate | C$25-35 | Budget, split storage |
Interpreting this table, capacity and access speed pull in opposite directions almost every time: the fastest-access options (DiCAPac WP-S3, NRS Expedition DriDuffel) sacrifice either lens compatibility or portability, while the slowest bag on the list (Watershed Ocoee Dry Duffel) offers the deepest submersion confidence. If your paddling involves frequent stops to shoot, weight access speed heavily; if your camera mostly rides packed away until you reach a scenic overlook, prioritize the submersion rating instead.
Photography Kayak Gear Setup: A Practical Usage Guide
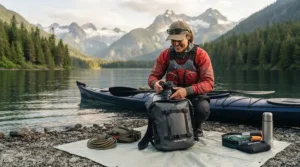
Getting a new waterproof camera bag for kayaking right on day one saves you from the sinking feeling of discovering a leak mid-trip. Start by testing the seal at home, in a sink or bathtub, before your gear ever touches a lake — wrap a towel in place of your camera, submerge the sealed bag for two full minutes, and check for any dampness. This single step catches manufacturing defects that would otherwise surface at the worst possible moment.
Roll-top bags need at least three full, tight rolls before clipping the buckle — two rolls is the most common mistake new paddlers make, and it’s the difference between a genuinely sealed bag and one that merely looks sealed. For zippered closures like TRU Zip or ZipDry, keep the track clean; sand and grit are the leading cause of premature seal failure, so a quick rinse and wipe-down after every beach or riverbank landing pays off over a season.
Once on the water, always secure the bag to a deck line or thwart with a leash — a genuinely waterproof bag still floats away in current if it isn’t tethered, and a lost bag is functionally the same as a flooded one. For maintenance, most manufacturers recommend an occasional application of a silicone-based protectant like 303 Aerospace Protectant on zippered and rolled seals to prevent the material from drying out and cracking, particularly after saltwater exposure. Photography kayak gear that gets this basic care routinely outlasts its official warranty period by years, according to aggregated long-term owner feedback across paddling forums.
Real Paddler Scenarios: Matching Bags to Trips
The weekend canoe tripper: Picture a photographer heading out for a two-day canoe route through a provincial park, camera gear limited to one DSLR body and two lenses, with portages between lakes. A dry bag for a DSLR canoe trip like this benefits most from carry comfort over pure submersion rating, since capsizes are less likely than on open water but portaging distance is real — the Earth Pak Waterproof Dry Bag Backpack fits this profile well, and its padded straps matter more here than an extra IP rating point.
The sea kayaker in exposed water: Now picture someone paddling coastal waters with real surf and current, camera packed away except at rest stops. Submersion risk here isn’t hypothetical — it’s a matter of when, not if. The Watershed Ocoee Dry Duffel or a hard-shell option like the Pelican Marine Water-Resistant Case for base-camp storage makes more sense, prioritizing total sealing over quick access.
The action shooter chasing wildlife on a calm river: For a paddler drifting a slow, calm river hoping to catch birds or wildlife without stopping to unpack gear, waiting to unseal a duffel means missing the shot entirely. This is exactly the scenario the DiCAPac WP-S3 solves — shoot-through access while the housing stays sealed, trading a bit of image sharpness for the ability to react instantly. Anyone chasing that specific balance of readiness and protection has landed on the actual use case this bag was designed to solve, and it’s worth reading a floating camera dry bag review or two from paddling photographers before committing, since fit varies meaningfully by camera model.
Your Quick Decision Framework: Choosing by Situation
If you paddle calm lakes and rarely capsize, choose a mid-tier roll-top like the OverBoard Pro-Sports SLR Camera Bag because the moderate IPX6 rating covers realistic risk without paying for expedition-grade sealing you won’t use.
If you paddle whitewater, surf, or anything with a real chance of a full roll, choose a fully submersible duffel like the Watershed Ocoee or NRS Expedition DriDuffel because a partial-submersion bag simply isn’t rated for your actual conditions.
If your budget is under C$50 and you’re testing whether kayak photography is a habit worth investing in, choose the HEETA 5-Pack because splitting gear across several inexpensive bags limits your downside while you figure out your real needs.
If you want to shoot continuously without repacking, choose the DiCAPac WP-S3 because it’s the only option here built around active shooting rather than passive storage.
If crush protection matters as much as water — think airline travel to a remote put-in, or gear riding in a vehicle before the trip even starts — choose the Pelican Marine Water-Resistant Case because soft dry bags offer essentially zero impact protection against drops or crushing.
How to Choose a Waterproof Camera Bag for Kayaking
Picking the right bag comes down to seven concrete criteria, each worth weighing before you check out:
- Match the IP or waterproof rating to your actual water conditions — calm lakes need less than surf or whitewater, and over-buying submersion protection just adds weight and cost.
- Check lens and body compatibility before buying, especially for shoot-through housings like the DiCAPac line, where port diameter is a hard physical limit, not a suggestion.
- Weigh access speed against protection level — bags that open fast tend to seal less completely, and vice versa; be honest about how often you actually need mid-paddle access.
- Consider carry comfort for portages, not just water protection, since a bag that’s miserable to carry gets left behind on the trips where you need it most.
- Factor in impact protection separately from water protection — a hard-shell case and a soft dry bag solve genuinely different problems, and serious kit sometimes needs both.
- Read aggregated review sentiment, not star ratings alone, since a 4.5-star average can hide a recurring seal failure that only shows up in the written reviews.
- Budget for maintenance products like seal protectant, since even premium bags degrade faster without basic upkeep — a detail Paddle Canada’s own paddling safety guidance implicitly reinforces by treating gear checks as a standard part of trip preparation, not an afterthought.
Common Mistakes When Buying a Waterproof Camera Bag for Kayaking
The single most common error is confusing “water-resistant” with “waterproof” — the two terms aren’t interchangeable, but marketing copy often blurs the line deliberately. Water-resistant gear handles rain and light spray; only a submersion-rated bag survives an actual capsize, and if your paddling includes any real risk of flipping, that distinction should drive your entire purchase decision.
A second frequent mistake is buying based on capacity alone without checking access style. A paddler who needs quick camera access every ten minutes will be miserable with a roll-top duffel, regardless of how well it seals — the mismatch between use case and closure type causes more buyer regret than any spec on a page. Third, many first-time buyers skip the at-home sink test entirely, only discovering a manufacturing defect on the water, when it’s far too late to do anything but watch gear get wet.
Finally, plenty of paddlers underestimate portage distance and end up with a bag that seals perfectly but destroys their shoulders over a multi-lake route — carry comfort genuinely deserves equal weight to waterproofing in the decision, not an afterthought bolted on at the end.
Waterproof Camera Bag vs Underwater Camera Housing
These two categories solve overlapping but distinct problems, and conflating them leads to disappointment either way. A waterproof camera bag — soft dry bag, duffel, or shoot-through case — keeps a camera dry while it’s stored or, in the DiCAPac’s case, lightly operable through a sealed port. An underwater camera housing, by contrast, is a rigid, pressure-tested enclosure designed for actual underwater photography, built to specific depth ratings well beyond what any kayaking accident would produce.
| Factor | Waterproof Camera Bag | Underwater Camera Housing |
|---|---|---|
| Primary purpose | Protect gear from splashes/submersion | Enable active underwater shooting |
| Typical depth rating | 1-5 metres (accident scenario) | 10-60+ metres (intentional diving) |
| Price range (CAD) | C$25-250 | C$300-2,000+ |
| Best For | Kayaking, canoeing, paddling day trips | Scuba, snorkeling, dedicated water photography |
For kayaking specifically, a bag is almost always the right call, and buying full underwater housing is significant overkill unless you’re also planning to dive or snorkel with the same camera. Reviewers and forum-based paddling photographers consistently reach the same conclusion: housing-grade depth ratings solve a problem kayakers rarely have, while adding weight, bulk, and cost that don’t translate into meaningfully better protection for an on-deck accident.
Floating Camera Dry Bag Review: What Real Users Report
Across aggregated reviews on retailer sites and paddling forums, a consistent pattern emerges for floating camera dry bags: buyers overwhelmingly praise brightly coloured, sealed-air bags for one specific reason that has nothing to do with waterproofing directly — visibility after an accidental drop. Neon yellow and orange bags that float are repeatedly credited with being spotted and recovered after floating away during a capsize, a scenario that happens more often than most paddlers expect.
The technical basis for floating is straightforward: a properly sealed dry bag traps air, and that trapped air provides buoyancy regardless of brand. What differs between bags is how reliably that seal holds under stress. Reviewers of budget options like the HEETA and Unigear-style bags note that floating performance is genuinely solid even at lower price points, since buoyancy depends more on seal integrity than material thickness. A recurring critique across floating camera dry bag review threads, however, is that clip and strap hardware — not the main seal — tends to be the first failure point after months of heavy use, which is worth checking before every trip regardless of how new the bag is.
Camera Protection Paddling: Where Bags Actually Fail
Camera protection paddling failures rarely come from the main seal itself — they come from the details around it. Aggregated review data points to three recurring failure modes: incomplete roll-top closures (too few rolls, or rolling on a diagonal instead of straight), grit in zipper tracks compromising an otherwise sound seal, and worn clip hardware giving way under the strain of a loaded bag in current.
A camera dry case paddling in genuinely rough conditions — surf landings, whitewater rapids, or long crossings in wind chop — faces cumulative stress that calm-lake paddling simply doesn’t produce, which is exactly why matching your bag’s rating to your actual conditions (not your aspirational conditions) matters so much. Parks Canada’s own paddling safety guidance for coastal and remote routes, including its Gwaii Haanas kayaking gear checklist, treats properly sealed, secured gear as a baseline safety expectation for exposed-water trips, not an optional upgrade — a framing worth borrowing even for casual weekend paddlers.
The practical fix across all three failure modes is the same: inspect before every trip, not just when the bag is new. A thirty-second check of rolls, zippers, and clips catches the overwhelming majority of preventable failures before they become an expensive lesson.
Long-Term Cost & Maintenance
Total cost of ownership for a waterproof camera bag extends well past the sticker price, and it’s worth running the numbers before assuming the cheapest bag is actually the cheapest option. A C$30 budget dry bag with a two-year realistic lifespan before seal degradation works out to roughly C$15 per year of protection. A C$200 expedition-grade duffel with a proven decade-plus lifespan, by contrast, can work out to under C$20 per year — genuinely comparable, once amortized, despite the dramatically different upfront cost.
Maintenance costs are modest across the board: a bottle of seal protectant runs a small fraction of any bag’s price and, applied a few times per season, meaningfully extends seal life on both budget and premium bags alike. The real cost differential shows up not in maintenance but in replacement frequency and, more importantly, in the value of the gear actually being protected — a bag failure protecting a C$3,000 mirrorless kit carries a very different risk calculus than one protecting a phone and car keys, and that risk should scale your bag budget accordingly, not the other way around.
Safety, IP Ratings & Regulations for Canadian Paddlers
Water protection claims are only meaningful when tied to a recognized standard, and the IP Code system is the one worth actually understanding. The second digit in a rating like IPX6 or IPX8 measures water resistance specifically — a 6 means protection against powerful water jets, while an 8 means protection against continuous submersion beyond one metre, with exact depth and duration varying by manufacturer testing. Bags marketed simply as “waterproof” without a stated rating are worth treating with the same skepticism as food labelled “natural” — it’s a claim, not a certification.
Beyond the bag itself, Canadian paddlers operating kayaks and canoes fall under Transport Canada’s Small Vessel Regulations, which classify these as human-powered pleasure craft with specific required safety equipment, separate entirely from camera gear considerations. Transport Canada’s own guidance on operating a human-powered craft outlines required safety gear and awareness points — water temperature, currents, and visibility among them — that shape the real-world conditions your camera bag also needs to survive. A bag rated for calm-lake splash protection simply isn’t matched to the conditions Transport Canada’s own safety guidance describes for open-water or sea kayaking routes, which is exactly why matching bag rating to trip type isn’t just a comfort decision — it’s a practical extension of the same risk assessment paddlers are already expected to make for personal safety equipment.
Frequently Asked Questions
❓ Is a dry bag the same as a waterproof camera bag?
❓ What IP rating do I need for kayaking?
❓ Can I use a regular dry bag for my DSLR?
❓ Do waterproof camera bags let you shoot while sealed?
❓ How much should I budget for a waterproof camera bag for kayaking?
Conclusion
There’s no single best waterproof camera bag for kayaking — there’s only the best bag for your specific water, your specific kit, and how often you actually need to reach your camera mid-paddle. Calm-lake paddlers chasing casual shots are well served by a mid-tier roll-top or even a budget multi-bag set, while anyone facing real surf, whitewater, or open-water conditions should weight submersion rating far more heavily than price or organizational features.
What ties every recommendation on this list together is a simple principle: match the bag’s actual, tested rating to your actual conditions, not to your best-case assumptions about the day. A capsize doesn’t check the weather forecast first, and neither should your gear choice. Whether you land on the submersion-proof confidence of the Watershed Ocoee Dry Duffel, the shoot-ready flexibility of the DiCAPac WP-S3, or the budget-smart approach of the HEETA 5-Pack, the right choice is the one rated for the water you’re actually going to paddle, not the water you’re hoping for.
✨ Don’t Miss These Exclusive Deals!
🔍 Take your kayaking photography setup to the next level with these carefully selected waterproof bags. Click on any highlighted item to check current pricing and availability. These picks will help you capture authentic paddling memories your future self will thank you for protecting!
Recommended for You
- Waterproof Phone Pouch For Canoe Tripping: 7 Top Picks (2026)
- Waterproof Phone Case for Kayaking: 7 Top Picks for 2026
- How to Pack a Canoe Barrel for a Portage Trip: 7 Genius Tips (2026)
Disclaimer: This article contains affiliate links. As an Amazon Associate, I earn from qualifying purchases. If you purchase products through these links, we may earn a small commission at no additional cost to you.
✨ Found this helpful? Share it with your friends! 💬🤗
