
In This Article
What is a bug tarp shelter for canoe camping? It is a rain-shedding tarp paired with, or built into, fine no-see-um mesh walls. It gives paddlers a dry, insect-free room at camp. It packs smaller than a screen house, weighs far less than a tent, and works around food, fire and wet gear.
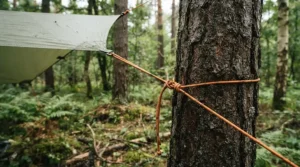
Picture the scene. You’ve paddled eight hours, portaged twice, and made camp just as the black flies clock in for their evening shift. Dinner becomes a sprint. Rain arrives. Somebody is slapping their own neck in the dark. A good shelter ends that movie.
Timing matters here. According to Ontario Parks’ guide to camping with bugs, black flies are mostly a May and June problem. Mosquitoes run from June through September, and deer flies and horse flies show up in July and August. In other words, a bug tarp shelter for canoe camping earns its place in nearly every paddling month.
This guide ranks seven real options, from a budget tarp to a premium mesh system. It then covers how to pitch, pair and portage them. Based on the spec comparison and the review sentiment below, you’ll know what to buy and why. Prices are ranges in CAD, and availability on amazon.ca changes by season and seller, so check current listings.
Quick Comparison: 7 Bug Tarp Options at a Glance
| Product | Type | Approx. weight | Best For |
|---|---|---|---|
| Eureka NoBugZone T11 | Tarp with built-in mesh | ~2.2 kg | Pairs and small groups |
| Eureka NoBugZone T13 | Tarp with built-in mesh | ~2.6 kg | Groups of 3-4 |
| NEMO Bugout | Tarp with drop-down mesh | ~2.2 kg (9×9) to ~3.2 kg (12×12) | Group cooking and rainy trips |
| Kelty Noah’s Tarp 12 | Open tarp (add netting) | ~1.2 kg | Budget builders |
| Sea to Summit Escapist Tarp | Ultralight tarp plus optional mesh | ~0.3 kg (tarp only) | Weight-obsessed soloists |
| MSR Front Range Tarp Shelter | Floorless pyramid plus optional insert | ~0.74 kg + ~0.88 kg | Small-group base camps |
| ENO DoubleNest with ENO Guardian Bug Net | Hammock plus net | Net ~0.43 kg | Hammock sleepers |
The weight spread is wild: roughly 0.3 kg to 3.2 kg. The Eureka NoBugZone T11 and NEMO Bugout are the true “one-piece” answers. The Kelty Noah’s Tarp 12 and Sea to Summit Escapist Tarp are building blocks that need netting to qualify. Canoe campers can afford extra kilograms on the water, but every one of them rides on your shoulders at the portage.
💬 Just one click — help others make better buying decisions too!😊
Top 7 Bug Tarp Shelter for Canoe Camping Picks: Expert Analysis
1. Eureka NoBugZone T11 — best all-round bug room for two paddlers
The standout here is the all-in-one design: a rain roof with no-see-um mesh walls and zippered doors, no clips to lose. It is a smaller, lighter sibling of the original NoBugZone 13, which retailers pitch squarely at canoe trippers.
The footprint is roughly 2.3 m square with a peak near 2 m. That is enough for two or three people to sit upright, cook and swat nothing. Weight sits around 2.2 kg, so it counts as a lightweight tarp shelter for canoe trips only if “lightweight” is relative to a tent. Poles are sold separately. Plan on trees, paddles or trekking poles to hold it up.
On paper this means camp life moves indoors, bugs stay out, and a light shower won’t send you running. Outdoor writer Kevin Callan has long championed the NoBugZone idea as a rain tarp with fine mesh around the walls. Reviewers on Canadian retailer pages describe the weight as well worth carrying in a canoe, though the review pool is small.
Pros:
- ✅ Tarp and mesh in a single piece
- ✅ Two doors for easy in and out
- ✅ Sized sensibly for two to three people
Cons:
- ❌ Needs trees or poles for the pitch
- ❌ No built-in floor against ground-level crawlers
Price range: roughly C$150-C$200 at Canadian retailers. Good value for a combined tarp and bug net shelter.
2. Eureka NoBugZone T13 — best when the whole crew wants in
Same concept, bigger room. The T13 is built for larger groups, or anyone who values elbow space over saving every gram.
Retail specs list a footprint of about 2.7 m square, a tall interior peak, and weight near 2.6 kg. Extra height matters more than it sounds. Taller paddlers can stand and cook without the hunch that wrecks a back after day three. Retailers also note extra reinforced tarp tie-offs and multiple zipper sliders per door, which allow use with a hammock when tied off to trees.
Here’s what the spec sheet won’t say plainly: the extra 400 grams over the Eureka NoBugZone T11 is cheap insurance for a group of four. Four adults in a smaller shelter get very friendly, very fast. Reviewers of the NoBugZone line consistently praise the setup simplicity, though the model-specific review volume is thin.
Pros:
- ✅ Roomy enough for three to four people
- ✅ Tall interior for standing or cooking
- ✅ Hammock-friendly zipper and tie-off design
Cons:
- ❌ Heavier and bulkier on portages
- ❌ Poles sold separately
Price range: about C$200-C$250. Worth it if headcount is the priority.
3. NEMO Bugout — best mesh-down system for rainy group trips
The standout is the roll-up mesh: a proper tarp with no-see-um walls that drop when bugs arrive and tie back when the breeze wins. Guide Jason Zabokrtsky, writing for GearJunkie, reported living under it through daily rain on a Boundary Waters trip.
The 9×9 size packs around 2.2 kg, and the 12×12 reaches about 3.2 kg, sized to cover a picnic table. The roof is 75D polyester rated to 1500 mm, with 15D mesh walls. That rating means steady rain is a non-event, while the mesh lets you convert from fortress to open tarp in minutes.
It suits groups of three or more who cook together. It is overkill for a solo trip. Reviewers do flag weak spots: some report corner and grommet areas tearing under strain, especially when guyed to poles, and many call it expensive. Spread tension across the guy points rather than hauling on two corners.
Pros:
- ✅ Mesh stows away when bugs are quiet
- ✅ Waterproof roof handles prolonged rain
- ✅ Big 12×12 size covers a whole cook zone
Cons:
- ❌ Corner stress failures reported by some buyers
- ❌ Premium price and noticeable weight
Price range: roughly C$250-C$400 depending on size. Check current price; strong for groups, harder to justify solo.
4. Kelty Noah’s Tarp 12 — best budget foundation for a DIY bug setup
This is a plain tarp, and that’s the point. At 12 by 12 feet (about 3.7 m square), it has 68D polyester, fully taped seams and a generous number of guy-out points for varied pitching.
Packaged weight is about 1.2 kg. Pair it with a separate net, like a mosquito pyramid, and you’ve built a combined tarp and bug net shelter on a budget. Mountains-focused reviewers call it versatile, easy to use and fairly priced. One buyer found the 12 oversized for a single hammock, and another noted the supplied guy lines didn’t match the advertised lengths.
My read of the spec: the 800 mm coating is fine for typical canoe-trip showers but isn’t stormproof beside the 1500 mm Bugout. Pitch it low and steep in heavy weather.
Pros:
- ✅ Roomy and versatile across many configurations
- ✅ Taped seams at a low price
- ✅ Light enough for easy portaging
Cons:
- ❌ No bug protection until you add netting
- ❌ Hydrostatic rating is modest for sustained downpours
Price range: roughly C$100-C$150. Best entry point for the build-your-own route.
5. Sea to Summit Escapist Tarp — best ultralight option for solo trippers
The headline is the weight: the medium tarp is around 270-300 g in 15D Ultra-Sil Nano, with eight reinforced tie-outs and cord-lock adjusters you can reach from under the tarp.
That fabric is rated about 1200 mm and seam-sealed. It will keep a solo paddler dry while barely registering in a pack. Sea to Summit also sells a mesh bug shelter that attaches to the tarp. Retailers say it’s optimized for the Large size, and the company’s pyramid-style Nano nets don’t suspend from it.
For portage-heavy routes this is the lightest serious rain cover here. The trade-off is cost and fragility: ultralight nylon demands careful site selection, and the tarp-plus-mesh pair adds up quickly. One retail reviewer rated it five stars for versatility in varied environments.
Pros:
- ✅ Remarkably low weight and tiny pack size
- ✅ Adjustable tie-outs reachable from beneath
- ✅ Optional matching mesh for bug season
Cons:
- ❌ Expensive once the mesh is added
- ❌ Thin fabric needs gentle handling
Price range: around C$250-C$300 for the tarp alone. Premium, but unmatched on grams.
6. MSR Front Range Tarp Shelter — best premium floorless base camp
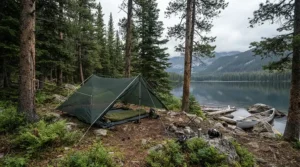
This one stands out for being a floorless pyramid that sleeps up to four. It is frameless, with a roughly 2.7 m footprint and a 1.6 m peak.
The tarp weighs about 0.74 kg. The optional Bug/Floor Insert adds about 0.88 kg for a micromesh body and a bathtub floor. Together they total about 1.6 kg, a lot of coverage for the weight. The pyramid shape sheds wind well, and it can be set up with trekking poles.
Trailspace’s reviewer found site selection matters and noted possible drafts and condensation in a single-wall design. They also found pitching easier after setting up the insert. Retail ratings on the insert are strong, though from small review counts.
For canoe camping this makes a superb two-person base camp. It is better suited to shoulder season than to a sweltering July evening.
Pros:
- ✅ Big living space for the weight
- ✅ Insert adds full bug and floor protection
- ✅ Pyramid shape handles wind well
Cons:
- ❌ Costly once tarp and insert are combined
- ❌ Condensation and drafts possible in single-wall form
Price range: each piece roughly C$350-C$500 at full retail. Premium value for small groups.
7. ENO DoubleNest with ENO Guardian Bug Net — best for hammock sleepers
The hook is the 360-degree mesh cocoon: the ENO Guardian Bug Net slips over any ENO hammock, and the ENO DoubleNest supports up to 400 lb. The net weighs about 425 g and measures roughly 2.8 m by 1.3 m, built from SkyWeave mesh and ripstop nylon.
Pair the hammock with a tarp like the Kelty Noah’s Tarp 12, and you’ve got a sleeping system lighter than most tents. OutdoorGearLab’s reviewer found the netting kept insects out and was spacious, though it obscures the view, hangs lower than necessary and adds bulk. Retail reviewers give it roughly 4.6 stars from a modest sample.
This only works where you have sturdy trees. That’s common across much of Canadian canoe country, but not on rocky islands.
Pros:
- ✅ Light, packable sleep system
- ✅ Integrated ridgeline and no-knot setup
- ✅ Strong user sentiment on bug-proofing
Cons:
- ❌ Needs two good anchor trees
- ❌ Net blocks the star view
Price range: net roughly C$80-C$110, hammock extra. Check current price; excellent for weight-conscious sleepers.
How to Choose a Bug Tarp Shelter for Canoe Camping
Choosing well comes down to six decisions. Work through them in order.
- Decide your group size. Two paddlers need around 2.3 m of floor. Four need around 2.7 m or more, which points to the Eureka NoBugZone T13 or NEMO Bugout.
- Set a carry-weight ceiling. Anything above 3 kg gets heavy on a long portage. Solo trippers can stay under 1 kg.
- Check the mesh. Insist on no-see-um mesh. The Canadian Encyclopedia notes that at least 164 black fly species live in Canada, and tiny biters slip through coarse netting.
- Match the waterproof rating to your region. Coastal or shoulder-season trips deserve roughly 1500 mm. Summer showers tolerate less.
- Confirm your anchor options. Many shelters need trees or poles. Open shorelines call for pyramids.
- Think about versatility. Mesh that stows away makes the shelter usable year-round.
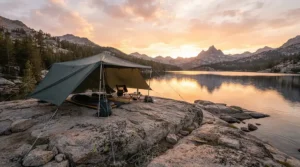
Combined Tarp and Bug Net Shelter vs Separate Pieces
A combined tarp and bug net shelter, like the Eureka NoBugZone T11 or NEMO Bugout, is simple. One item, one pitch. The cost is weight and a fixed shape.
A modular approach, such as a Kelty Noah’s Tarp 12 plus a separate net, offers flexibility. You can ditch the netting when bugs fade. But you manage two pieces, and gaps appear where they meet. A mosquito at the join defeats the whole point.
| Setup | Bug protection | Rain protection | Weight | Best For |
|---|---|---|---|---|
| Tent alone | Excellent for sleeping | Excellent | Heavy | Solo sleepers who only need a bedroom |
| Combined tarp and bug net shelter | Excellent, plus daytime living space | Good to excellent | Moderate | Eureka NoBugZone T11 users and group cooks |
| Open tarp with head net only | Poor for sustained bugs | Good | Light | Late-season trips |
| Hammock with net and tarp | Excellent | Good | Light | ENO DoubleNest sleepers |
The table above shows the core tension: living space versus weight. If you want a daytime refuge with no bugs, a combined system wins. If you only sleep outdoors, the lightest setup does the job.
Lightweight Tarp Shelter for Canoe Trips and Portage Weight Considerations
A canoe forgives weight. Your shoulders do not. Portage weight considerations start with a plain rule: the heaviest item you can’t split into two packs becomes your bottleneck. A 3.2 kg NEMO Bugout in a 12×12 is easy on the water but unpleasant over a long carry.
A true lightweight tarp shelter for canoe trips usually means a separate net and tarp, such as the Sea to Summit Escapist Tarp at about 0.3 kg. Compare it to the Eureka NoBugZone T13 at about 2.6 kg. That gap is more than two litres of water.
Three tactics help. Split the shelter among paddlers so no one carries all of it. Choose the smallest footprint that fits your crew. And skip poles when trees or paddles will do, which saves roughly 500 g.
Rain and Mosquito Tarp Setup for Backcountry: Step by Step
A reliable rain and mosquito tarp setup for backcountry camping follows a simple order. Start with the site, because everything else depends on it.
- Pick the site. Camp on a durable surface, away from still water and thick brush, where bugs congregate. Ontario Parks recommends this too.
- Pitch the high point first. Tie off to trees or poles, with the back edge toward the wind.
- Stake the corners low. Gaps at the ground let bugs crawl in.
- Set the netting. Drop the mesh and anchor the loops to the ground before dusk, not after.
- Check the seams. A single gap turns a shelter into a mosquito nursery.
- Stage your gear. Stow cookware, lights and a bug jacket inside before biting begins.
First-30-day mistakes are mostly timing errors: pitching after dark, or leaving the door zipper half closed during a cook. Treat the zipper like a lock.
✨ Don’t Miss These Exclusive Deals!
🔍 Take your paddling trips to the next level with these carefully selected shelters. Click on any highlighted item to check current pricing and availability. These picks will help you create a bug-free camp your whole crew will love!
Tarp Pitching Configurations for Bug Season
Not every tarp pitching configuration suits bugs. The wrong shape leaves open gaps; the right one seals them. Three work especially well.
The pyramid or lean-in. A low, steep roof with one edge staked to the ground leaves almost no gap. It suits the MSR Front Range Tarp Shelter and the Kelty Noah’s Tarp 12 with netting.
The A-frame. A ridgeline between two trees, both sides staked, gives a roomy open front. Add a net across the opening and you have a bug room.
The tall lean-to. One side high for living space, the other low and staked. It sheds rain nicely but needs careful netting.
For canoe trips, tarp pitching configurations that use paddles or trees spare you carrying poles. Note that Leave No Trace guidance warns against guy lines wrapped tightly around trunks. Use wide webbing or a stake instead.
Pairing a Tarp With a Hammock or Ground Pad
Pairing a tarp with a hammock or ground pad decides how well you sleep. Both approaches work, but they solve different problems.
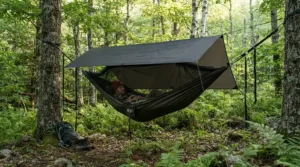
Hammock route. Pair an ENO DoubleNest and ENO Guardian Bug Net with a Kelty Noah’s Tarp 12 overhead. You get a very light system. Reviewers note the net can hang low, so keep a ridgeline taut.
Ground pad route. Pair a pad with an open tarp and a separate net or a floored insert like the MSR Front Range Tarp Shelter system. This is more flexible on rocky shorelines and needs no trees.
The deciding factor is terrain. Boreal shorelines with spruce suit hammocks. Bare granite islands suit pads. Pairing a tarp with a hammock or ground pad is really a choice about where you expect to camp.
Real-World Scenarios: Three Paddlers, Three Setups
The solo weekender. A paddler running a 4 km portage chain in June needs light weight and bug coverage. The Sea to Summit Escapist Tarp with a bug net suits the carry. The budget is steep, but the weight savings are real.
The couple on a week-long loop. Two people, one canoe, steady cooking. The Eureka NoBugZone T11 gives them a shared room at moderate weight and cost. Splitting the load keeps each pack manageable.
The family of four. Kids need space and mosquitoes love kids. The Eureka NoBugZone T13 or NEMO Bugout 12×12 gives a living room. Add a campfire and enough repellent for adults, with product choice guided by Health Canada.
Bug Tarp Shelter vs Tent: Which Wins on the Water?
A tent is a bedroom. A bug tarp shelter for canoe camping is a living room that can double as one. Tents win on privacy and storm protection. Bug tarps win on cooking, gear drying and daytime refuge.
Most experienced paddlers carry both, or pair a lightweight tent with a bug tarp. That’s the best-of-both approach. If you can only bring one item, the question is how bad the bugs get. In peak black fly and mosquito season, a tent confines you to sleeping hours. A bug tarp frees your whole evening. In shoulder season, a tent alone is fine.
Common Mistakes When Buying a Bug Tarp Shelter for Canoe Camping
- Buying on weight alone. The lightest tarp isn’t the lightest system once you add netting.
- Ignoring the anchor plan. A shelter that needs trees fails on open shores.
- Skipping a mesh check. Coarse mesh lets small biters through. Algonquin Park’s insect guidance recommends a screen dining shelter and inspecting netting before a trip.
- Forgetting ground gaps. Even small openings defeat the shelter.
- Overbuying. A four-person shelter for two wastes grams.
Long-Term Cost and Maintenance
Cost per use is the honest measure. A C$400 shelter used 20 nights a season over five years costs well under C$5 per night.
| Product | Typical price range (CAD) | What you get | Value verdict |
|---|---|---|---|
| Eureka NoBugZone T11 | C$150-C$200 | Tarp with mesh walls | Strong all-rounder |
| Kelty Noah’s Tarp 12 | C$100-C$150 | Open tarp | Best budget base |
| Sea to Summit Escapist Tarp | C$250-C$300 | Ultralight tarp | Premium for weight savers |
| MSR Front Range Tarp Shelter | C$350-C$500 | Floorless pyramid | Premium base camp |
The table shows value tracks use. Frequent paddlers should buy better; occasional trippers should favour the budget Kelty Noah’s Tarp 12 plus a net.
Maintenance is simple. Dry the shelter before storage to prevent mildew, reseal worn seams, and inspect mesh and zippers each spring.
Safety, Repellent and Regulations in Canada
Shelter reduces bites, but it isn’t the whole plan. Health Canada’s guide to personal insect repellents lists DEET and icaridin among approved ingredients. It says DEET up to 30% is suitable for adults and children over 12. It also advises applying sunscreen first and repellent second.
Check fire bans before lighting a smoky fire, as Ontario Parks advises. Keep food out of the mesh area. Camp away from shorelines on durable surfaces, and follow local park rules wherever you paddle.
FAQ: Bug Tarp Shelter for Canoe Camping
❓ How much does a bug tarp shelter for canoe camping cost in Canada?
❓ Can I use a regular tarp with mosquito netting instead?
❓ What mesh size stops black flies and no-see-ums?
❓ Do I need a floor on a bug tarp shelter?
❓ When is bug season in Ontario canoe country?
Conclusion: Pick the Shelter That Matches Your Route
A bug tarp shelter for canoe camping isn’t a luxury. It is the difference between eating dinner and fleeing from it. Choose the Eureka NoBugZone T11 for balanced value and the Eureka NoBugZone T13 or NEMO Bugout for crews. Pick the Kelty Noah’s Tarp 12 when budget rules, and the Sea to Summit Escapist Tarp or MSR Front Range Tarp Shelter when weight or base-camp comfort matters. Hammock sleepers should look at the ENO DoubleNest with the ENO Guardian Bug Net.
Whatever you choose, remember the basics: pitch low, close the gaps, camp on durable ground, and weigh every kilogram against your portages.
Recommended for You
- Mosquito Shelter For Patio: 7 Best Picks For Canada (2026)
- Screened Shelter For Mosquitoes: 7 Best Picks For Canada In 2026
- Lightweight Mosquito Shelter For Backpacking: 7 Best Picks (2026)
Disclaimer: This article contains affiliate links. As an Amazon Associate, I earn from qualifying purchases. If you purchase products through these links, we may earn a small commission at no additional cost to you.
✨ Found this helpful? Share it with your friends! 💬🤗
